Monthly Shaarli
June, 2023

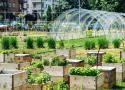
New research shows that if done right, urban farms and gardens can support all kinds of species—for the good of people and the environment.
People have long stoked an urban-versus-rural rivalry, with vastly different cultures and surroundings. But a burgeoning movement—with accompanying field of science—is eroding this divide, bringing more of the country into the city. It’s called rurbanization, and it promises to provide more locally grown food, beautify the built environment, and even reduce temperatures during heat waves.
Content
It’s also reversing the longstanding assumption that growing food is straight-up bad for biodiversity because clearing land for agriculture necessitates removing native plants and animals. Ecologist Shalene Jha of the University of Texas, Austin says this idea was based on observations of rural agriculture, where growing industrialized swaths of corn or wheat can be catastrophic for existing ecosystems. But that doesn’t hold for the urban farms, gardens, and even smaller green spaces.
In a recent paper in the journal Ecology Letters, Jha and her colleagues showed that urban gardens can actually boost biodiversity—particularly if residents prioritize planting native species, which attract native insects like bees. “The gardener actually has a lot of power in this scenario,” says Jha. “It doesn't matter how large or small the garden is. It's the practice of cultivating the landscape—and the decisions they make about the vegetation and the ground cover—that ultimately decide the plant and animal biodiversity there.”
Jha’s team characterized the biodiversity of 28 California urban gardens over the course of five years. Far from the mono-cropped monotony of a wheat field, they found rich ecosystems humming with activity that, in turn, increased species diversity. The researchers found predators like birds and ladybugs, which prey on crop-munching insects and thus help increase yields, and an abundance of pollinators like bees, which also benefit from crop diversity and increase plant productivity. That means urban gardens aren’t just producing food for people, but for other species as well. “They’re actually supporting incredibly high levels of plant and animal biodiversity,” Jha says.
This biodiversity is largely due to a strategic trade-off. One of the challenges of urban gardening is that it requires intensive manual labor: You can’t drive a combine through a city at harvest time. But that limitation turns out to be an ecological blessing. Because everything is done by hand, urban farmers can grow all sorts of plants right next to each other, packed in tightly to increase yields.
In another study published this month in the journal Agronomy for Sustainable Development, a separate team of researchers looked at 72 urban agriculture sites in France, Germany, Poland, the United Kingdom, and the United States. “We see pretty diverse growing spaces that often are growing a huge variety of crops, as well as non-food products,” says study author Jason Hawes, an environmental sustainability researcher at the University of Michigan. On average, the sites grew 20 different crops. “Lots of folks were also just growing flowers for fun in their visual gardens, and the community gardens have flowers planted to make the space more pleasant,” he says. “These sorts of things do contribute to local biodiversity.”
That biodiversity hardens urban ecosystems against pests that would have a field day with a monocrop. “You all of a sudden have a mimic of what naturally occurs in terms of insect predation. Because if you build it, they will come,” says Colorado State University horticulturalist Jennifer Bousselot, who studies the practice of growing crops on rooftops and wasn’t involved in either of the new papers. Aphids may descend on your garden, for instance, but so too will the ladybugs that keep their population in check.
An additional benefit is that gardeners can stagger the growth of flowering plants throughout the year—known as succession planting—essentially extending the food supply for local pollinators. While native plants are best at attracting native animals, she says, pollinators can make do with something like an imported tomato plant. “I am a big fan and advocate for native plants, but I’m an even bigger advocate for planting a plant with purpose,” says Bousselot. “And believe it or not, most pollinators can adapt.”
Bees in particular love a good urban garden, especially if it’s loaded with ornamental flowers. Previous research has shown that bee diversity can actually be higher in cities than in surrounding rural areas. It’s counterintuitive, but the flower diversity in an urban garden can be greater than that of a corn or wheat field.
And while brown patches of dirt may not look nice to you, bees literally dig them. Unlike honey bees that live in swarming hives, the vast majority of species are actually solitary, and many burrow into dirt for shelter. Having open ground in a garden provides them habitat. Bees also hate open spaces because that’s where birds, dragonflies, and other predators patrol. “It’s like putting a giant target on their back saying ‘Come and eat me,’” says biologist Gerardo Camilo, who studies urban bees at Saint Louis University but wasn’t involved in the papers. “They like messiness.” If you leave your yard looking a little shabby, bees will have places to hide as they bounce from flower to flower.
“There’s a take-home message here for everyday gardeners: With relatively minimum effort, you can make a big change,” says Camilo. “You don’t need to be consciously improving the environment. You can just concentrate on your one little thing—which is the growth of some food—and do it in the right way, and you can have significant impacts.”
But there are still limits to what an individual gardener can do. A bee has to get to your backyard in the first place. That means cities need chains of green spaces—with some open dirt and messy vegetation—so the insects can travel safely. “The neighborhood that surrounds your garden must be inviting to bees, to afford them essentially a road to travel to work,” says Camilo.
That kind of solution requires group action and city planning, but it comes with a whole host of knock-on benefits. Greenery absorbs stormwater, for instance, mitigating urban flooding. Plants also “sweat” water vapor, dramatically lowering temperatures, which get much higher in cities than in rural areas because of the preponderance of concrete. Green spaces are great for mental health. Food waste can go straight into urban gardens as compost, reducing dependence on synthetic fertilizers, which are terrible for the planet. And producing food closer to where it’s consumed could reduce the emissions associated with shipping produce.
There’s also mounting evidence that growing crops in urban areas can be far more productive than on rural farms. Yields for certain vegetables, like cucumbers, can be up to four times greater. That’s due in large part to urban farmers tending their crops by hand, which requires a lot of work but also creates jobs.
Deploying more gardens in cities, though, comes with challenges. Real estate is expensive, so it won’t be cheap to set aside land. And urban agriculture needs water, which is always at a premium. Ideally, it could come from rain catchment systems, but cities might also be able to build infrastructure to funnel stormwater into green spaces, where it can soak into the ground. “I think we saw in the recent flooding in California that there is a huge amount of public support for finding new ways to deal with runoff that don’t just involve letting it run out to sea,” says Hawes.
There’s real urgency behind doing whatever it takes to bring more agriculture into urban areas: More than half of humanity now lives in towns and cities, a figure expected to rise to 5 billion people by the end of this decade. “Urban gardens are producing 15 to 20 percent of our food supply globally, and that number is just increasing,” says Jha. “And so their value—not only in terms of food production, but also in terms of the plants and animals they support—is increasingly important.”

![Alessandro Cantarelli [1100x550] · Long Exposure Photography](https://i.redd.it/td54udbyc87b1.jpg)
![Bristle Cone Pine Forest CA @ Night [2800x2000] · Long Exposure Photography](https://i.redd.it/ge917er80n8b1.jpg)
Ingredients
- 1 tsp dry active or ¾ tsp instant yeast
- 1 tsp sugar
- ½ cup warm water
- 2 ½ cups all-purpose flour
- 1 cup whole wheat flour
- Salt to taste
- 1 tbsp olive oil
- More water for kneading dough
- ¼ cup black and white sesame seeds
Instructions
- I always proof my yeast. You can skip this step if you choose and add the yeast directly to the flour. To proof the yeast, mix it with the sugar and warm water. Set aside for 5 to 10 minutes till frothy.
- Put the flours, salt, olive oil and proofed yeast in the bowl of your kneading machine. You may knead the dough by hand too. Knead the dough, adding as much more water as is required to form a dough that is soft and smooth. You want a dough that is somewhat slack, not sticky but should be easy enough to shape. We’re not looking for the slackness of a sourdough.
- Shape the dough into a ball and place in an oiled bowl, turning it well to coat all over with oil. Cover loosely and allow it to rise till double in volume. This should take about an hour and half depending on ambient temperature.
- Gently knead to deflate the dough. Divide the dough into two pieces – 1/3rd and 2/3rd approximately in size. Shape the larger portion into a nice, smooth and tight ball. Using your fingers, flatten the smaller portion into a flat circle that is big enough to wrap around the larger ball of dough. Do not make this circle too thin or too thick.
- Spread the sesame seeds uniformly on a flat plate. Lightly brush the surface of the circle of dough with some oil. This is to keep separation between the dough while scoring. Take the larger ball of dough. Dampen the top and sides of it with a little water. Then roll it in sesame seeds so they uniformly and closely coat the surface.
- Now gently place this ball, sesame seed surface facing down, in the center of the circle of dough. Bring up the sides of the circle together and seal well so the dough has enclosed the ball completely.
- Place the dough ball on a lightly greased parchment covered baking tray with the seam sides down. Cover loosely and let it rise for 30 to 45 minutes till puffy. Do not let it over proof.
- Lightly dust the surface of the dough with flour. Using a piece of string/ twine, mark the surface into six or eight equally spaced spokes, like in a wheel. Using a blade or lame, score firmly and smoothly along each marked spoke, from the center down to the sides. Cut deep enough to reach the sesame seed layer but not beyond. Make sure the scoring cuts are neat and separated. The oil and sesame seeds will ensure that layers separate on baking.
- You should now be able to see the sesame seed layer through the cuts. Bake the bread at 210C (410F) for about 30 to 40 minutes till the “leaves/ petals” have separated and opened up, the bread is a beautiful brown and sounds hollow when tapped.
- Let it cool completely. The outer layers should be crisp while the bread itself will be soft. Serve any way you prefer.
Je n'ai pas encore goûté, mais je ne suis pas fan de la recette. Pas de mesure de sel ni d'eau, ça ne facilite pas la mise en place. Par contre, il est beau pour une première. Il me reste à pratiquer pour avoir quelque chose qui a de l'allure.
Quelques vidéos pour améliorer mes baguettes et mes cookies :
Thanks! It was taught Grandmother to grandkids for generations..here is the recipe written out. Enjoy! (From a Facebook post to my family..so its written as it's for beginners, so you can ignore the basics part of it )
5 Pounds flour a bag of All Purpose is just fine. Have a bit extra on hand (perhaps up to three cups more) if the dough needs to be 'tightened up' later A "three packet" of dry active yeast it comes with three small packets attached, you'll use all three at once. 6 Cups of water at 100-110 degrees F don't go hotter or you'll kill the yeast Four Tablespoons salt (fine ground like Kosher is best) 1.5 Cups Canola Oil
NO milk, no sugar.. Keep it to those 5 ingredients.
Other things you'll need • Very large bowl-- it's going to hold five loaves of bread's worth of dough.. I vastly prefer metal • Cutting board-- extra flour for "dusting" if needed • Non Serrated chef's knife • Four to five pans, metal nonstick pie tins are great, you can use loaf pans as well-- it's up to you • More Oil- about a half cup- for the pans to keep the bread from sticking • Plastic wrap and non stick spray • A very light blanket.
To make
Start with 2 cups of the tepid water Add all of the yeast Whisk it as you are adding the yeast, set aside for three minutes to let the yeast "Bloom"
Pour the flour in a very large bowl, add the salt Add the first two cups of tepid water with the yeast in it.. It'll small "yeasty" and that's good
Add another two coups of tepid water to the bowl and begin to mix (that's 4 cups of water to this point)
Knead dough by hand, use your hands for all of this. You'll learn the feel of it after a few attempts.
The dough will be, at this point, really sticky. Work the water and flour together. Work to turn the dough over now and then as you'll see the flour will try to stay on the bottom of the bowl for a while so keep rotating it and kneading.
The dough will eventually start to come together, of the two remaining cups of tepid water put one in.. At this time add the 1.5 cups of oil. The bread will immediately begin to feel "squishy" (that's a technical term you know…) and it'll actually start to smell like bread. If it's too firm add the water by one quarter cup increments, you might not need to add that last cup of water. Usually I use part of it but rarely all of it. If the dough is still really, really sticky then add some of the extra flour-- half a cup at a time.
What you are going for is a dough ball that feels fairly smooth, it should still be warm from the water you added. If it's too stiff add more water, and if it's too sticky and loose add a bit of flour as described above.
You should be ab le to pull the whole dough ball up out of the bowl without it sticking too much.
Once the doughball has come together put it back in the bowl, first putting about a tablespoon of oil in the bottom to prevent sticking.. Move the bowl around to let the oil run in different directions to cover the bottom.
Once the doughball is in the bowl, cover it with plastic wrap but you must spray it first with the nonstick spray, the plastic and the top of the doughball.
Now, put the dough in a warm humid place if you can find it until the doughball doubles in size. A great trick is to boil a few cups of water in the microwave and when it's done put the bowl in the microwave, it'll be humid and warm-- obviously do not turn it on for any reason..
In about 45 minutes.. (depending on weather conditions, ingredients etc..)
After the dough rises to twice it's size, take the plastic off and kneed the bread. Mostly using a slow motion "punching" movement. Turn the dough a few times during the process. You should hear the bubbles pop a few times, it'll sound like quiet squeaking. As the bubbles work out of the bread it'll get smaller and a bit more dense. Once again cover it back up with the plastic after spraying and put it in the warm and humid environment you used previously.
After about 30 to 40 minutes…
Take the bread out, kneed it again. Now take the pans you have, ensure they have a think coating of oil on the bottom and cut fifth of the bread out and roll it into a ball a bit larger than a Baseball. If yo u wish to use the cutting board to roll it out by all means do, I simply hold the loaf size dough ball and fold it a few times each time folding it towards what will become the bottom, to create a seam on one side and a smooth side. Place them seam side down in the middle of the pans. Put one cut in the middle of each loaf cutting about half way down to the bottom.. This will control how the dough opens up.
Allow the loaves to rise for about 20 more minutes and put into a 350 degree oven for about 25 minutes, you may need to rotate where they are in the oven for even baking. Frequently I'll add a few minutes to the end to take them out of their pans and flip them over so the bottom of the bread can brown as well.
When the bread is golden brown, remove from the oven and if you can put them on a cooling rack. You can eat them just about immediately, they are fantastic with butter, great to go with soup, or just toast.