

Especially aluminium tent pegs are a bit tricky. Most metals will become harder as they are 'worked' (as in getting bent) and the initial bend when you hit the stone will have the effect that the bend itself is harder than the straight metal around it. So if you now try to bend them back in shape you will notice the peg bending left and right of the original bend but that one just stays where it is. If you finally manage to straighten it out, the harder and therefore more brittle metal may snap. This effect is called work hardening and is especially pronounced in aluminium. For this metal it is also especially tricky to reverse, i.e. to get it soft again. The process for this softening is called annealing and for aluminium you will have to heat the metal to a temperature that is uncomfortably close to its melting point. A bit of a challenge when camping or without a metal workshop at home. But I think not impossible.
Below I'll explain how to anneal aluminium. If you have a steel peg (much easier to work than aluminium and less likely to break) or if you can't be bothered annealing the aluminium peg you can skip to the two ways to straighten the metal. For unannealed aluminium I would not recommend method 2 though, as it will most likely break.
Annealing of aluminium: In short, the purpose of the annealing process is to remove stress inside the metal, which causes it to become less workable. Aluminium needs to be heated to a temperature close to it's melting point (but obviously not above) and then doused in water, i.e. cooled down quickly.
You need plain household soap without additives like fragrances, skin conditioners etc. - this will be used as a makeshift temperature indicator so you know you've reached the right temperature without accidentally melting it. Furthermore you want a heat source like a blow lamp (I don't know if a gas camping cooker will work but it may be worth a try), a vessel with water to douse the heated peg and cool it rapidly down and a pair of pliers or disposable cotton cloth or whatever seems suitable to hold the hot peg without burning your fingers (maybe you could try and place the peg on a camping cooker where it is immersed in the flames instead).
Firstly cover the peg with soap directly from the bar (without water). Now heat the peg up until the soap on it turns black. Try to spread the heat evenly over the affected area. Watch very carefully for the soap to change colour as it is now almost hot enough to melt. Once there, quickly douse the peg in water.
If you were to try this on a camping stove you may want to apply some insulation to the straight parts of the peg so the heat you apply to the bent bit doesn't dissipate away too quickly (or you may never reach the required temperature). An old rag of tightly woven wool, or better even leather, should work well as these materials don't combust that easily - it will stink right enough and the rag will be ruined. Improvise with appropriate care.
This process can be repeated if you don't feel it worked well the first time. You will have to clean the peg before that - grinding the grime off with sand should work fine or ideally some emery paper if you have it. If you don't clean it you won't see the soap turning black.
You can find more hand-on information about annealing of common metals here.
Careful: Don't burn yourself. The metal will be very hot. Don't touch it with your fingers and take care it can not accidentally fall on you.
Straightening the metal (1): Now you should be able to bend the peg back. The perfect tools for this job would be a sturdy pair of mole grips to hold the peg (but if you are careful your hand will do), a hammer and anvil. I know, if you had a blacksmith workshop at home you would not be asking this question. However for a thin piece of metal like aluminium you should be able to use the tools of our ancestors from the days before metal smelting was discovered and use stones. You'll want to pick a hammerstone that is comfortable in your hand. You want to start with an anvil stone with a bend only slightly less than the bend in your peg. Place the peg on the anvil stone so the inside of the bend points to the anvil. There should be some space between the peg and the anvil stone right in the middle of the bend but the two points where peg and anvil are touching should not be too far away from each other, maybe three quarters of an inch (for really tight bends) to two inches (for wider bends). Hit with the hammerstone the middle of the bend. Continue this while turning / exchanging the anvil stone to suit the bend until you end up with one that is almost flat. As a rule your next hit with the hammerstone should always go to the back of the middle of the bit that is bent the most.
This may sound a bit complicated when described in writing but once you get the hang of this, the details will make sense naturally and it is surprisingly simple to do. Your peg won't look like new obviously, but you will be surprised how straight you can get it with this method.
Careful: If you hit the peg with the hammerstone it will jump in your hand unless it was perfectly aligned and all the energy from the hit is dissipated by bending the metal back. If you happen to get this always right from the start consider a career as a blacksmith - you are a natural. If you don't it will hurt. If you have it, use a suitable pair of pliers. A molegrip would be ideal. You could also use a bit of fabric (or better, leather) wrapped around the peg to dissipate the shock of the impact. Don't try to hold the peg to tight. Allow it to jump. The hammer and anvil stones are supposed to take all the force from the hit, not your hand.
Straightening the metal (2): If you can find a hole in a metal fence or similar you could insert the peg to just before the bend. Then you could insert the other side of it in a pipe and use the leverage to bend the peg back. Sometimes it is quite hard to prevent the peg from spinning away and to keep it straight that way. Instead of a pipe you could use a spanner with a ring, or any other metal tool item with a hole where the other side of the peg can be inserted. To prevent the peg from spinning, put the tool on in a way that you pull it rather than push. This method is quicker to do if you can find the tools but the result is somewhat cruder. It is also more stressful for the metal - so it is more likely to break your peg.

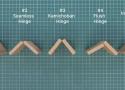
One doesn’t generally associate cardboard with structural components like hinges, but [Itoshige Studio] assures us that you can absolutely create hinges out of this ubiquitous material
. In total the video covers five different designs, ranging from the simple and straightforward to an interlocking tab design that approximates a typical steel hinge with paper rod to keep both sides of the hinge together.
The most simplistic hinge is unsurprisingly just a strip of craft paper, which is also demonstrated as the hinge for a wooden box in lieu of the typical metal hinge. This same principle is then demonstrated for a fancy cardboard box.
From here the designs get increasingly more involved. First a seamless hinge variation, and then a kamichoban hinge design that’s inspired by traditional Japanese room dividers and furniture, using panels that are interconnected with overlapping sections to create a fascinatingly flexible hinge that can fully fold either way.
The flush hinge design is somewhat like the craft paper hinge, but significantly fancier and probably sturdier, while also looking pretty good on something like a cabinet. Finally the interlocking tab hinge is effectively a cardboard version of the hinge design that’s found on every room’s door, with a similar level of flexibility. This is obviously the trickiest one to assemble and get right, but it has its own charm.
Considering that all of these examples use regular corrugated cardboard that we get shipped to our homes by the truckload, the cost to try these examples is your time plus some basic tools and glue. The author also sells a book that contains templates – in addition to digital versions – for these hinges and other designs, if you’d like to enjoy the 100% paper experience.


- Rebinding DUNE - Part 1 - Disassembling A Vintage Book: Paper Repair & Resewing
- Rebinding DUNE - Part 2 - Rescuing A Vintage Book: Custom Endpapers, Backing & Covers
- Rebinding DUNE - Part 3 - Upgrading A Vintage Book: Cover Flap, Magnets & Leather
- Rebinding DUNE - FINALE - Transforming A Vintage Book: Leather Endbands, Tooling & the Final Reveal!

- DIY Slippers : 16 Steps (with Pictures) - Instructables
- DIY Your Own Cozy Shoes 룸슈즈만들기 | How to make slippers the size you want. [sewingtimes] - YouTube
- Free Slipper Sewing Pattern for Women • Heather Handmade
- Free Slipper Sewing Patterns and Ideas
- Megan Ta Da: House Slippers To Be Sewn
- NativeTech: Making Woodland Style One-piece, Soft-sole, Center-seam Moccasins
- Step into Comfort: DIY Slippers to Keep Your Feet Cozy
- winter socks/house slippers10 MINUTES MAKING / Very easy even for beginners - YouTube
- Всего 4 шва, а тепло и комфорт вашим ногам обеспечен. Домашние тапки с теплой подошвой без выкройки. - YouTube
- How To Make Slippers In Any Size - Free Sewing Tutorial | Sewing Bee Fabrics

Un projet qui pourrait m'être utile pour m'entrainer les doigts !
- 4 Ways to Set Up an Ultralight Tarp Shelter || REI - YouTube
- 45 second ultra fast Ridge Line & Emergency Tarp Shelter - YouTube
- DIY Lightweight Tarp - YouTube
- DIY Rope Tensioning System - Super easy 3 minutes project - New invention - Bushcraft Rope Tensioner - YouTube
- DIY Tarp Build - Ultralight Membrane Silpoly - YouTube
- DIY Tying a Dutch Hook into a Brummel Eye Splice - YouTube
- HEX12 Tarp Instructions - HEX12_TarpInstructions-_revA.pdf
- Hex12 Tarp Kit - Ripstop by the Roll
- How Big Should Your Tarp Be? - Tarp Sizes With 8 Unique Scenarios - Tent Camping Trips
- How to set up a tarp - YouTube
- How to Setup A Tarp with a Ridgeline - YouTube
- How to Sew a Double Hem with Corner Reduction - YouTube
- How to Tie a Trucker's Hitch - YouTube
- How to use a loop alien - ridge line tensioning, attaching a ridge line with a loop alien - YouTube
- How to use the LoopAlien RCA - YouTube
- MEC Scout Tarp | MEC
- My guyline & tension system for tents, tarps, and hammocks
- MYOG Tarps 101 Needles and Thread - YouTube
- Quick Deploy, No Tie, Tarp Ridge-line - YouTube
- The 3 Essential KNOTS for Tarps | Camping & Bushcraft | Tarpology Essentials | Plus a Thank You! - YouTube
- Tip for Sewing Thin Silnylon Fabric - YouTube
- Canvas Tarp and Tent Sewing Patterns and Plans | Bushcraft USA Forums
- Silnylon 1.1 oz. Fabric by The Yard - Ripstop by the Roll
Sew along
- Seriously..I think it needs stitches.: Minecraft Mondays Sew Along
- Seriously..I think it needs stitches.: Minecraft Mondays #1: Steve
- Seriously..I think it needs stitches.: Minecraft Mondays #2: Creeper
- Seriously..I think it needs stitches.: Minecraft Mondays #3: Skeleton
- Seriously..I think it needs stitches.: Minecraft Mondays #4: Alex
- Seriously..I think it needs stitches.: Minecraft Mondays #5: Moo.
- Seriously..I think it needs stitches.: Minecraft Mondays #6: Oink.
- Seriously..I think it needs stitches.: Minecraft Mondays #7: The Village People
- Seriously..I think it needs stitches.: Minecraft Mondays #8: Wolf
- Seriously..I think it needs stitches.: Minecraft Mondays #9: Ocelot
- Seriously..I think it needs stitches.: Minecraft Mondays #10: Enderman
- Seriously..I think it needs stitches.: Minecraft Mondays #11: Squid
- Seriously..I think it needs stitches.: Minecraft Mondays #12: Witch
- Seriously..I think it needs stitches.: Minecraft Mondays #13: Zombie Pigman
- Seriously..I think it needs stitches.: Minecraft Mondays #14: Mooshroom
- Seriously..I think it needs stitches.: Minecraft Mondays #15: Snow Golem
- Seriously..I think it needs stitches.: Minecraft Mondays #16: Gold Steve
- Seriously..I think it needs stitches.: Minecraft Mondays #17: Zombie Villager
- Seriously..I think it needs stitches.: Minecraft Mondays #18: Blaze
- Seriously..I think it needs stitches.: Minecraft Mondays #19: Rabbit
- Seriously..I think it needs stitches.: Minecraft Mondays #20: Slime + a Giveaway!
- Seriously..I think it needs stitches.: Minecraft Mondays #21: Bonus Blocks -- Chicken Palooza
- Seriously..I think it needs stitches.: Minecraft Mondays #22: Bonus Blocks -- Ghast & Ender Dragon
- Seriously..I think it needs stitches.: Minecraft Mondays #23: Bonus Blocks -- Spider, Cave Spider & Pick Axe
- Seriously..I think it needs stitches.: Minecraft Mondays #24: Bonus Blocks -- Guardian, Elder Guardian & Polar Bear
- Seriously..I think it needs stitches.: Minecraft Mondays #25: Bonus Blocks -- Sword & Shulker
- Seriously..I think it needs stitches.: Minecraft Mondays #26: Bonus Blocks -- Siamese Cat, Sheep, and Diamond Steve
- Seriously..I think it needs stitches.: Minecraft Mondays #27: Bonus Blocks -- Magma Cream & Magma Cube
- Seriously..I think it needs stitches.: Minecraft Mondays #28: Bonus Blocks -- Water Bucket & Potion Bottle
- Seriously..I think it needs stitches.: Minecraft Mondays #29: Bonus Blocks -- Wither & Wither Skeleton
- Seriously..I think it needs stitches.: Minecraft Mondays #30: Bonus Blocks -- Puffer Fish & Silver Fish
- Seriously..I think it needs stitches.: Minecraft Mondays #31: Bonus Blocks -- TNT & Grass Cubes
- Seriously..I think it needs stitches.: Minecraft Mondays #32: Bonus Blocks -- Iron Golem & Heart
- Seriously..I think it needs stitches.: Minecraft Mondays #33: Bonus Blocks -- Bat, Herobrine & Zombie
Tissu imprimé
- Licensed Cotton Fabric | Minecraft Pixels Green
- MINECRAFT style Cotton Fabric - ideal for Curtains Cushions Crafts - Ellbee Fabrics
- Licensed 53 - Minecraft friends – Rain Forest Fabrics
- Licensed 65 - Minecraft Alex & Steve – Rain Forest Fabrics
- Mindcraft tools- Licensed 67 – Rain Forest Fabrics
Divers
- Make a MineCraft Quilt! Easy pixel quilt! - YouTube
- Microsoft Word - Minecraft Instructions - minecraft.pdf
- Minecraft | My Rainy Day Designs
- Tales of the Flowers: Mom's Quilting Special - Awesome Minecraft and Ultimate Disney Quilts
- The Fleming's Nine: Minecraft Quilt
J'ai fait 2 coussins avec le bloc TNT et le bloc herbe. C'était le fun.
- Joanna Blüm Studio
- Bucket Hat Sewing Pattern PDF / Easy Sun Hat Tutorial / DIY Fisherman Summer Hat 5 Sizes unisex Xs Thru XL Instant Download - Etsy Canada
- How to Sew Bucket Hat for Beginners | GA001 - YouTube
- Free Bucket Hat Sewing Pattern • Heather Handmade
- Checkpoint Charlie Hat : 7 Steps (with Pictures) - Instructables
- Fedora Hat Tutorial and Pattern - Melly Sews
- FREE Bucket Hat Pattern by AppleGreen Cottage - in 5 Sizes!
- How to Sew a Reversible Sun Hat
- Mens Sun Hat PDF Sewing Pattern Reversible Brimmed Sunhat
- Sorrento Bucket Hat - Digital Sewing Pattern – Elbe Textiles