Ingrédients
Gâteau
- 430g de fromage à la crème, tempéré
- 120g de cassonade
- 4 œufs
- 1 gousse de vanille
- 280g de crème 35%
- 20g de farine tout usage
- une pincée de sel
Poires
- 1 poire bien mûre, en dés
- 3 càs de cassonade
- le jus d'un citron
- la gousse de vanille utilisée
Instructions
- Préchauffer le four à 445°F.
- Au batteur, combiner le fromage à la crème, la cassonade, les œufs et l'intérieur de la gousse de vanille.
- Une fois le mélange bien lisse, y ajouter la crème 35%, le sel et la farine, puis mélanger jusqu'à ce que le mélange soit homogène.
- Graisser et parcheminer un moule de 8 pouces, puis y verser le mélange.
- Cuire au four environ 25 minutes, jusqu'à ce que la croûte soit bien dorée et foncée, mais pas brûlée !
- Retirer du four et laisser tempérer 15 minutes, avant de le transférer au réfrigérateur pour le refroidir complètement (un minimum de 2 heures de repos).
- Pendant ce temps : ajouter la gousse de vanille vide dans un petit chaudron avec le jus de citron et la cassonade. Porter à ébullition et y ajouter la poire coupée en dés.
- Mélanger pour bien enrober les morceaux de poires et retirer du feu. Laisser tempérer jusqu'au moment de servir sur le gâteau.

Ingrédients
Génoise au chocolat
- 200 g de sucre
- 6 œufs
- 180 g de farine
- 60 g de cacao en poudre non sucré
- 1 cuillère à café de levure chimique
- 1 pincée de sel
Garniture et montage
- 800 g de cerises dénoyautées en conserve (égouttées et réservant le jus)
- 500 ml de crème fouettée
- 100 g de sucre glace
- 1 cuillère à café d'extrait de vanille
- 100 g de copeaux de chocolat pour la décoration
- Cerises entières pour la décoration (facultatif)
Instructions
- Préchauffez le four à 180°C (350°F). Beurrez et farinez un moule à gâteau de 26 cm de diamètre.
- Dans un grand bol, battez les œufs et le sucre jusqu'à ce que le mélange soit léger et mousseux. Tamisez la farine, le cacao, la levure et le sel, puis incorporez-les délicatement au mélange d'œufs et de sucre.
- Versez la pâte dans le moule préparé et faites cuire au four pendant 30 minutes, ou jusqu'à ce qu'un cure-dent inséré au centre du gâteau en ressorte propre. Laissez le gâteau refroidir complètement avant de le démouler et de le couper en trois couches horizontales égales.
- Pendant que le gâteau refroidit, préparez la crème fouettée en battant la crème, le sucre glace et l'extrait de vanille jusqu'à ce qu'elle forme des pics fermes.
- Imbibez légèrement les couches de gâteau avec le jus de cerise réservé
- Placez la première couche de gâteau sur un plat de service, garnissez-la de crème fouettée et répartissez la moitié des cerises égouttées par-dessus. Répétez avec la deuxième couche de gâteau, la crème fouettée et les cerises restantes. Placez la dernière couche de gâteau sur le dessus et recouvrez le gâteau entier de crème fouettée sur les côtés et le dessus.
- Décorez le gâteau avec les copeaux de chocolat sur les côtés et le dessus du gâteau. Si vous le souhaitez, ajoutez quelques cerises entières pour garnir le dessus. Réfrigérez le gâteau pendant au moins 2 heures avant de le servir pour permettre aux saveurs de se mélanger.

Ingredients
- ¾ cup organic cane sugar
- ½ cup skim milk powder
- 1 2⁄3 cups whole milk
- 1 2⁄3 cups heavy cream
- 3 egg yolks
Instructions
- Prepare an ice bath (see note below) in your sink or in a large heatproof bowl.
- In a medium saucepan, combine the sugar, skim milk powder and milk. Stir with a hand mixer or whisk until smooth.
- Make sure the skim milk powder is wholly dissolved into the mixture and that no lumps remain (any remaining sugar granules will dissolve over the heat). Stir in the cream.
- Clip a candy thermometer to the saucepan and set the pan over medium heat.
- Cook, stirring often with a rubber spatula and scraping the bottom of the pan to prevent sticking and burning, until the mixture reaches 110 degrees, 5 to 10 minutes. Remove the pan from the heat.
- Place the egg yolks in a medium bowl. While whisking, slowly pour in ½ cup of the hot milk mixture to temper the egg yolks.
- Continue to whisk slowly until the mixture is an even color and consistency, then whisk the egg-yolk mixture back into the remaining milk mixture.
- Return the pan to the stovetop over medium heat and continue cooking the mixture, stirring often, until it reaches 165 degrees, 5 to 10 minutes more.
- Transfer the pan to the prepared ice bath and let cool for 15 to 20 minutes, stirring occasionally. Pour the ice cream base through a wire-mesh strainer into a storage container and place in the refrigerator for 1 to 2 hours, or until completely cool.
- Now you're ready to make ice cream. Transfer the cooled base to an ice cream maker and churn it according to the manufacturer's instructions. Or, if you want, you can keep it in the refrigerator for up to 3 days before churning.
- After churning, serve immediately or harden in your freezer for 8 to 12 hours for a more scoopable ice cream.
Note: The easiest place to create an ice bath is in your kitchen sink. Fill the sink a quarter of the way with cold water and add a few handfuls of ice. Then gently lower the ice cream base into the ice bath. Let cool for 15 to 20 minutes, stirring occasionally. Make sure your base has cooled completely before churning.
Pour changer de la base Ben & Jerry que j'affectionne particulièrement.
Ingrédients
- 500 g de marrons glacés (ou marrons au sirop)
- 5 marrons supplémentaires
- 25 cL de lait
- 15 cL de crème liquide type fleurette
- 1 cuillère à soupe de rhum (facultatif)
Instructions
- Utiliser des ingrédients bien froids.
- Mélanger le lait, la crème et le rhum. Couper grossièrement les 500 g de marrons et les ajouter au mélange.
- Mixer finement jusqu’à ce que ce soit parfaitement homogène.
- Mettre à turbiner.
- Pendant ce temps, couper les 5 marrons restant en cubes d’environ 1 cm de côté. Les ajouter à la glace en fin de turbinage.
Ingrédients
- 30 cL de lait entier
- 20 cL de crème
- 85 g de sucre
- 3 jaunes d’œufs
- 180 g de beurre de cacahuète (Dakatine ou équivalent)
Instructions
- Mettre le lait, la crème et le beurre de cacahuète dans une casserole.
- Faire chauffer lentement en remuant de temps en temps pour faire dissoudre le beurre de cacahuète.
- Couper le feu dès les premiers bouillons.
- Mettre le sucre et les jaunes d’œufs dans un saladier.
- Fouetter jusqu’à faire blanchir les jaunes d’œufs.
- Verser le contenu de la casserole sur les jaunes, tout en mélangeant pour homogénéiser.
- Remettre le tout dans la casserole et faire chauffer à feu moyen. Ne pas cesser de mélanger avec une cuillère en bois et stopper le feu dès que le mélange nappe la cuillère.
- Verser l’appareil dans le saladier et laisser refroidir quelques minutes.
- Réserver une nuit au réfrigérateur.
- Turbiner.
Ingrédients
- 35 cL de lait
- 15 cL de crème liquide (fleurette)
- 90 g de sucre
- 120 g de raisins secs
- 4 jaunes d’oeufs
- 1 gousse de vanille
- 2 cuillères (30 mL) à soupe de rhum (pour la glace)
- Du rhum en quantité suffisante (pour les raisins)
Instructions
- Dans une casserole, faire chauffer à la limite de l’ébullition le lait et la crème.
- Couper une gousse de vanille en deux et la raclée avec la pointe d’un couteau pour récupérer un maximum de grains de vanille. Mettre le tout (gousse et grains) dans la casserole. Laisser infuser une dizaine de minutes.
- Pendant ce temps, fouetter les jaunes d’oeuf avec le sucre dans un saladier jusqu’à blanchiment du mélange.
- Tout en filtrant, verser le lait sur les jaunes d’oeufs. Mélanger.
- Rincer la casserole et y remettre la préparation. Faire épaissir sur feu moyen tout en remuant. La préparation doit napper la cuillère. En fin de cuisson, ajouter les 2 cuillères à soupe de rhum et mélanger.
- Mettre les raisins dans un bol. Recouvrir de rhum.
- Laisser les deux préparations reposer une nuit au réfrigérateur.
- Mettre la préparation à turbiner.
- Pendant ce temps ,égoutter soigneusement les raisins réhydratés au rhum et les ajouter en fin de turbinage.

Ingrédients
- Fleurs d’hibiscus séchées : 50g
- Lait entier : 500ml
- Crème liquide : 250ml
- Sucre : 150g
- Jaunes d’œufs : 4
- Vanille : 1 gousse ou 1 cuillère à café d’extrait de vanille.
Instructions
- Infusion des fleurs d’hibiscus : Portez le lait à ébullition dans une casserole. Ajoutez les fleurs d’hibiscus séchées, couvrez et laissez infuser hors du feu pendant environ 20 minutes. Filtrez le mélange pour retirer les fleurs d’hibiscus et récupérez le lait infusé. Vous remarquerez que le lait aura pris une jolie teinte rose.
- Préparation de la crème anglaise : Dans un bol, fouettez les jaunes d’œufs avec le sucre jusqu’à ce que le mélange blanchisse. Remettez le lait infusé à chauffer doucement. Incorporez progressivement ce lait chaud au mélange d’œufs et de sucre, en remuant constamment pour éviter que les œufs ne cuisent. Versez ce mélange dans la casserole et faites cuire à feu doux en remuant constamment avec une spatule en bois jusqu’à ce que la crème nappe la spatule. Ne laissez pas bouillir.
- Incorporation de la crème et de la vanille : Une fois la crème anglaise épaissie, retirez-la du feu et ajoutez la crème liquide ainsi que les graines de la gousse de vanille ou l’extrait de vanille. Mélangez bien et laissez refroidir complètement. Pour accélérer le processus, vous pouvez placer le mélange au réfrigérateur.
- Turbiner la glace : Une fois le mélange bien froid, versez-le dans une sorbetière et laissez turbiner selon les instructions de l’appareil, généralement 20 à 30 minutes. La glace doit être onctueuse et bien prise. Si vous n’avez pas de sorbetière, vous pouvez verser le mélange dans un récipient adapté et le placer au congélateur en remuant toutes les 30 minutes pendant environ 3 heures pour éviter la formation de cristaux.
- Conservation et service : Transférez la glace dans un récipient hermétique et laissez-la prendre au congélateur pendant au moins 2 heures avant de servir. Servez la glace aux fleurs d’hibiscus séchées dans des coupes ou des cornets, décorée éventuellement de quelques fleurs séchées d’hibiscus pour une touche esthétique supplémentaire.

Ingredients
- 300ml Double cream
- 300ml Whole milk
- 6 Large free range egg yolk(s)
- 110g Silver Spoon Caster Sugar
- 1 Orange (zest of)
- 2 tbsp Orange juice (freshly squeezed)
- 2 tbsp Cointreau
Instructions
- Heat the cream, milk and orange zest in a large pan until just boiling.
- Take off the heat and leave to infuse for 10-15 minutes.
- Whisk the egg yolks and sugar until pale and thick. Whisk the cream mixture into the eggs, then pour back into the pan and return to the heat.
- Add the orange juice and Cointreau and cook until the custard has thickened, stirring continuously. Taking care not to boil.
- Leave to cool, then chill in the fridge for 4 hours or overnight.
- Churn in an ice cream maker OR place in the freezer, stirring every hour until frozen.
Ingrédients
- 30 cL de lait entier
- 20 cL de crème liquide
- 75 g de sucre
- 4 jaunes d’œufs
- 1 gousse de vanille
- Du kirch
- 130 g de fruits confits (choisissez le mélange de fruits confits qui vous donne le plus envie !)
Instructions
- Hacher grossièrement les fruits confits avec un gros couteau pour obtenir des petits dés.
Les mettre dans un bol et recouvrir de kirch. Filmer et réserver au réfrigérateur. - Mettre le lait et la crème dans une casserole.
- Couper la gousse de vanille en deux dans la sens de la longueur. Racler les graines avec la pointe d’un couteau et mettre le tout (gousse + graines) dans la casserole.
- Faire chauffer doucement et couper le feu dès le début de l’ébullition. Laisser infuser une quinzaine de minutes.
- Pendant ce temps, mettre les jaunes d’œufs et le sucre dans un saladier.
- Fouetter jusqu’à ce que le mélange devienne blanc et mousseux.
- Tout en filtrant pour retirer la gousse de vanille, verser le mélange lait / crème sur les jaunes fouettés.
- Homogénéiser avec le fouet.
- Remettre la préparation dans la casserole et faire chauffer lentement, tout en remuant, pour que la préparation épaississe légèrement. Elle doit napper la cuillère.
- Remettre le tout dans le saladier et laisser tiédir.
- Réserver une nuit au réfrigérateur.
- Mettre la préparation à turbiner.
- Pendant ce temps, égoutter les fruits confits.
- Les ajouter dans la sorbetière lorsque la glace commence à prendre.
Ingredients
- 1 cup whole milk
- 2 cups heavy cream
- 1/2 cup sugar (100g)
- a pinch of salt
- 1 cup whole bean coffee (80g)
- 4 large egg yolks
- 4 Tbs maple syrup (the real stuff, not that Aunt Jemima shit)
- 4 strips of candied bacon, coarsely chopped
Instructions
- In a medium saucepan over medium heat, mix together the milk, 1 cup of cream, the sugar, salt and coffee. Stir until sugar is dissolved. Cover with a lid and remove from heat. Let steep for 1 hour.
- When the coffee mix has finished steeping, put it back on medium heat until warmed again. Strain the coffee beans and discard. Slowly add the heated coffee-cream into the egg yolks, whisking constantly. Return it all to the pan and cook, stirring constantly and scraping the bottom of the pan, until thick enough to coat the back of a spoon, about 12 minutes.
- Strain the custard and stir over an ice bath until cool. Refrigerate until well chilled, or up to three days. When chilled, whisk in the maple syrup.
- Churn the custard according to your ice cream maker’s instructions. At the end of churning, toss in the candied bacon bits.
- Store, covered in plastic wrap, in an airtight container, for up to 1 month.


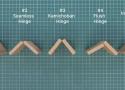
Especially aluminium tent pegs are a bit tricky. Most metals will become harder as they are 'worked' (as in getting bent) and the initial bend when you hit the stone will have the effect that the bend itself is harder than the straight metal around it. So if you now try to bend them back in shape you will notice the peg bending left and right of the original bend but that one just stays where it is. If you finally manage to straighten it out, the harder and therefore more brittle metal may snap. This effect is called work hardening and is especially pronounced in aluminium. For this metal it is also especially tricky to reverse, i.e. to get it soft again. The process for this softening is called annealing and for aluminium you will have to heat the metal to a temperature that is uncomfortably close to its melting point. A bit of a challenge when camping or without a metal workshop at home. But I think not impossible.
Below I'll explain how to anneal aluminium. If you have a steel peg (much easier to work than aluminium and less likely to break) or if you can't be bothered annealing the aluminium peg you can skip to the two ways to straighten the metal. For unannealed aluminium I would not recommend method 2 though, as it will most likely break.
Annealing of aluminium: In short, the purpose of the annealing process is to remove stress inside the metal, which causes it to become less workable. Aluminium needs to be heated to a temperature close to it's melting point (but obviously not above) and then doused in water, i.e. cooled down quickly.
You need plain household soap without additives like fragrances, skin conditioners etc. - this will be used as a makeshift temperature indicator so you know you've reached the right temperature without accidentally melting it. Furthermore you want a heat source like a blow lamp (I don't know if a gas camping cooker will work but it may be worth a try), a vessel with water to douse the heated peg and cool it rapidly down and a pair of pliers or disposable cotton cloth or whatever seems suitable to hold the hot peg without burning your fingers (maybe you could try and place the peg on a camping cooker where it is immersed in the flames instead).
Firstly cover the peg with soap directly from the bar (without water). Now heat the peg up until the soap on it turns black. Try to spread the heat evenly over the affected area. Watch very carefully for the soap to change colour as it is now almost hot enough to melt. Once there, quickly douse the peg in water.
If you were to try this on a camping stove you may want to apply some insulation to the straight parts of the peg so the heat you apply to the bent bit doesn't dissipate away too quickly (or you may never reach the required temperature). An old rag of tightly woven wool, or better even leather, should work well as these materials don't combust that easily - it will stink right enough and the rag will be ruined. Improvise with appropriate care.
This process can be repeated if you don't feel it worked well the first time. You will have to clean the peg before that - grinding the grime off with sand should work fine or ideally some emery paper if you have it. If you don't clean it you won't see the soap turning black.
You can find more hand-on information about annealing of common metals here.
Careful: Don't burn yourself. The metal will be very hot. Don't touch it with your fingers and take care it can not accidentally fall on you.
Straightening the metal (1): Now you should be able to bend the peg back. The perfect tools for this job would be a sturdy pair of mole grips to hold the peg (but if you are careful your hand will do), a hammer and anvil. I know, if you had a blacksmith workshop at home you would not be asking this question. However for a thin piece of metal like aluminium you should be able to use the tools of our ancestors from the days before metal smelting was discovered and use stones. You'll want to pick a hammerstone that is comfortable in your hand. You want to start with an anvil stone with a bend only slightly less than the bend in your peg. Place the peg on the anvil stone so the inside of the bend points to the anvil. There should be some space between the peg and the anvil stone right in the middle of the bend but the two points where peg and anvil are touching should not be too far away from each other, maybe three quarters of an inch (for really tight bends) to two inches (for wider bends). Hit with the hammerstone the middle of the bend. Continue this while turning / exchanging the anvil stone to suit the bend until you end up with one that is almost flat. As a rule your next hit with the hammerstone should always go to the back of the middle of the bit that is bent the most.
This may sound a bit complicated when described in writing but once you get the hang of this, the details will make sense naturally and it is surprisingly simple to do. Your peg won't look like new obviously, but you will be surprised how straight you can get it with this method.
Careful: If you hit the peg with the hammerstone it will jump in your hand unless it was perfectly aligned and all the energy from the hit is dissipated by bending the metal back. If you happen to get this always right from the start consider a career as a blacksmith - you are a natural. If you don't it will hurt. If you have it, use a suitable pair of pliers. A molegrip would be ideal. You could also use a bit of fabric (or better, leather) wrapped around the peg to dissipate the shock of the impact. Don't try to hold the peg to tight. Allow it to jump. The hammer and anvil stones are supposed to take all the force from the hit, not your hand.
Straightening the metal (2): If you can find a hole in a metal fence or similar you could insert the peg to just before the bend. Then you could insert the other side of it in a pipe and use the leverage to bend the peg back. Sometimes it is quite hard to prevent the peg from spinning away and to keep it straight that way. Instead of a pipe you could use a spanner with a ring, or any other metal tool item with a hole where the other side of the peg can be inserted. To prevent the peg from spinning, put the tool on in a way that you pull it rather than push. This method is quicker to do if you can find the tools but the result is somewhat cruder. It is also more stressful for the metal - so it is more likely to break your peg.

- Ae PooiM - YouTube
- Atelier Alaska DIY Couture Débutant - YouTube
- Couture Enfant & Tricot Débutant - YouTube
- From Carly B - YouTube
- Nathalie Couture easy - YouTube
- ProperFit Clothing Co. - YouTube
- Romy Stan Zak [FR] - YouTube
- Sailrite - YouTube
- sewingtimes - YouTube
- Witchcrafty - YouTube
- withwendy - YouTube
Une boîte à lettre morte électronique dans une ampoule connectée.
Un portail captif, un serveur web et des documents le tout avec moins de 4Mo d'espace disque.
ADVICE FROM A FORMER PROSECUTOR: DO NOT TALK TO THE POLICE WITHOUT A LAWYER! EVER!
When I was a prosecutor, the first thing I would ask when given a case was "did he say anything?" Nothing lights up a prosecutor’s face when he is faced with a difficult case and finds out the suspect talked.
I’ve seen it all too many times as a prosecutor. The police tell someone they need to have a friendly chat and get their side of the story. It won’t take long, and then they can leave. So, the person talks. Maybe because they didn’t do anything wrong. Maybe because they genuinely want to do the right thing and help the police solve a crime. And guess what happens? They get arrested.
If the police ever ask you to come to the police station or are stopping by your house “because they only have a couple questions for you” — that means one of two things:
- You are a suspect;
-
You are a possible suspect.
Realize this: If you're not the victim of a crime, the police are not here to help you. And the law says that they can lie to you – as much as they want – if it gets you to confess. So, if you're not the victim of a crime, and the police want to talk to you to get your side of the story, you can't trust a thing they say.
The police will attempt to convince you that if you answer just a few questions, it will be the end of this matter. What they are really thinking is that “this guy’s guilty and we need to get as much information from him as possible.”
WHAT IF I HAVEN'T DONE ANYTHING WRONG?
Doesn't matter. When innocent people speak to law enforcement before speaking with a criminal defense attorney, it is always a mistake.
Why?
In the first place, you have no idea what information the police officer has or where it came from. Are you the subject of a criminal investigation or just a witness? The police will not tell you. Do they have circumstantial evidence? Where did he police get their information? From a reliable witness? From somebody with a grudge against you? Surveillance video? Bottom line, you don't know. As law professor James Duane would say, "you have the right to remain innocent."
Under no circumstances should you make any statement at all to the police. Making a statement can never be helpful to you. Your explanation will never lead to the police changing their mind about arresting you. Most times, your statement will hurt you in ways you can’t anticipate and may even create a case that doesn’t exist without your statement. A lot of the times they aren’t looking for a confession, they’re looking for little bits of information to help their case. Questions like, "Do you know so and so, which way do you go to work, what car do you drive?" seem harmless when what they are doing is filling in the blanks to convict you.
NO, YOU CAN'T TALK THEM OUT OF IT
No, they don’t care about your story
The police don’t care that you would never do something like that. That you have a good job. That you’re college educated. That you support your elderly parents, your five kids and your wife. The police don’t care that you’re a really nice guy. They don’t even care that you weren’t even there. Most people know that they don’t have to talk to the police, that they, “have a right to remain silent.” But the urge to defend yourself can be overwhelming, particularly if you think your explanation might end the whole thing.
DON’T DO IT!
Talking to the police CANNOT and WILL NOT help you.
THE POLICE HAVE ALREADY MADE THEIR DECISION
Talking to the police cannot make any difference. Nobody can “talk their way out of” an arrest. No matter how “savvy” or intelligent you think you might be, you will not convince them that you are innocent It is not like what you see on TV where the police are only trying to find out the truth. Most of the time, when they want to talk to you, they already believe that you did whatever crime they are investigating. You can expect to not leave the police station and be arrested.
THEN WHAT SHOULD I DO IF A POLICE OFFICER WANTS TO ASK ME ABOUT A CRIME?
You should tell the officer respectfully and politely that:
- I would like to invoke my right to remain silent; and
- I would like an attorney.
If you say those two things, all of the pressure the police place on you to talk goes away. They can't ask you any more questions. It's like magic. But if you don't say those two things, they keep applying pressure, and convincing you that it is in your best interests to talk to them when it is not.
DOESN’T HAVING A LAWYER MAKE YOU LOOK GUILTY?
Even if it does, who cares? Cases against defendants are built on evidence, not appearances. Having an attorney present is not evidence, the things you say are. Bringing an attorney with you may be the only way you are going to go home .
LET US TALK TO THE POLICE FOR YOU
Let us talk to the police. We can find out if they are planning to arrest you or if you really are just a witness. We can find out if they really want to 'hear your side of the story' or if that was just a ruse to get you to turn yourself in. Because whether you’re a witness or a suspect, the police are going to say exactly the same thing: “Come in, we just have a few questions.”
Your lawyer can sit with you and the police while you’re being interviewed. Your lawyer can tell you what questions to answer and what questions not to answer (in other words, when to shut up).
Every day, someone looks back on an encounter with the police and wishes they hadn’t talked. But no one ever looks back and wishes they hadn’t called their lawyer.
Don’t Call The Cops First. Call Your Lawyer. Call the Campola Law Firm.
What you need and how to do it


We are told that wealth is a measure of contribution. The richer a person becomes, the more they must have given to society. This is one of the founding myths of capitalism. It is repeated so often that many people accept it without thinking. Schoolchildren are taught that great fortunes are the reward for hard work, intelligence, innovation, and risk. Newspapers celebrate billionaires as visionaries. Politicians praise entrepreneurs as wealth creators. Business commentators speak of fortunes as though they emerged from the mind of a single genius rather than from the labour of millions.
With discussion around Elon Musk becoming the world’s first trillionaire, we are witnessing this mythology in its purest form. A trillion dollars is such a vast sum that it barely registers as a real quantity. Most people cannot imagine a million dollars. A billion is one thousand times larger. A trillion is one thousand billions. The figure slips beyond ordinary understanding. That is precisely why it deserves examination.
A trillionaire does not represent the triumph of human potential. It represents a historic failure of human society. The existence of a trillionaire demonstrates that the wealth produced by countless workers has been concentrated into the hands of one individual on a scale without precedent. It reveals a world where economic power has become so centralised that a single person can command resources greater than those available to many nations. It exposes the absurdity of a system that struggles to house, feed, educate, and care for billions while allowing one man to accumulate wealth beyond any conceivable personal use. The question is not whether Elon Musk deserves a trillion dollars. The question is how any human being can possess such wealth while millions remain trapped in poverty and insecurity.
Supporters of Musk often present him as a self-made man. This narrative collapses under scrutiny. Like every capitalist, Musk’s fortune depends on the labour of others. Cars are not produced by CEOs. Rockets are not assembled by shareholders. Satellites are not launched by investors. Every product associated with Musk emerges from the collective work of engineers, technicians, cleaners, warehouse workers, coders, miners, drivers, administrators, and countless others spread across global supply chains. The workers create the value. Capitalism ensures that a portion of that value is appropriated by those who own. This is the foundation of the system. It is not a flaw. It is its organising principle.
Workers sell their labour because they must survive. Owners purchase labour because it generates profit. The difference between what workers are paid and the value they produce becomes the source of accumulated wealth. The billionaire does not become rich despite workers. The billionaire becomes rich because workers exist. A trillionaire therefore represents an immense transfer of wealth from labour to capital. Every increase in personal fortune reflects social wealth flowing upward. Every surge in stock valuation signals the expansion of ownership claims over the productive efforts of others.
When people speak about Musk’s wealth, they often point out that much of it exists in shares rather than cash. This observation is supposed to reassure us. It misses the point entirely. Ownership itself is power. A billionaire does not need a vault filled with banknotes. Ownership grants command over resources, workplaces, technologies, land, infrastructure, and labour. A share certificate is not merely a financial instrument. It is a legal claim on the wealth produced by others.
The distinction between cash and shares matters little to those whose lives are shaped by the decisions of corporations. Workers can lose jobs because of shareholder demands. Communities can be transformed by investment decisions. Governments can be pressured by wealthy investors threatening capital flight. The power is real regardless of the form it takes.
Musk’s rise also reveals how modern capitalism has transformed celebrity into an economic force. Earlier generations of industrialists often remained distant figures. Today’s billionaires cultivate public identities. They present themselves as rebels, outsiders, innovators, or visionaries. Social media has allowed wealthy individuals to bypass traditional gatekeepers and communicate directly with millions. This creates a dangerous illusion. People begin to identify with billionaires rather than with their fellow workers. Workers earning ordinary wages defend the interests of men whose fortunes exceed the economic output of entire countries. People struggling with rent celebrate stock market gains that bring them no benefit. Citizens facing stagnant wages cheer the accumulation of wealth that deepens social inequality. The billionaire becomes a character in a story rather than a participant in a class relationship.
This confusion is politically useful. A population that admires the rich is less likely to question the structures that make extreme wealth possible. The focus shifts from exploitation to personality. Critics are invited to debate whether Musk is clever, eccentric, rude, entertaining, innovative, or controversial. The economic system itself escapes scrutiny. Yet no amount of personality can explain a trillion-dollar fortune.
The reality is that capitalism naturally concentrates wealth. Competition eliminates weaker firms. Successful companies absorb rivals. Markets become dominated by fewer players. Capital accumulates. Wealth generates more wealth. Ownership expands. Economic power becomes increasingly centralised. This tendency has been observed for centuries. It is visible everywhere. Small businesses disappear while giant corporations expand across continents. Local economies become subordinate to multinational firms. Financial institutions grow larger and more interconnected. The rich become richer because wealth itself creates advantages unavailable to everyone else.The emergence of a trillionaire is therefore not an accident. It is a logical outcome of capitalist development.
Defenders of the system often argue that extreme wealth benefits everyone because successful entrepreneurs drive innovation. Without billionaires, we are told, society would stagnate. This argument rests on a profound misunderstanding of how innovation actually occurs. Scientific breakthroughs emerge from collective effort. Research depends on generations of accumulated knowledge. Universities train scientists. Public institutions fund basic research. Workers develop technologies. Engineers solve practical problems. Ideas circulate through society. The myth of the lone genius obscures this reality.
Even the technologies associated with Musk rely heavily on public investment and collective knowledge. The internet, satellite systems, computing technologies, battery research, aerospace engineering, and countless other innovations emerged through decades of social effort. No individual invented them alone. The billionaire arrives at the end of the process and claims ownership.
Capitalism rewards ownership far more generously than contribution. A nurse contributes more to society than a hedge fund manager. A sanitation worker contributes more to public health than a venture capitalist. A teacher contributes more to human development than a speculator. Yet wealth flows overwhelmingly toward ownership rather than social usefulness. This contradiction lies at the heart of the system. The trillionaire embodies it in its most extreme form.
There is also a deeper moral question. What kind of society permits such concentrations of wealth while basic needs remain unmet? Across the world, people struggle to obtain housing, healthcare, education, clean water, and food security. Millions live under constant economic pressure. Entire regions face ecological devastation. Public infrastructure deteriorates. Social services are cut in the name of fiscal responsibility. Governments routinely claim there is insufficient money to address these problems. Yet somehow enough wealth exists for individuals to accumulate fortunes measured in hundreds of billions.
The issue is not scarcity. The issue is distribution. Humanity already possesses the productive capacity to ensure a decent standard of living for everyone. The obstacle is not technological. It is political and economic. Resources are allocated according to profit rather than need. Production serves markets rather than communities. Human welfare remains subordinate to private accumulation. The existence of a trillionaire makes this contradiction impossible to ignore.
Anarchists have long argued that concentrated wealth and concentrated power are inseparable. Economic domination inevitably produces political domination. Those who control resources acquire influence over governments, media institutions, public discourse, and social priorities. This influence does not require conspiracy. A billionaire can shape society simply through ordinary decisions. Investment choices affect employment. Ownership influences information flows. Political donations affect policy. Corporate lobbying shapes legislation. Media platforms alter public discussion. Power follows property. This is why anarchists reject the distinction often made between economic and political authority. A boss who controls access to wages possesses power. A landlord who controls access to housing possesses power. A billionaire who controls vast resources possesses power. The fact that such authority emerges through markets rather than elections does not make it less significant. Freedom becomes hollow when survival depends upon institutions controlled by others. The billionaire class therefore represents more than economic inequality. It represents a form of social domination.
Supporters of Musk frequently point to his ambitions regarding space exploration, artificial intelligence, and technological progress. They argue that history advances because extraordinary individuals pursue extraordinary projects. Yet this argument quietly assumes that humanity requires rulers. It assumes that collective intelligence is incapable of organising complex activity without wealthy patrons. It assumes that workers can build rockets but cannot democratically determine social priorities. It assumes that innovation requires hierarchy. It assumes that progress depends upon concentrated ownership. Anarchists reject these assumptions. People cooperate every day without billionaires directing them. Scientific communities exchange knowledge across borders. Workers coordinate vast production systems. Mutual aid networks emerge during crises. Communities organise themselves whenever institutions fail. Human beings possess extraordinary capacities for cooperation.
A world organised around human need would direct resources toward collective flourishing. Housing would be treated as a necessity rather than an investment vehicle. Healthcare would be available to all. Production would be shaped by ecological realities rather than shareholder demands. Technology would serve communities rather than private fortunes. In such a society, the appearance of a trillionaire would be regarded as evidence of dysfunction rather than achievement.
Future generations may look back upon our era with astonishment. They may struggle to understand how societies tolerated such extremes. They may find it strange that people celebrated individuals whose fortunes exceeded the budgets of nations while children went hungry and families slept in cars. They may wonder why journalists wrote admiring profiles of billionaires instead of questioning the institutions that produced them. Perhaps they will see trillionaires the way we see hereditary aristocrats. For centuries, kings and nobles claimed that their privileges were natural, necessary, and beneficial. Entire societies were organised around these assumptions. Today those claims appear absurd. The billionaire class rests upon similarly fragile foundations. Its power depends upon social acceptance. Its legitimacy depends upon stories. People must believe that extreme wealth reflects merit. They must believe that hierarchy is natural. They must believe that ownership confers moral authority. Once those beliefs begin to crack, the system becomes harder to defend.
Elon Musk becoming the world’s first trillionaire is celebrated across financial markets. Investors cheer. Business magazines will undoubtedly produce commemorative covers. Commentators will describe a historic milestone. Workers should see something different. They should see a measure of how much wealth has been extracted from collective labour. They should see a reminder that capitalism rewards ownership more lavishly than work. They should see evidence that economic power has become dangerously concentrated. Most importantly, they should refuse the invitation to admire their oppressors.
The wealthy are not our role models. They are not proof that the system works. They are proof of who the system works for. A trillionaire is not the symbol of a successful society. A trillionaire is the symbol of a society that has allowed wealth, power, and human possibility to be monopolised by a tiny ruling class while the vast majority produce the world and receive only a fraction of what they create. The proper response is neither envy nor admiration. It is opposition.

Ingrédients
- 750 g de farine
- 43 cl (+/- 10) de lait frais
- 30 g de levure fraîche
- 100 g sucre
- 100 g de beurre
- 1 gros œuf fermier (60 g)
- 1 zeste de citron bio râpé
- 50 g raisins secs
- 25 g de rhum brun (facultatif)
- 12 g de sel
- 1 jaune d’œuf pour dorer
Instructions
- Si vous optez pour la version avec raisins secs au rhum, faire macérer les raisins quelques heures ou même la veille dans du rhum brun. En principe les raisins devraient complétement absorber l’alcool, qui lui, va complétement disparaître lors de la cuisson et ne laisser que les parfums.
- Dans le bol du pétrin, verser le lait tempéré à 20°C, ajouter la levure et la faire fondre.
- Verser la farine par-dessus ainsi que l’œuf et le sucre. Il est très important de ne pas mettre la levure en contact direct avec le sel, au risque de la détruire.
- Démarrer le pétrissage en 1ère vitesse pendant 2 à 3 minutes, jusqu’à ce que la pâte de forme puis ajouter le sel à ce stade
- Démarrer la 2ème vitesse et pétrir la pâte pendant 5 minutes jusqu’à ce que la pâte se décolle des bords du récipient. Cette opération permet de rendre la pâte élastique et de lui incorporer l’air nécessaire au développement de la levure.
- Puis est venu le moment d’ajouter le beurre. Le beurre doit être froid mais pas glacé, à température ambiante est le mieux, mais surtout pas liquide. L’ajouter par petites portions et continuer le pétrissage pendant 4 à 5 minutes ou jusqu’à ce que la pâte se décolle des bords du récipient et devienne lisse, souple et élastique.
- Si vous avez opté pour les raisins secs, au rhum ou pas rhum, c’est maintenant qui faudra les mettre et continuer le pétrissage pour encore 1 à 2 minutes.
- Lorsque le pétrissage est terminé, faire une belle boule avec cette pâte puis la réserver dans un grand bol, à couvert, pour le pointage à température ambiante, ceci pour 60 à 90 minutes, ce qui permet à la levure de commencer son action.
- Une fois la pâte bien développée, lui donner un rabat (la plier en 4) et la remettre dans le bol puis déposer le au réfrigérateur pendant une heure environ.
- Le temps étant écoulé, déposer la pâte sur le plan de travail et la diviser en deux parts, les bouler très légèrement et les laisser se détendre sous un torchon pendant 10 minutes.
- Reprendre les pâtons et les façonner en long, de la grandeur des moules, ici 25 cm.
- Les déposer dans les moules beurrés et farinés ou comme ici, recouvert d’un papier sulfurisé et les faire pousser dans un endroit chaud (28°C), recouverts d’une feuille plastique, pour une bonne heure de pointage. Il faut un développement maximal pour ce genre de gâteau.
- Préchauffer le four à 180°C, dorer les brioches avec de l’œuf battu, puis avec une paire de ciseau, les entailler profondément 5 à 6 fois afin d’obtenir les pointes caractéristiques des taillaules.
- Enfourner pour 30 à 35 minutes tout en surveillant régulièrement la cuisson et sitôt cuites, les démouler et les refroidir sur une grille.

Ingredients
- ½ cup (1 stick) unsalted butter, cut into 8 equal pieces
- 1 cup (125 g) all-purpose flour
- ½ cup (63 g) buckwheat flour
- ½ tsp. baking powder
- ½ tsp. baking soda
- 1¼ tsp. Diamond Crystal or ¾ tsp. Morton kosher salt, plus more
- 6oz. bittersweet chocolate (65–75% cacao) bars or wafers (disks, pistoles, fèves)
- ⅔ cup (133 g; packed) light brown sugar
- ½ cup (100 g) granulated sugar
- 1 large egg
- 2 large egg yolks
- 1 tsp. vanilla extract
Instructions
- Heat ½ cup (1 stick) butter in a small saucepan over the lowest heat possible until melted (you don’t want it to sputter or brown), about 5 minutes.
- Meanwhile, whisk 1 cup (125 grams) all-purpose flour, ½ cup (63 grams) buckwheat flour, ½ tsp. baking powder, ½ tsp. baking soda, and 1¼ tsp. Diamond Crystal or ¾ tsp. Morton kosher salt in a medium bowl.
- Coarsely chop 6 oz. bittersweet chocolate. Set aside a handful of chocolate in a small bowl.
- Scrape butter into a large bowl and add ⅔ cup (133 grams) light brown sugar and ½ cup (100 grams) granulated sugar. Whisk vigorously until butter has been absorbed into the sugar and no big lumps remain, about 30 seconds.
- Add 1 large egg, then 2 large egg yolks, one at a time, whisking until fully combined after each addition. Whisk in 1 tsp. vanilla extract. At this point, your mixture should look much lighter in color and be smooth, almost creamy.
- Add dry ingredients and use a rubber spatula or wooden spoon to stir until just incorporated and almost no dry streaks remain. Add chopped chocolate (but not the chocolate you reserved in the small bowl) to batter. Gently mix just to distribute. Cover bowl with an airtight bowl cover, a kitchen towel, or plastic wrap and chill 2 hours. (If you’re crunched for time, 1 hour will do, but cookies will be best after 2.)
- Place racks in upper and lower thirds of oven; preheat to 375°. Using a tablespoon measuring spoon, scoop out scant 2-Tbsp. portions of dough (or, if you have a scoop, this is a leveled-off #30 or a heaping #40)) until you have 10 portions divided between 2 parchment-lined baking sheets (you want five per sheet—these will spread a bit!). Roll portions into balls and gently press a piece or 2 of reserved chocolate into each one. It’s okay to cram the chocolate on there—some pieces can even be vertical. Cover and chill any remaining dough.
- Bake cookies, rotating baking sheets top to bottom and front to back halfway through, until edges are golden brown and centers are puffed, 8–10 minutes. (Pull at 8 if you like your cookies softer and want to guarantee they’re still soft the next day!)
- Working one at a time, pull baking sheets out of the oven and tap lightly on the stove to deflate cookies. Sprinkle with Diamond Crystal kosher salt (if you’re using Morton, skip it: the crystals are too large). Let cookies cool on baking sheets 5 minutes, then transfer to a wire rack and let cool completely. Let baking sheets cool (to do this fast, run them under cold water), then turn parchment paper over. Repeat process with remaining dough, dividing evenly between baking sheets, to make 6–8 more cookies.
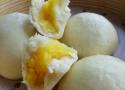
Ingrédients
- 300 g de farine de blé
- 50 g de farine de riz
- 1 sachet de levure boulangère sèche
- 20 cl de lait
- 70 g de sucre
- 3 cuillères à soupe d’huile neutre (pépins de raisin par exemple)
- de la pâte à tartiner chocolat noisette (ici gianduja)
Instructions
- Faites tiédir le lait avec le sucre jusqu’à dissolution.
- Quand le lait est tiède/chaud (non bouillant – 30/35°C – trempez votre petit doigt dedans, vous ne devez pas trop ressentir la chaleur), ajoutez-y l’huile (neutre en saveur et en couleur, pas comme ce que j’ai fait donc) et la levure de boulanger.
- Mélangez.
- Dans un grand saladier, mélangez les deux farines puis versez-y le lait tiède tout doucement en mélangeant délicatement avec les doigts.
- Travaillez la pâte jusqu’à obtenir une boule, enrobez-la de farine (pour éviter qu’elle ne colle au plat et favoriser son extraction plus tard) et laissez-la monter deux heures dans son saladier, recouvert d’un linge propre, dans un endroit chaud et à l’abri des courants d’air (enfermée dans votre four éteint par exemple)
- Une fois que la pâte à brioche a bien levée, étalez-la sur un plan de travail, préalablement fariné, à l’aide d’un rouleau à pâtisserie. Ni trop épaisse, ni trop fine.
- Munissez-vous d’un emporte pièce rond de 8 cm de diamètre (environ… ou un verre, ou un petit bol) et découpez des cercles jusqu’à épuisement de la pâte.
- Déposez une petite boule de gianduja au centre de l’un des rond de pâte, et repliez-la autour de la boule vers le haut petit à petit jusqu’à avoir fait le tour.
- Faites une sorte de « tourbillon » au moment de fermer la brioche pour solidifier la « soudure » (humidifiez un peu la pâte au besoin).
- Posez votre banh bao sur un carré de papier cuisson et procédez à la réalisation des autres jusqu’à épuisement de la pâte.
- Enfin, posez-les dans votre panier de cuiseur-vapeur, sans trop les coller et laissez-les cuire 10 à 15 minutes. Une fois cuit vos banh bao ont un peu gonflé et sont bien blancs.
- Servez rapidement après cuisson.
Ingrédients
Farce à la crème-œuf
- 1 œuf
- 30 g de beurre mou
- 35 g de sucre glace
- 20 g de custard powder
- 18 g de fécule de maïs
- 45 g de lait entier
Pâte
- 150 g de farine T 45
- 1,5 g de levure boulangère sèche
- 80 à 85 g d'eau tiède
- 10 g de sucre
- 1 pincée de sel
- 1 c. à café d'huile végétale
Instructions
Pâte
- Mélangez l'eau et la levure, laissez mousser pendant 5 à 10 min.
- Mélangez tous les ingrédients à sec, versez le mélange levure-eau petit à petit.
- Pétrissez pendant 5 min pour avoir une boule lisse et homogène.
- Ajoutez l'huile, pétrissez de nouveau.
- Laissez pousser dans un endroit doux (en couvrant d'un linge humide) et pas trop sec pendant 1 heure.
Farce
- À préparer de préférence la veille et conserver au frais.
- Battez l'oeuf.
- Mélangez le beurre mou avec du sucre, ajoutez l’œuf en plusieurs fois, mélangez bien entre chaque ajout d’œuf.
- Tamisez la fécule et la custard powder, ajoutez dans la préparation précédente, mélangez bien.
- Ajoutez du lait.
- Faites cuire ce mélange au micro-onde pendant 1 min 15, sortez toutes les 20 secondes pour bien mélanger.
- Passez au tamis pour avoir une texture plus fine (pas obligatoire).
- Réservez la farce au frais.
Pliage et cuisson
- Sortez la pâte, dégazez, formez en forme de boudin.
- Divisez en 6 morceaux équivalents.
- Abaissez chaque morceau en petite galette, le bord doit être plus fin que le centre.
- Mettez une belle c. à café de farce au centre de la galette, pliez pour avoir la forme d'un baozi.
- Placez les petits pains dans la panier vapeur, côté plis vers le bas.
- Laissez pousser pendant 30 à 40 min.
- Mettez le panier sur une casserole ou un wok pré-rempli d'eau froide.
- Faites cuire à la vapeur pendant 12 min à partir d'ébullition (départ d'eau froide).

Ingrédients
- 5 coings (env. 1kg700)
- 1kg500 de sucre cristallisé
- anis étoilé (3 ou 4)
- clous de girofle (5 ou 6)
- cannelle (1 cuillère à café)
- cardamome (1 cuillère à café)
- eau.
Instructions
- Laver et frotter les coings avec une petite brosse pour enlever la "peluche".
- Couper chaque fruit en quatre (sans les éplucher), enlever les trognons en les conservant, tailler chaque morceaux de coings en lamelles.
- Dans une casserole, mettre les trognons, recouvrir d'eau et faire bouillir à petit feu pendant 30 min; égoutter, jeter les trognons et garder "l'eau de coing".
- Peser les tranches de coing; mettre dans un faitout: pour 1kg500 de fruits, ajouter 1kg500 de sucre cristallisé, 60cl d'eau de coing et les épices; laisser macérer 3h pour que le sucre soit bien dissous en remuant de temps en temps.
- Porter à ébullition et laisser cuire à petit feu pendant 30 min en remuant de temps en temps. Laisser refroidir et reposer 24h.
- Le lendemain, porter de nouveau à ébullition et faire cuire encore 30 min en remuant; le mélange doit épaissir.
- Mettre en pot et fermer hermétiquement.

Ingredients
Topping
- ¼ cup (60 g) salted butter, melted
- ½ cup (100 g) brown sugar, light or dark (I usually use light) tightly packed
- 10 pineapple slices, patted dry (a 20oz can is typically enough)
- maraschino cherries
Vanilla Cake
- ½ cup (115 g) unsalted butter, softened to room temperature
- ¾ cup (150 g) granulated sugar
- 2 large eggs, room temperature preferred
- 1 teaspoon vanilla extract
- 1 ½ cups (195 g) all-purpose flour
- 1 ½ teaspoons baking powder
- ¼ teaspoon salt
- ½ cup (120 ml) whole milk, room temperature preferred
Instructions
- Preheat oven to 350F (175C)
- Pour melted butter into 9.5-10" pie plate or deep cake pan, make sure it entirely covers the bottom of the pan and use a spoon or spatula to grease the sides of the pan.
- Sprinkle brown sugar evenly over butter mixture. Arrange pineapple slices over the bottom of the pan, slice leftover slices in half and arrange up the sides of the pan, as seen in photo.
- Place cherries in center of pineapple rings and as desired in empty spaces. Set aside.
- To prepare vanilla cake, beat butter and sugar in medium-sized bowl until creamy and well-combined.
- Add eggs, beating one at a time until combined.
- Stir in vanilla extract.
- In a separate bowl, whisk together flour, baking powder, and salt.
- Alternate adding flour and milk to the wet ingredients, starting and ending with flour and mixing until just combined after each addition (I prefer to do this part by hand with a spatula to be sure not to overmix).
- Pour batter evenly over prepared cake pan over the pineapple/cherry layer.
- Bake on 350F (175C) for 30 minutes. At the 30 minute mark, loosely cover with foil and continue to bake (still on 350F/175C) for another 15 minutes, until a toothpick inserted in the center comes out mostly clean with few crumbs (total cook time for cake will be 45 minutes).
- Allow to cool for 10-15 minutes and then carefully invert cake onto serving platter (careful, it will still be very hot!).
- Allow to cool before cutting and enjoying, but don’t wait too long as this cake tastes wonderful (best!) warm from the oven!
Ingredients
- 400g bread flour (14 ounces; about 2 1/2 cups), plus more for dusting
- 10 g kosher salt (0.35 ounces; about 2 teaspoons), plus more for sprinkling
- 4 g instant yeast (0.15 ounces; about 1 teaspoon), such as SAF Instant Yeast
- 275 g water (9.5 ounces; about 1 cup plus 3 tablespoons)
- 8 g extra-virgin olive oil (0.25 ounces; about 2 teaspoons), plus more to coat pans and for drizzling
- 1 1/2 cups pizza sauce, such as our New York–style pizza sauce
- 12 ounces grated full-fat, low moisture (dry) mozzarella cheese (see note)
- Toppings as desired
- Small handful torn fresh basil leaves (optional)
- 2 ounces grated Parmesan or Pecorino Romano cheese (optional)
Instructions
- Combine flour, salt, yeast, water, and oil in a large bowl. Mix with hands or a wooden spoon until no dry flour remains. (The bowl should be at least 4 to 6 times the volume of the dough to account for rising.)
- Cover bowl tightly with plastic wrap, making sure that the edges are well sealed, then let rest at cool room temperature (no warmer than 75°F or 24°C) for at least 8 hours and up to 24. Dough should rise dramatically and fill bowl. In a hot kitchen, the dough may overproof near the end of that range.
- Sprinkle top of dough lightly with flour, then transfer it to a well-floured work surface. Divide dough into 2 pieces and form each into a ball by holding it with well-floured hands and tucking the dough underneath itself, rotating it until it forms a tight ball.
- Pour 1 to 2 tablespoons oil in the bottom of two 10-inch cast iron skillets or round cake pans (see note). Place 1 ball of dough in each pan and turn to coat evenly with oil. Using a flat palm, press dough around the pan, flattening it slightly and spreading oil around the entire bottom and edges of the pan. Cover tightly with plastic wrap and let dough sit at room temperature for 2 hours (at room temperatures above 75°F or 24°C, the dough may require less time to rise; at temperatures below 65°F or 18°C, it may require more time). After the first hour, adjust an oven rack to the middle position and preheat oven to 550°F (290°C).
- After 2 hours, dough should be mostly filling the pan up to the edges. Use your fingertips to press it around until it fills in every corner, popping any large bubbles that appear. Lift up one edge of the dough to let any air bubbles underneath escape, then repeat, moving around the dough until there are no air bubbles left underneath and the dough is evenly spread around the pan.
- Top each round of dough with 3/4 cup sauce, spreading sauce to the very edge with the back of a spoon. Sprinkle evenly with mozzarella cheese, all the way to the edges. Season with salt. Add other toppings as desired. Drizzle with olive oil and scatter a few basil leaves over the top of each pizza, if desired.
- Transfer pan to oven and bake until top is golden brown and bubbly and bottom is golden brown and crisp when you lift it with a thin spatula, 12 to 15 minutes. Immediately sprinkle with grated Parmesan or Pecorino Romano cheese, if using. Using a thin spatula, loosen pizza and peek underneath. If bottom is not as crisp as desired, place pan over a burner and cook on medium heat, moving the pan around to cook evenly until it is crisp, 1 to 3 minutes. Remove the pizzas and transfer to a cutting board. Cut each pizza into 6 slices and serve immediately.

Ingrédients
- 580g de farine T65 + 1 CS bombée de gluten
- 170g de lait
- 170g d'eau
- 1 oeuf
- 3 CS d'huile d'olive
- 1 sachet de levure sèche de boulanger (8g) délayée dans une CS d'eau tiède
- 1 CC sel
- 1 CS miel
- 1 rizhome de curcuma fraîchement râpé
- des petites graines au choix, légèrement torréfiées (poêlées pendant 15 mn feu moyen, ou four à 170° 10 mn): sésame, courge, tournesol, lin
Instructions
- Déposez les éléments liquides dans la cuve du robot en terminant par la levure délayée préalablement dans 1 CS d'eau tiède.
- Versez les solides par dessus, ajoutez le curcuma, en le râpant à l'aide d'une microplane par exemple.
- Pétrissez au crochet pour obtenir une pâte à la robe jaune homogène, pas trop longuement, 5 minutes suffisent pour obtenir une masse souple un peu collante.
- Couvrez d'un film à même la pâte (elle ne doit pas croûter!), et laissez pousser dans un endroit tiède, sans courants d'air. Une poussée lente, à l'extérieur est préférable à une accélération de la chaleur dans un four, il y a moins de risques de développer une acidité excessive. Si vous avez cependant une forte odeur de levure malgré "une poussée extérieure", ajoutez à votre pâte du jus de citron et un demi zeste...ou bien changez de levure, pour une de meilleure qualité.
- Lorsque la pâte a poussé, appuyez dessus fortement pour chasser l'air. Farinez légèrement un plan de travail (on ne doit pas trop intégrer de farine à présent aux buns!) déposez la pâte, coupez-là en dix morceaux égaux, façonnez-les en boules, en marquant une soudure qui sera le "dessous", si ça colle tant pis, ne refarinez surtout pas vos mains, vos buns doivent rester légers !
- Déposez vos pâtons sur une plaque à biscuits de cuisson (perso je les mets sur deux plaques vierges, ni feuille de cuisson, ni badigeon d'huile qui "croûterait" le dessous des pains, ils doivent rester parfaitement moelleux) antiadhérentes par contre...et ce, de manière espacée et en quinquonce. Recouvrez d'un film alimentaire, pour ne pas faire croûter le dessus des pains. Laissez sur un plan de travail, dans un endroit tiède.
- Préchauffez votre four T 200° sans rien à l'intérieur, surtout pas la grille qui va recevoir vos buns, vous cuiriez le dessous des petits pains beaucoup trop rapidement !
- Dans un bol, délayez 1CS d'eau avec 1 CC de miel, une fois bien diluée, imbibez un petit chiffon propre du liquide. Lorsque les pains ont doublé de volume, enlevez le film et "mouillez" le dessus des buns, parsemez enfin avec vos graines favorites.
- Déposez votre plaque à buns sur une grille parfaitement froide, ajoutez un ramequin d'eau bouillante au milieu des pains, ceci afin qu'il y ait une ambiance légèrement humide dans le four et enfournez pour dix minutes ! Pas plus. C'est près !
- Attendre qu'ils soient totalement refroidis avant de les congeler ou dégustez avec vos garnitures préférées.
- Si on le désire on peut au bout de 30 minutes, couper les pains en deux et les toaster légèrement côté mie.

Ingredients
Dough
- 455 grams (3 1/2 C) unbleached all purpose flour
- 2 1/4 tsp instant yeast
- 1 tsp sugar
- 1 1/4 tsp salt
- 1/2 cup water
- 1/4 cup milk
- 1/4 cup vegetable oil
- 2 large eggs
- 2 large egg yolks
Filling and Topping
- 1 tbsp butter
- 1 tbsp olive oil
- 1 large red onion, halved and thinly sliced
- 6 large shallots, thinly sliced
- 1 tsp sugar
- 1 tbsp herbes de Provence, plus more for sprinkling (mine is from The Spice House)
- 6 ounces grated Gruyere cheese, plus another ounce for sprinkling
- 1 tbsp Dijon mustard
- 1 egg, beaten with 1 T water
Instructions
- Whisk the dry ingredients of the bread in the bowl of a stand mixer.
- Whisk the water, milk, eggs, and egg whites together in a bowl and add to the dry ingredients.
- Mix with the dough hook for about 10 minutes on medium low speed.
- Place the dough into an oiled bowl, cover, and allow to rise until doubled, about an hour.
- While the dough is rising, prepare the onion filling. In a 12 inch skillet, melt the butter and olive oil.
- Add the onions, shallots, and sugar, and cook for about 5 minutes on medium heat. Add the herbs and continue to cook, stirring regularly, for about 20 minutes more, until caramelized.
- When the dough has doubled, place it on a piece of baking sheet sized piece of parchment paper.
- Roll it out to a 12 inch by 11 inch rectangle.
- Spread the mustard lengthwise in the middle of the dough into a 3 inch line.
- Spread the onion mixture over the mustard.
- Sprinkle the 6 ounces of cheese over the onion mixture.
- Using a sharp knife, make diagonal 1 inch cuts on both sides of the stripe of onion and cheese mixture.
- Lift the parchment with the loaf onto a baking sheet.
- Fold the ends over the filling, and then fold the strips over the filling, alternating from both sides, so that the top of the dough looks like a braid.
- Preheat the oven to 350 degrees F.
- Cover the loaf loosely with oiled plastic wrap and let it rise until doubled, about 30 to 40 minutes.
- Brush the top of the loaf with the egg wash.
- Sprinkle the center of the braid with about an ounce of grated Gruyere.
- Sprinkle the top of the cheese lightly with herbes de Provence.
- Bake the loaf for about 45 minutes, until nicely browned and the center registers about 190 degrees F.
- Cool on a wire rack. Serve warm, or cool completely and wrap in foil to serve later.
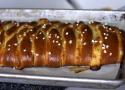
Ingredients
Sponge
- 6 tablespoons (3 ounces) warm water
- 1 teaspoon sugar
- 1 1/2 teaspoons instant yeast
- 1/4 cup (1 ounce) unbleached all-purpose flour
Dough
- Sponge (above)
- 6 tablespoons (3 ounces) sour cream or yogurt
- 1/4 cup (4 tablespoons or 2 ounces) unsalted butter, softened
- 2 large eggs, 1 beaten for dough, 1 beaten with 1 teaspoon water for brushing bread
- 1/4 cup (1 3/4 ounces) sugar
- 1 teaspoon salt
- 1 teaspoon vanilla extract
- 2 1/2 cups (10 5/8 ounces) unbleached all-purpose flour
- Pearl sugar* or sparkling white sugar for sprinkling
Lemon cream cheese filling
- 1/3 cup (2 1/2 ounces) cream cheese, softened
- 2 tablespoons (5/8 ounces) sugar
- 2 tablespoons (1 ounce) sour cream
- 1 teaspoon fresh lemon juice
- 2 tablespoons (1/2 ounce) unbleached all-purpose flour
- 1/4 cup (2 ounces) homemade (recipe below) or prepared lemon curd
Instructions
Sponge
- In a small bowl, combine the sponge ingredients.
- Stir well to combine, loosely cover with plastic wrap, and set aside to proof for 10 to 15 minutes.
Dough in a stand mixer
- Combine the sponge, sour cream, butter, egg, sugar, salt and vanilla in the bowl of a stand mixer.
- Add flour and mix with the paddle attachment until the dough is a rough, shaggy mass.
- Switch to the dough hook and knead on until a soft, smooth dough forms, about 5 to 6 minutes.
- Place the kneaded dough in a lightly greased bowl, cover with plastic wrap, and allow to rise for 60 to 90 minutes, until quite puffy and nearly doubled.
Dough by hand
- Whisk together sour cream, butter, egg, sugar, salt and vanilla in a large, wide bowl.
- Stir in sponge.
- Add the flour and mix with a wooden spoon as best as you can; you may need to get your hands in there to form it into a shaggy ball.
- Turn ball of dough and any incorporated scraps onto a counter and knead until a smooth, soft dough forms, about 5 to 10 minutes.
- Place the kneaded dough in a lightly greased bowl, cover with plastic wrap, and allow to rise for 60 to 90 minutes, until quite puffy and nearly doubled.
Filling
- Combine all the filling ingredients (except the lemon curd) in a small bowl, mixing until smooth and lump-free.
- Reserve the filling and lemon curd until ready to fill the braids.
Bread
- Gently deflate the dough and roll it out on a very well floured counter to a 10″ x 15″ rectangle.
- Transfer rectangle to a large piece of parchment paper, please; I did not and it led to all sorts of trouble.
- With the side of your hand, lightly press two lines down the dough lengthwise, dividing it into three equal columns.
- Spread the cream cheese filling down the center section, leaving the top and bottom two inches free of filling.
- Spread the lemon curd over the cream cheese filling.
- To form the mock braid, cut crosswise strips one inch apart down the length of the outer columns of you dough (the parts without filling).
- Make sure you have an equal amount of 1-inch strips down the right and left sides.
- Be careful not to cut your parchment paper; if you have a bench scraper, this is a great time to use it.
- Remove the four corner segments.
- To “braid”, begin by folding top flap down and bottom flap up over the filling.
- Lift the top dough strip and gently bring it diagonally across the filling.
- Repeat on the right side, and continue down the entire braid, alternating strips until you are out.
- You can tuck the last couple that hand off decoratively under the end of the braid.
- Carefully transfer the dough and the parchment paper to a baking sheet.
- Cover loosely with plastic and set it aside to rise for 45 to 50 minutes, until quite puffy.
- Preheat the oven to 375°F.
- Brush the loaves with egg wash, and sprinkle with pearl or coarse sparkling sugar.
- Bake for 25 to 30 minutes, or until the loaves are golden brown and your apartment smells like a doughnut factory.
- Remove from the oven and cool for 15 to 20 minutes before serving.

Ingredients
- 3 large eggs, at room temperature
- 3/4 cup (94g) all-purpose flour
- 3/4 cup (180ml) whole milk, at room temperature (or nondairy)
- 1 teaspoon lemon zest*
- 2 Tablespoons (25g) granulated sugar
- pinch salt
- 1/2 teaspoon vanilla extract
- 3 Tablespoons (43g) unsalted butter
Toppings
- 2 Tablespoons confectioners’ sugar, for sifting
- optional toppings: berries, whipped cream, maple syrup, and/or strawberry sauce
Instructions
- Place the eggs in a blender and blend on medium-high speed until frothy and fluffy, about 45 seconds. Add flour, milk, lemon zest, sugar, salt, and vanilla, and blend until combined. The batter is thin. Set aside and allow to rest for 15 minutes at room temperature, or cover and refrigerate it for up to 24 hours. (No need to bring to room temperature before baking.)
- Preheat the oven to 400°F (204°C). Place butter in a 10-inch oven-safe skillet (or any 3-quart baking dish), and place in the oven for just 5 minutes to melt the butter. (Be sure not to leave it in the oven to burn!) Remove from the oven and use a pastry brush to spread the melted butter up the sides of the pan.
- Pour the batter into the center of the hot pan. No need to swirl it around. Place it in the oven and bake for 15 minutes. Keeping the Dutch baby pancake in the oven, reduce the temperature to 350°F (177°C) and bake for 10 more minutes, or until the edges and center are browned.
- Remove from the oven and cool for 5 minutes before adding desired toppings. Slice and serve.
- The pancake is best enjoyed right away, but you can cover and store leftovers in the refrigerator for up to 5 days, or in the freezer for up to 2 months.
C'est vraiment très bon. Je vais en refaire !

What Is a Yo Yo Quilt?
Yo-yo quilts are made from round pieces of fabric with long stitches along their turned-under outer edges. Stitches are pulled to gather the circles into rosettes.
Individual yo-yos are typically hand sewn side by side into rows when they are used to make a quilt, but they also work nicely for 3-dimensional appliqué embellishments.
Yo-yo quilts were popular in the 1930s and 1940s, and there are many lovely examples sewn with fabrics from those eras. Some were structured, with the rosettes arranged to form a pattern, but many of the examples are scrap quilts.

Best long-distance trail for beginner hikers 🤝 Cumbria Way 🏴 112 km ~ 71 miles | 6 days
Ingredients
- 125 g (4.4 oz) dark chocolate (from 50% to 70% cocoa). The higher the percentage of cocoa, the more intense the chocolate flavor.
- 185 g (6.5 oz) whole blanched almonds or almond flour
- 125 g (1 stick) unsalted butter
- 3 medium eggs, at room temperature
- 125 g (7 tablespoons) granulated sugar
- powdered sugar, for decoration
Instructions
- Melt the butter and chocolate in a double boiler and set aside.
- Meantime, separate the yolks from the whites and let the yolks aside for the moment.
- Place the whites in a bowl and beat them up with an electric mixer or with a stand mixer until stiff. Set aside: they will be added to the torta caprese mixture at the end.
- Beat the egg yolks with the sugar until you get a fluid and pale yellow cream. It takes about 5 minutes.
- Now if you are using whole blanched almonds, you must first mince them finely and reduce them to flour.
- Add the almond flour little by little to the yolks and sugar cream and mix well.
- Then add the melted chocolate to the mixture and stir.
- Add the beaten egg whites, stirring with a wooden spoon from the bottom up.
- Grease and flour a 20 cm/8 inch non-stick springform pan with removable bottom, then pour the torta caprese mixture.
- Level well with a spoon.
- Then preheat the oven to 350°F (180°C).
- Bake in a static oven on the middle rack for about 30 minutes.
- At the end, remove from the oven and let the cake cool in the pan for at least 30 to 40 minutes.
- Let it cool completely on a cooling rack so that it chills quickly without moistening the bottom of the cake.
NOTE -- Baking times may vary from oven to oven, but be aware that torta caprese should be moist inside. So usually, for a 20 cm/8 inch baking pan, the baking time never exceeds 35 to 38 minutes.

Ingredients
- ½ Cup warm water
- 1 pkg/ Tbsp. Red Star Platinum Yeast
- 2/3 Cup warmed buttermilk, or 2 ½ Tbsp. buttermilk powder dissolved in 2/3 Cup warm water
- 1 tsp. salt
- ¼ Cup sugar
- 2 Tbsp. butter
- 3 + Cups unbleached all-purpose flour
Instructions
- Place warm water and yeast in EZ DOH bucket and stir to dissolve yeast.
- Let rest 1 minute.
- Add one cup of flour, then additional dough ingredients.
- EZ DOH-it for 2-3 minutes, or until dough is smooth and soft and all ingredients are incorporated.
- Remove dough from bucket, spray bucket with cooking spray, “smooth” dough and replace in bucket.
- Cover and let rise until doubled.
- At this point, the dough may be formed into rolls (should make about 12) or a 9X 5 loaf. I also have used this several times as a “base” for layered pull-apart bread. To use it as such, roll the dough out into a large rectangle, about 15”x 9”. Spread 2 tablespoons of softened butter on the dough, then sprinkle with your favorite ingredients
- Slice the covered dough in half, lengthwise.
- Then cut three slices the other way, making 8 even-sized pieces.
- Stack the pieces atop one another- four “piles” of two.
- Slice each of the piles in half.
- Grease a 9x5 loaf pan or use a “tea loaf” pan, which measures 13x4” .
- Place each of the “piles” in the pan on its side, working quickly.
- Cover and let rise until doubled, or cover and place in the frig overnight.
- Bake at 375 for 30 minutes or until golden.
- Remove from pan and cool on a wire rack.
- Brush top with softened butter.
Notes
- Sweet: Cinn-sugar and raisins…..maybe some toasted nuts, too! Or maybe some chopped apples…..
- Greek: I used about ½ of a frozen pkg. of spinach (thawed and well-drained); 10-15 Kalamata olives, sliced; 1/3 Cup feta cheese; ½ cup mozzarella; 1 ½ tsp. prepared minced garlic (or 1-2 cloves of garlic, minced); 1/3 Cup chopped (well-drained) roasted red peppers; Mix everything together and spread on the dough - Add what YOU like!
- Ham & Cheese “Devil Bread” : Spread 2 Tbsp. of Dijon mustard on the butter. Follow with 1-2 Cups chopped cooked ham pieces; 1 Cup shredded cheese (I used a mix of cheddar & mozzarella- whatever I had in the fridge)

Ingredients
Dough
- 1 1/3 Cup warm water
- 1 packet/Tbsp.Red Star Platinum yeast
- 2 tsp. Kosher salt
- ½ Tbsp. Sugar
- 2 Tbsp. olive oil
- 3- 3 ¼ C. Unbleached, all-purpose flour
Filling
- Olive oil
- 1 Tablespoon butter
- 1/2 green or Italian pepper, chopped
- 1 medium onion, chopped
- 1/2 can sliced mushrooms
- 1 clove garlic, minced
- 1 package frozen chopped spinach, thawed and squeezed dry
- Pinch cayenne pepper
- Pinch freshly ground pepper
- Pinch of parsley, basil, and oregano
- 1 tsp. garlic powder
- Pinch crushed red pepper seeds
- Pinch salt
- 4 slices provolone cheese
- 1-1/2 cups mozzarella cheese
- 2 Tbsp. grated Parmesan cheese
Instructions
- Place warm water and yeast in EZ DOH bucket and stir to dissolve yeast.
- Wait 1-2 minutes.
- Add 1 cup flour, then remaining ingredients and EZ DOH-it , adding the final ¼ c. of flour gradually till the dough is soft and smooth.
- Remove the dough from the bucket, spray the bucket with cooking spray and then replace dough and cover bucket.
- Let rise till doubled.
- Saute peppers and onions in olive oil and butter.
- Add mushrooms and fresh garlic and saute for 2-3 minutes.
- Add the spinach and spices and cook a minute or two more.
- Roll out dough to a thin oval shape.
- Spread out cooked mixture all over.
- Add cheeses on top.
- Roll and seal the ends.
- Place on lightly greased baking sheet.
- Bake in a 350-degree oven for 30 minutes or until lightly browned on top.
One doesn’t generally associate cardboard with structural components like hinges, but [Itoshige Studio] assures us that you can absolutely create hinges out of this ubiquitous material
. In total the video covers five different designs, ranging from the simple and straightforward to an interlocking tab design that approximates a typical steel hinge with paper rod to keep both sides of the hinge together.
The most simplistic hinge is unsurprisingly just a strip of craft paper, which is also demonstrated as the hinge for a wooden box in lieu of the typical metal hinge. This same principle is then demonstrated for a fancy cardboard box.
From here the designs get increasingly more involved. First a seamless hinge variation, and then a kamichoban hinge design that’s inspired by traditional Japanese room dividers and furniture, using panels that are interconnected with overlapping sections to create a fascinatingly flexible hinge that can fully fold either way.
The flush hinge design is somewhat like the craft paper hinge, but significantly fancier and probably sturdier, while also looking pretty good on something like a cabinet. Finally the interlocking tab hinge is effectively a cardboard version of the hinge design that’s found on every room’s door, with a similar level of flexibility. This is obviously the trickiest one to assemble and get right, but it has its own charm.
Considering that all of these examples use regular corrugated cardboard that we get shipped to our homes by the truckload, the cost to try these examples is your time plus some basic tools and glue. The author also sells a book that contains templates – in addition to digital versions – for these hinges and other designs, if you’d like to enjoy the 100% paper experience.

Ingredients
Dough
- 1 pkg/Tbsp. Red Star Platinum yeast
- ¼ Cup warm water
- ½ Cup warm milk
- 2 – 2 ¾ Cups unbleached, all-purpose flour
- 2 Tbsp. softened butter2 Tbsp. sugar
- ½ tsp. salt
Filling
- ½ Cup crumbled feta cheese
- 2 Tbsp. shredded mozzarella cheese
- 1 Tbsp. parmesan cheese
- ½ tsp. Greek seasoning (I use Cavender’s All-Purpose Greek Seasoning)
- ½ pkg. frozen spinach, thawed and squeezed dry
Instructions
- In EZ DOH bucket, stir together yeast and water.
- Let rest 1 minute.
- Add one cup of flour and then remaining dough ingredients.
- EZ DOH-it for 2-3 minutes, adding enough flour to produce a smooth, elastic dough.
- Remove dough from bucket and “smooth” or “cloak” dough, pulling it under.
- Spray the inside of the bucket with cooking spray.
- Replace dough and let rise until doubled.
- While dough is rising, combine filling ingredients.
- After dough has risen, on a lightly floured surface, roll dough out into a large rectangle, 14x 9” approximately.
- Spread with filling.
- Roll up dough, cinnamon-roll style, starting with long edge.
- Slice into 10-12 rolls and place in a greased 8 or 9” round cake pan.
- Cover and let rise until doubled.
- Bake at 375 for 20-25 minutes, or until golden.

Ingredients
Dough
- 1 pkg/Tbsp. Red Star Platinum yeast
- ¼ Cup + 2 Tbsp. warm water
- 2 ½ -3 Cups unbleached all-purpose flour
- 2 Tbsp. butter, softened
- ¼ Cup + 2 Tbsp. warm milk
- ¼ Cup sugar
- 1 egg
- ½ tsp. salt
Filling
- ¼ Cup almond paste
- 2 Tbsp. butter, softened
- ¼ Cup brown sugar
- 1/8 tsp. almond extract
Streusel topping
- 3 Tbsp. sugar
- 1 Tbsp. unbleached all-purpose flour
- 1 Tbsp. butter
Icing
- ¾ Cup powdered sugar
- 1 Tbsp. milk
- 1/8 tsp. almond extract
Instructions
- Place warm water and yeast in EZ DOH bucket and stir to dissolve yeast.
- Let rest 1 minute.
- Add one cup of flour, then additional dough ingredients.
- EZ DOH-it for 2-3 minutes, or until dough is smooth and soft and all ingredients are incorporated.
- Remove dough from bucket, spray bucket with cooking spray, “smooth” dough and replace in bucket.
- Cover and let rise until doubled.
- In a mixing bowl, beat filling ingredients together.
- On a lightly floured surface, roll dough out into a 12” square.
- Spread filling over the dough. Roll up, jelly-roll style and seal seams.
- Cut into 6-8 large rolls or 12 smaller rolls.
- Place in a greased 9” round or square baking pan.
- Cover and let rise until doubled.
- Combine topping ingredients and sprinkle over the rolls.
- Bake at 375 for 20-30 minutes or until golden.
- Carefully turn out rolls onto a wire rack to cool.
- Combine icing ingredients and drizzle over rolls.
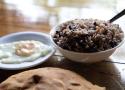
Ingredients
- 1 egg, room temperature
- 4 cups of white flour
- 2 teaspoons granulated white sugar + 1/8 teaspoon
- 1 teaspoon yeast
- 1/3 cup water + 1/4 cup warm water
- 1/3 cup milk
- 1/3 stick butter or margarine
- 1 teaspoon salt
Instructions
- Combine 1/4 cup warm water, 1 teaspoon yeast and 1/8 teaspoon granulated sugar in a small cup or bowl. Set aside.
- In a saucepan, combine water, milk, egg salt, and sugar. Bring to a boil on medium heat and add margarine. Once the margarine has melted, remove from heat and bring to room temperature.
- Place the milk mixture in a mixer and add flour to it until the dough no longer sticks to your fingers.
- Make a hole in the middle of the dough ball and pour the yeast mixture in the middle. Cover, and begin to knead until well combined.
- Divide the dough ball into two parts and place them in your greased baking pans. Allow to rise for a half-hour in a warm place (like next to a warm oven or in the sun.) Knead each one a little bit and then allow to rise for another half hour.
- Bake at 350 degrees Fahrenheit for 45 minutes.

Ingrédients
- 120 ml de lait
- 60 g de beurre fondu
- 320 g de farine T55
- 80 g de farine de châtaigne
- 2 oeufs
- 1 c. à café de levure boulangère déshydratée
- 1 c. à café de sel
- 50 g de sucre
- 1 sachet de sucre vanillé
- 1 c. à café d'arôme vanille
- 1 c. à soupe de rhum (facultatif)
- 1 jaune d'oeuf avec un peu d'eau pour la dorure
Préparation
- Dans un petit bol, battre les 2 oeufs. Réserver.
- Dans le bol de votre robot, muni du crochet pétrisseur, diluer la levure boulangère avec le lait tiède.
- Ajouter ensuite les farines, le sucre, le sucre vanillé ainsi que le sel.
- Verser ensuite les oeufs battus, la vanille liquide, sans oublier le beurre fondu.
- Pétrir l'ensemble pendant une dizaine de minutes (jusqu'à obtenir une pâte consistante).
- Couvrir d'un torchon propre et laisser lever pendant 2 heures (la pâte doit doubler de volume). (pour accélérer la pousse, vous pouvez mettre le saladier dans un four préchauffé à 40°).
- Sortir le pâton et le dégazer sur un plan de travail légèrement fariné puis le façonner comme vous le souhaitez (j'ai fait 3 boules que j'ai déposé dans un moule coeur).
- Couvrir d'un torchon propre et laisser lever pendant 1 heure.
- Préchauffer votre four à 170°C (Th. 5-6).
- Badigeonner le dessus de votre brioche d'un mélange jaune d'oeuf / eau.
- Enfourner 25 minutes à 170°C (Th. 5-6). (à surveiller et à adapter à votre four).
- Laisser refroidir avant de déguster.
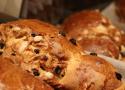
Ingrédients
- 1kg de farine
- 6 oeufs
- 1/2 litre lait
- 50g de levure boulangère
- 200 à 300 g sucre (+ un peu de sucre perlé)
- 10g de sel
- 250 g de beurre
- 200 g de raisins de Corinthe
Instructions
- Le plus simple est d'utiliser un robot pour pétrir la pâte.
- Il faut incorporer le beurre à la fin du pétrissage d'environ 20 minutes (ainsi que le raisin et le sucre perlé).
- Laisser ensuite reposer une demi-heure.
- Après avoir donné la forme d'un Jésus à deux têtes à votre pâte, laissez lever pendant une heure et demi.
- Traditionnellement la coquille a la forme d'un enfant emmailloté, on la façonne en formant une boule (le corps) à laquelle on colle une boule plus petite de chaque côté (la tête et les jambes).
- Avant d'enfourner dans un four à 180°C pendant 35 minutes, badigeonnez votre pâte de jaune d'oeuf.
Note : avec une paire de ciseaux, il faut ensuite faire une petite fente sur les côtés de votre pâte pour laisser s'échapper un peu le sucre.
Ingredients
Dough
- 500 grams (3-¾ cups) All-Purpose Flour plus extra for dusting
- 125 grams (½ cup + 2 tablespoon) Sugar
- 7.5 grams (2- ½ teaspoon) Rapid Rise (or Quick Rising) Instant Yeast.
- 3 grams (½ teaspoon) Salt
- 100 grams (½ cup) Non-Salted Butter at room temperature
- 100 ml eggs use a measuring cup, it equals about 6-½ Tbps
- 5 ml (1 teaspoon) Vanilla extract
- 120 ml (½ cup) of Milk warm.
Toppings
- 100 grams (½ cup plus 1 teaspoon) Vegetable Shortening plus extra to grease the dough and baking sheets
- 100 grams (⅞ of a cup) Confectioner Sugar
- 120 grams (1 cup) All-Purpose Flour
- 5 grams (2-½ teaspoon) Cocoa powder for half of the topping, if desired
- 5 grams (1 teaspoon) Cinnamon optional for the white topping
Instructions
Dough
- Have each ingredient ready and measured (by weight) before starting, and thoroughly read the notes above. Mix the all-purpose flour, yeast, sugar, and salt in the bowl of a stand mixer at medium speed, just to mix it well.
- Add the butter and mix well (using the stand mixer with the hook attachment), then mix in the eggs and vanilla extract and slowly pour the milk in little by little until the dough looks cohesive (you may need less or more milk, as some flours soak up more liquid than others). Keep beating the mixture for about 7 minutes at medium speed. Add a little more flour around the inside of the bowl (2-3 tablespoons), just enough for the dough to separate from the container. The dough should be soft and slightly sticky.
- YOUR DOUGH SHOULD FEEL VERY SOFT AND ELASTIC.
- Place the dough on your floured working table and knead it just enough to shape it into a ball.
- Place this ball in a large greased bowl to rest. Cover it with plastic wrap (or wax paper) and a kitchen napkin. Let the dough rest in a warm place for about 2 hours until it doubles in size. I usually turn the light on in my oven and place the bowl inside, close to the light. Be aware that if your kitchen is cold, the dough will take longer to rise. Be patient and do not try to proceed to the next step until the mixture has doubled in size.
Toppings
1.While the dough is rising, you can prepare the sugar topping. Soften the shortening with your spatula until it is very creamy, and then add the confectioner's sugar. Finally, add in the flour little by little (if using, add the ground cinnamon in this step). Set this paste aside to use later. If you're making half of the Conchas with the chocolate topping, then divide the paste in two and add the cocoa powder to one half, mixing it until it integrates very well.
- Once the dough has risen and doubled in size, place it onto a floured surface and let it rest for about 5 minutes. Divide the dough into 16 small balls (60 grams each). To shape the balls, lightly flour your hands and place each small ball on the working surface and gently press down with your hand, rotating your hand to form the balls.
- Place them onto greased baking sheets and continue until you've finished shaping all of the dough.
- Using your hands, grease the top of each ball with a little shortening. Do not skip this step, as it will help the topping adhere to the dough.
- To add the topping, flour your hands and divide the topping paste into 16 balls. Use your hands to press down on each one to form a small, flat circle (I like to use a sheet of plastic, like when making tortillas). Place this disk onto the ball of dough, and press it down very firmly.
- Once you've finished placing the topping on the buns, use a concha cutter or a knife to decorate them with the traditional concha shape.
- Allow the conchas to rise in a warm place until they are almost double in size. Depending on the temperature of your kitchen, this step could take anywhere from 1 to 2 hours. Do not leave them to rise any longer, because if you let them grow too much they will collapse inside the oven. Bake in a preheated oven at 325º degrees for 20 minutes, or until the bottom of the conchas are lightly golden. If you are placing more than one baking sheet in your oven, rotate them after 10-12 minutes. Move the sheet on the bottom rack to the top rack and vice versa to have an even baking.
Ingrédients
Pour la pâte
- 550g Farine blanche
- 20g Levure fraîche
- 250ml Lait
- 100g Beurre
- 1 Oeuf
- 50g Sucre fin
- 1/2cc Sel
- 250g Raisins secs
Pour la crème pâtissière
- 125g Sucre
- 500ml Lait
- 50g Maïzena
- 5 Oeufs
Pour le glaçage
- 250g Sucre glace
- 4cs Jus de citron
- 1 Blanc d'oeuf
Instructions
- Faites tremper les raisins secs dans un bol de lait.
- Placez les ingrédients suivants dans le bol du robot pétrisseur pour former la pâte: la farine, le lait, la levure, le sel, l’oeuf, le sucre et le beurre en gros dés. Pétrissez environ 10 minutes pour obtenir une pâte bien homogène.
- Sortez ensuite la boule de pâte du bol du robot pour la faire reposer une heure à température ambiante dans un saladier fariné et recouvert d’un linge.
- Pendant ce temps, préparez la crème pâtissière qui viendra garnir le milieu des couques: chauffez le lait avec la moitié du sucre. Dans un saladier, battez les jaunes d’oeufs avec l’autre moitié du sucre et ajoutez-y la Maïzena. Ajoutez-y ensuite le mélange de lait chaud. Versez le tout dans une casserole et faites chauffer en remuant sans cesse à l’aide d’un fouet. Amenez à ébullition à feu moyen et dès qu’il y a une belle ébullition et que la pâte s’est quelque peu épaissie, arrêtez la cuisson et placez la crème dans un plat à four. Filmez-la immédiatement, en collant bien le film alimentaire sur la pâte pour éviter qu’une croûte ne se forme sur la crème pâtissière lorsque celle-ci refroidit. Placez le plat au réfrigérateur pour la faire refroidir totalement.
- Après ce temps de repos, applatissez la pâte au rouleau à pâtisserie pour former le plus grand rectangle possible sans déchirer la pâte.
- Etalez uniformément la crème pâtissière sur tout le rectangle de pâte.
- Egouttez ensuite les raisins secs et répartissez-les sur toute la surface.
- Découpez des bandes de 2 cm de pâte dans le sens de la largeur du rectangle de pâte et roulez les bandes de pâtes sur elles-mêmes.
- Placez ces roulades sur une plaque de four recouverte de papier sulfurisé et laissez reposer 30 minutes.
- Battez le jaune d’oeuf restant avec un tout petit peu d’eau et badigeonnez les couques à l’aide d’un pinceau.
- Préchauffez le four à 210°C et enfournez les couques à mi-hauteur pendant 15 minutes.
- Laissez refroidir entièrement. Préparez ensuite le glaçage en mélangeant le sucre glace, le blanc d’oeuf et le jus de citron à l’aide d’un fouet.
- Répartissez ce glaçage sur la surface des couques et dégustez!

Ingrédients
- 3 tasses d'eau chaude (pas bouillante)
- 2 c. à thé de levure instantanée
- 2 c. à thé de sel
- 2 c. à thé de sucre
- 1 paquet de bacon, cuit et coupé en dés
- 2 tasses de cheddar, râpé et séparé
- 6 tasses de farine
- 1/8 c. à thé de poivre noir moulu
Instructions
- Dans un grand bol, mélanger l'eau, la levure et le sucre. Fouetter et laisser reposer 5-7 minutes dans un endroit chaud (le four éteint avec la lumière allumée).
- Incorporer 1 tasse de cheddar et tous les autres ingrédients (gardez quelques morceaux de bacon pour saupoudrer le dessus plus tard) dans le bol contenant la levure et mélanger jusqu'à incorporation complète. La pâte sera très collante.
- Couvrir la pâte avec un linge à vaisselle propre et humidifie et déposer dans le four éteint avec la lumière allumée environ 1h30.
- Déposer la pâte sur une surface enfarinée et pétrir quelques minutes.
- Couper la pâte en deux, mettre dans deux moules à pain rectangulaires, puis saupoudrer le dessus avec la tasse de cheddar restante et les morceaux de bacon réservés plus tôt.
- Couvrir la pâte avec le linge à nouveau et le placer dans un endroit chaud pendant 30 minutes.
- Préchauffer le four à 400°F et enfourner les pains pendant 15 minutes.
- Après 15 minutes, placer une feuille de papier d'aluminium sur les pains, abaisser la température à 350°F et cuire pendant 35 minutes.
- Au bout de 35 minutes, retirer la feuille de papier d'aluminium et continuer la cuisson 10 minutes.
Ingredients
- 450 g (3 1/2 cups) bread flour
- 7 g (1 1/2 teaspoons) instant yeast (see note)
- 7 g (1 3/4 teaspoons) Diamond Crystal kosher salt; for table salt, use half as much by volume or the same weight
- 270 g (1 1/4 cups) tepid water
- 25 g (2 tablespoons plus 1 teaspoon) canola or other neutral flavored oil
- 15 g (1 tablespoon) fresh lime juice
- 12 g (2 teaspoons) sugar
- Nonstick cooking spray
Instructions
- In a stand mixer bowl, whisk flour, yeast, and salt to combine. In a liquid measuring cup or bowl, whisk water, oil, lime juice, and sugar until sugar is dissolved.
- Fit stand mixer with dough hook, and on medium-low speed, slowly pour water mixture into flour mixture and mix until a shaggy dough forms, about 2 minutes. Increase the speed to medium and continue to mix, scraping down bowl and dough hook as needed, until the dough is smooth and stretchy and clears the sides of bowl, but sticks to the bottom, about 5 minutes.
- Using clean hands, transfer dough to a lightly oiled work surface and knead by hand to form a smooth, round ball, about 30 seconds. Place dough seam side down in a lightly greased large bowl. Cover bowl with plastic wrap and let sit at warm room temperature (75°F/24°C) until doubled in size, 1 to 1 1/2 hours.
- Transfer dough to a lightly oiled work surface. Using your hands, punch dough down to deflate, then form it into a taut ball, and let rest, covered, for 20 minutes.
- Divide dough into 4 even portions for longer banh mi loaves or 6 dough portions for shorter loaves (see notes). Lightly spray the dough portions all over with cooking spray, cover with plastic wrap, and let rest for 15 minutes.
- Working with one dough portion at a time, pull edges of the dough towards the center, pinching ends together, to create a tight ball. Set dough ball seam side down on work surface, then cup dough beneath your palm and work it in quick circular motion to form a smooth ball. Repeat with remaining portions of dough. Let rest, covered, for 15 minutes.
- Flip each dough ball so that the seam side is on top. Working with one dough ball at a time, use your fingers to press down and deflate two-thirds of the ball; the remaining one-third of the dough ball should still be airy and plump with an elongated football shape.
- Using a small, lightly oiled French tapered rolling pin or other small rolling pin, roll the deflated side of dough until it is evenly flat and fans outward (for smaller loaves about 10 inches wide and 1/8 inch thick; for larger loaves, 12 inches wide and 1/8 inch thick), while keeping the inflated portion of the dough untouched (this ensures the center of each will be full and fluffy). The rolled out portion of the dough should be longer than the still inflated portion of the dough.
- Using both hands and starting with the still-inflated portion of dough, gently roll the dough over itself to form a log; continue rolling until a longer baguette forms with tapered ends (you should have a tapered baguette measuring about 1 1/2 inches thick in the middle that is about 8 inches long for smaller loaves and 10 inches long for larger ones). Gently press and pinch seam closed along the length of loaf.
- Transfer shaped loaf, seam side down, to a perforated baguette tray that has been lightly coated with cooking spray (see notes). Repeat loaf shaping with remaining portions of dough, then spray the loaves evenly with cooking spray and loosely cover with plastic wrap. Let rest until the dough springs back slowly when pressed lightly, about 45 minutes.
- Meanwhile, adjust oven racks to the upper-middle position and the lowest position. Place a large baking dish on the bottom oven rack and fill halfway with boiling water. Preheat oven to 475°F (246°C).
- Holding a bread lame concave side up, with handle oriented at a 30-degree angle to loaf, make one 1/4-inch deep slash along the centerline of each loaf, using a single swift motion from one end to the other, but leaving 1/2-inch uncut at each end.
- Using a spray bottle of water, mist the surface of each loaf. Working quickly, place loaves in the oven, then mist the inside walls of the oven with water. Bake loaves for 8 minutes, then rotate the tray and bake 4 minutes longer.
- Reduce oven temperature to 400°F (205°C) and continue to bake loaves until golden brown all over, 6 to 8 minutes. If the bottoms of the loaves have not achieved the desired color, flip loaves upside down and bake until bottoms are golden brown, 2 to 3 minutes. Transfer loaves to a wire rack and let cool for at least 15 minutes before serving.

Ingredients
- 2/3 cup (150ml) milk, whole or 2%
- 2 ¼ tsp(8g) active dry yeast
- 1/2 cup (100ml) sugar
- zest of 1/2 orange
- zest of 1/2 lemon
- 2 1/2 cups (312g)all purpose flour
- 1/4 tsp salt
- 1/3 cup (75g) unsalted butter, diced and at room temperature
- 2 large eggs, at room temperature
- 1 tsp vanilla extract
- 1 egg + 1 tbsp (15ml) milk, for the egg wash
- ¼ cup (80g) orange marmalade
- 3 tbsp pearl sugar (or crushed sugar cubes)
- About 20 candied orange peel sticks
- 12 candied cherries
Instructions
- Warm up the milk to a warm temperature (not hot!) in a sauce pan or in the microwave. Stir in the yeast and set aside for 10 minutes. Your yeast should foam.
- In a large mixing bowl, combine the sugar, lemon zest and orange zest, and rub with your fingers so the zest releases moisture and the sugar becomes moist and lumpy. Whisk in the flour and salt.
- Dig a well in the middle and add the eggs and the milk with yeast. Stir until all the flour is incorporated and you get a very sticky mixture. Add the cubed butter and knead for 10 minutes until all the butter is well incorporated.
- Transfer the dough to a large, greased bowl. Cover with a cloth and set aside in a draft-free environment for 2-3 hours, until the dough has doubled in size.
- Line a large baking sheet with parchment paper.
- When the dough has doubled in size, punch it in the middle to deflate it. Transfer the dough onto a floured working surface and shape into a ball. Transfer the dough ball onto the parchment paper-lined baking sheet. Poke a whole in the middle of the ball with your index finger, and enlarge the hole to form a crown. Do not hesitate to form a large hole (about 4 inches in width) in the middle as its size will decrease when the crown bakes.
- If you have a trinket, stick in somewhere underneath the crown.
- Cover the crown with a cloth and let rise for 1 more hour.
- Pre-heat your oven to 350°F (180°C).
- After the one-hour mark, whisk the egg yolk with the milk and brush it all over the crown. Sprinkle evenly with pearl sugar.
- Bake the brioche for 30 minutes until it looks puffy and golden.
- Take out of the oven and immediately brush marmalade over top to give it a nice shine. When the brioche has completely cooled down, decorate it with citrus peels and candied cherries.
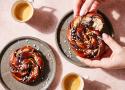
Ingredients
Dough
- 2 1/3 cups (280g) King Arthur Unbleached All-Purpose Flour
- 1/2 cup (57g) King Arthur Organic Whole Wheat Flour
- 1/2 cup (113g) water, lukewarm (100°F)
- 1/4 cup plus 2 tablespoons (85g) milk, lukewarm (100°F)
- 4 tablespoons (57g) butter, at room temperature
- 2 1/2 tablespoons (31g) granulated sugar
- 1 1/4 teaspoons table salt
- 2 teaspoons instant yeast
- 3/4 teaspoon Cloud Forest Ground Cardamom
Filling
- 1/2 cup (99g) granulated sugar
- 2 teaspoons to 1 tablespoon Cloud Forest Ground Cardamom
- 1 1/2 teaspoon ground cinnamon
- 1 1/2 teaspoons black cocoa
- 1/2 teaspoon ground black pepper, optional
- 1/4 teaspoon table salt
- 1 large egg, beaten with 1 tablespoon water (egg wash)
Glaze
- 1/4 cup (56g) water
- 2 tablespoons (25g) granulated sugar
- 1/4 teaspoon Cloud Forest Ground Cardamom
Topping
- Swedish pearl sugar, for sprinkling
Instructions
To make the dough
- In the bowl of a stand mixer fitted with a dough hook, combine all of the dough ingredients. Mix for 1 to 2 minutes on low until combined, then increase to medium speed and knead until the dough is smooth and pulls away from the sides of the bowl, about 5 minutes. If mixing by hand, add the dough ingredients to a large bowl and mix to combine. Let the dough rest for 20 minutes and then knead until smooth.
- Place the dough in a lightly greased bowl, cover, and let it rest for 60 minutes or until puffy and risen but not necessarily doubled in size.
To make the filling
- In a small bowl, combine all of the filling ingredients except for the egg wash and set aside.
To roll the dough
- Place a piece of parchment on your work surface and lightly flour it. (Alternatively, you can work directly on a lightly floured surface, though the parchment helps with transport later.) Gently transfer the dough onto the floured surface and sprinkle flour on top. Press or roll the dough with a rolling pin into a rectangle, roughly 12" x 20" with the long side running parallel to the edge of your work surface.
- Brush the entire surface of the dough with egg wash. Reserve any excess. Sprinkle the filling mixture evenly across the entire surface of the dough. Fold the dough like a letter in thirds: starting on the right side, fold one third into the center, then the opposite third over the first.
- After the letter fold, the dough block should measure approximately 12" x 6 1/2". Roll briefly to extend the width of the dough so that it measures roughly 12" x 8". Lift the parchment and dough onto a baking sheet. Cover the dough with plastic or slide a food-safe bag over the entire tray, press out all the air, and chill for 10 to 15 minutes in the refrigerator.
- Keep the parchment on the baking sheet and gently transfer the dough to a lightly floured work surface and roll to elongate it to a 16" x 8" rectangle.
- Using a ruler and a pizza wheel or sharp knife, make small notches along the short side of the dough at 1" intervals. Repeat on the other short end of the dough. Align the ruler with the notches at both ends, placing it flat on the dough. Use it as a guide to cut 8 strips that are 1" wide and 16" in length.
- One at a time, twist the ends of each dough strip in opposite directions. The dough may start to form a tube, which is OK, but stop shy of twisting so tightly that a tube fully forms. (For the best rise, it is better to have a looser twist than a very tightly wound tube.)
Loosely coil the tube into a single layered spiral, tucking only the tip underneath at the end. Press gently to seal. Using both hands or a spatula, carefully place each spiral onto the parchment-lined baking sheet. Repeat with the remaining dough until all the buns are shaped. - Cover the cardamom buns loosely and place them in a warm place to rise for 60 to 75 minutes, or until slightly puffy and risen. Towards the end of the rising time, preheat the oven to 450°F.
- When ready to bake, gently brush each cardamom bun with the reserved egg wash.
- Bake the cardamom buns for 13 to 20 minutes, or until deep golden brown and the interior temperature reaches at least 185°F when measured with a digital thermometer.
To make the glaze
- While the rolls bake, prepare the glaze. In a small saucepan, stir together the glaze ingredients. Bring the mixture to a boil over medium heat while stirring and simmer for 5 to 7 minutes, or until the sugar has dissolved and the mixture has thickened slightly. Set aside until ready to use.
- When the buns are finished baking, remove them from the oven and glaze immediately. Sprinkle with Swedish pearl sugar quickly before the glaze dries.
- Storage information: These cardamom buns are best enjoyed warm the day they are baked, but once baked, they can be stored overnight in an airtight container at room temperature and reheated a day later in a 350°F oven for 10 minutes. Freeze for longer storage.
Ingrédients
Pour la pâte
- 300 g de farine , tamisée
- 100 ml de lait entier
- 4 cuillères à soupe d’eau tiède (à 36°C)
- 70 g de sucre cassonade
- 40 g de beurre demi-sel , coupé en morceaux
- 1 cuillère à café de levure boulangère déshydratée
- 2 oeufs , battus en omelette
- 2 cuillères à café de cardamome fraîchement moulue
- 70 g de fruits secs (raisins blonds, raisins de Corinthe et/ou cranberries)
- 50 g de morceaux de citron confit
Pour le brossage
- 1 jaune d’œuf
- 2 cuillères à soupe de lait
- 2 cuillères à café de sucre
Instructions
Pâte
- Dans une petite casserole, porter le lait à une température de 38°C, puis hors du feu, ajouter le sucre, le sel et le beurre coupé en morceaux, remuer jusqu'à ce que le beurre soit fondu puis réserver.
- Dans la cuve d’un robot culinaire, verser les 4 cuillères à soupe d'eau tiède puis ajouter la levure sèche de boulanger en pluie et remuer jusqu'à complète dissolution.
- Laisser reposer 5 minutes.
- Ajouter le mélange de lait, beurre et sucre, puis les œufs battus et mélanger.
- Ajouter la moitié de la farine tamisée et la cardamome moulue et bien mélanger à l’aide du crochet pétrisseur.
- Ajouter les fruits secs et confits et mélanger.
- Ajouter l'autre moitié de la farine tamisée progressivement et pétrir pendant 5 minutes à vitesse moyenne.
- Transférer la pâte sur un plan de travail généreusement fariné et pétrir la pâte.
- Si besoin, ajouter encore un peu de farine jusqu’à pouvoir former une boule de pâte.
- Couvrir d’un linge et laisser reposer 15 minutes.
- Sur le plan de travail fariné, pétrir à nouveau la pâte à la main pendant 10 minutes puis la transférer dans un grand saladier graissé.
- Couvrir la pâte d'un linge et la laisser pousser pendant 1h30 dans un endroit tiède et à l’abri des courants d’air ou à l’intérieur d’un four (éteint) préchauffé à 30°C.
- Placer la pâte sur un plan de travail fariné, la dégazer et la bouler.
- Chemiser la plaque du four d’un papier sulfurisé.
- Placer la boule de pâte au centre de la plaque, la couvrir et la laisser pousser pendant 1h15 dans un endroit tiède, à l’abri des courants d’air. Elle doit au moins doubler de volume.
- Préchauffer le four à 160°C chaleur tournante puis enfourner le julekake pour une première cuisson de 15 minutes.
Brossage
- Dans un bol, mélanger vigoureusement le lait, le jaune d’œuf et le sucre.
- Au bout de 15 minutes de cuisson, sortir le pain brioché et le badigeonner du mélange de lait, sucre et jaune d’œuf, puis poursuivre la cuisson pendant 15 minutes environ, ou jusqu’à ce qu’il soit bien doré et qu'une croûte se soit formée en surface.
- Laisser tiédir ou refroidir sur une grille et déguster immédiatement, nature ou avec du fromage brun norvégien ou du beurre.
Ingrédients
Pour la pâte
- 1,5 kg de farine de blé , tamisée
- 50 g de levure boulangère fraîche émiettée (ou 30 g de levure boulangère sèche)
- 500 ml de lait entier (à 36°C)
- 160 g de beurre , ramolli, coupé en dés
- 1 cuillère à café de sel
- 3 cuillères à soupe de sucre semoule
- 3 cuillères à café de cardamome , fraîchement moulue
Pour la garniture
- 2 cuillères à soupe de cardamome fraîchement concassée
- 150 de beurre , très mou
- 100 g de sucre cassonade
Pour le brossage
- 1 œuf , battu en omelette
- 1 cuillère à soupe de cardamome fraîchement moulue
- 75 g de sucre semoule
Instructions
Pâte
- Verser la levure dans un grand bol et ajouter le lait. Mélanger.
- Laisser pousser pendant 10 minutes.
- Verser la farine, la cardamome fraîchement moulue et le sucre dans la cuve d’un robot culinaire et mélanger.
- Creuser un puits au centre de ce mélange.
- Ajouter le beurre et verser le mélange de levure au centre du puits.
- A l’aide du crochet pétrisseur, pétrir la pâte à faible vitesse pendant 5 minutes.
- Ajouter le sel puis pétrir à nouveau pendant 5 minutes à vitesse moyenne.
- Enfin pétrir pendant 2 minutes à forte vitesse.
- Couvrir la pâte d’un linge et la laisser pousser pendant 45 minutes dans un endroit chaud, à l’abri des courants d’air.
Garniture
- Mélanger le sucre cassonade et la cardamome dans un bol.
- Transférer la pâte sur un plan de travail et la pétrir pendant 1 minute.
- Diviser la pâte en 4 pâtons égaux.
- Abaisser un pâton à la fois en un rectangle d'environ 1 cm d'épaisseur.
- A l’aide d’une spatule, étaler ¼ de la quantité de beurre et saupoudrer ensuite quelques cuillères à café de sucre cassonade à la cardamome sur chaque rectangle.
- Découper 10 bandes d'environ 1 à 2 cm de large et enrouler chaque bande autour du pouce jusqu’à former une sorte de torsade ou de nœud.
- Placer les kardemummabullar, espacés, sur une plaque à pâtisserie chemisée de papier sulfurisé ou dans des moules cartonnés.
- Couvrir et laisser pousser pendant 30 minutes dans un endroit chaud, à l’abri des courants d’air.
Brossage et cuisson
- Préchauffer le four à 225°C, chaleur tournante pendant 20 minutes.
- Mélanger le sucre semoule et la cardamome dans un bol.
- Badigeonner les kardemummabullar d'œuf battu et saupoudrer chacun d’un peu de de sucre semoule à la cardamome.
- Enfourner, baisser la température du four à 180°C, et cuire les kardemummabullar au milieu du four pendant environ 25 minutes ou jusqu'à ce qu'elles prennent une belle couleur dorée.
- Retirer du four et laisser refroidir un peu avant de servir.
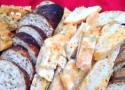
Ingredients
- ¼ tsp. Red Star Platinum yeast
- 1 ¾ Cup warm water
- 3 Cups unbleached, all-purpose flour (or bread flour)
- 1 ½ tsp. salt
- 1 Cup finely grated asiago cheese
- 2 tsp. dried basil
- ½ Cup chopped sun-dried tomatoes
Instructions
- Dissolve the yeast in the warm water in the EZ DOH bucket. Let rest 1 minute. Add remaining ingredients and “EZ DOH-it” till well-combined. The mixture will be sticky!
- Cover the bucket with a plate or plastic wrap and let it sit on the counter for 12-18 hours.
- Sprinkle a generous amount of flour on a kitchen surface and carefully “pour” dough onto the floured surface and form/pat/push it gently into a ball.
- Sprinkle with additional flour and let rest for 20 minutes.
- At this point, because this dough is so “loose”, I like to use some type of form. Usually, I used a double French bread form, lined with baking parchment.
- Using a VERY sharp knife, or a bench knife, carefully cut the dough in two.
- Now comes the messy part: With a generous amount of flour and a bench knife, push each dough piece “in” on the sides and lengthen it.
- Carefully and quickly, pick it up and place it on one of the parchment-lined forms, lengthening it as you lay it in.
- Repeat with the second piece. (Ta-da- the worst is over!).
- Lightly sprinkle with flour, cover and let rise 1-2 hrs.
- Heat the oven to 425 thirty minutes before baking.
- Bake for 30-45 minutes, until nicely browned.
- Remove from oven and cool on a wire rack.
Ingrédients
- 250 g de farine de blé
- 80 ml de lait
- 2 oeufs
- 80 g de sucre de canne
- 1/2 sachet de levure de boulanger (soit 10 g sec ou 20 g de levure fraîche)
- 30 g de crème fraîche
- 10 g de beurre
- 1 pincée de sel
Instructions
- Diluez la levure dans le lait et laissez reposer 5 minutes.
- Fouettez les oeufs et 30 g de sucre en poudre.
- Disposez la farine dans un grand saladier. Creusez un puits, ajoutez le mélange oeufs-sucre et le sel.
- Pétrissez d'une main en versant petit à petit le lait. Quand la boule de pâte est élastique et homogène, continuez de la malaxer sur le plan de travail en la soulevant pour incorporer de l'air.
- Mettez le pâton dans le saladier, couvrez avec un torchon et laissez lever dans une pièce chaude, jusqu'à ce qu'il triple de volume.
- Beurrez une plaque à pâtisserie. Étalez la pâte avec la paume de la main pour lui donner une forme de galette. Couvrez avec un torchon. Laissez lever 45 minutes dans une pièce chaude.
- Préchauffez le four à 200°C. Badigeonnez la surface avec la crème fraîche. Saupoudrez avec le reste de sucre. Faites cuire pendant 15/20 minutes jusqu'à ce que la galette soit dorée sur les bords.
- Sortez-la du four et laissez refroidir sur une grille.
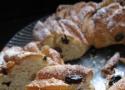
Ingrédients
Pâte
- 7 g de levure sèche
- 300 g de farine à pâtisserie (T45)
- 40 g de sucre semoule
- 1 œuf
- 120 g de lait
- 40 g de beurre en dés
- 1 pincée de sel
Garniture
- 30 gr de noix
- 30 g de beurre fondu
- 30 g de sucre + 1 c à c de cannelle
- 30 g de raisins secs
Instructions
- Verser dans la cuve la levure, la farine, le sucre, l’œuf le lait le sel, le beurre en dés.
- À la fin du programme laisser lever à couvert pendant 45 min environ.
- Sortir la pâte de la cuve et la déposer sur un plan de travail fariné, dégazer et bouler la pâte.
- Étaler la pâte en un rectangle et badigeonner de beurre fondu.
- Répartir par dessus le sucre et la cannelle puis les noix broyés et les raisins secs.
- Rouler le rectangle et couper le boudin obtenu en deux,
- Tresser les deux parties sans trop serrer, former une couronne.
- Déposer sur une plaque farinée ou sur un papier sulfurisé.
- Laisser lever jusqu’à ce que la pâte ait doublé de volume.
- Badigeonner du restant de beurre fondu
- Cuisson dans four préchauffé à 180 °C environ 20 à 25 min
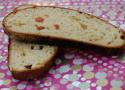
Ingrédients
- 350 g de farine pour pain brioché
- 150 g de coco en poudre
- 150 ml de lait de coco
- 100 ml d’eau
- 30 g de sucre
- 15 g de beurre
- 100 g de mélange exotique
- 1 sachet de levure de boulanger
Instructions
- Mélanger tous les ingrédients sauf le mélange de fruits exotiques.
- Pétrir au robot puissance minimum pendant 15 min ou en MAP programme pâte seule.
- Faire une boule et laisser lever à température ambiante pendant environ 3h ou moins si il fait très chaud.
- Ajouter ensuite les fruits exotiques, et renouveler la levée.
- Enfourner à 180° pendant environ 30 min.
Ingredients
Sourdough
- 210 g flour (Typ 550)
- 145 g Water
- 20g sourdough
Dough
- Sourdough
- 500g Flour Type 550
- 80g Oil
- 10g Salt
- 5g fresh yeast
- 80g egg yolks (from 4 eggs size L)
- 55g Egg (1 Egg size L)
- 60g sugar
- 125g Water
Filling
- 300g almonds, finely grounded
- 300g Marzipan
- 100g bread crumbs
- 100g sugar
- 400g Water
- 4 Egg whites
Glazing
- 100g powdered sugar
- juice of 1/2 lemon
Instructions
- Mix all ingredients for the Sourdough and let it stand at 25°C for about 12 hours.
- Dissolve the yeast in water, then knead in the kitchen machine with eggs, oil, salt, flour and sourdough for 5 min at slow speed.
- The knead 7 min at middle speed. Because the sugar inhibits the gluten development, the sugar is added just now. Add always a tablespoon at once and knead in between always for 1 min.
- Ferment for 1.5 hour.
- While dough is fermenting prepare the filling: Bring water to boil and at the marzipan in small pieces. Stir until it dissolved completely. Now add ground almonds, bread crumbs and sugar and stir the mixture until its starts to bubble. Now set aside to cool down. After cooling fold in the egg white.
- Roll the dough to a rectangle of 25 cm x 45 cm, and spread the filling on it. Roll into a log .
- Place each log on a baking tray lined with baking paper, then use a scissor or dough scrapper to cut it lengthwise, so you got two strands. Cross the strands and braid a braid.
- Proof for 1.5 hours or overnight in fridge.
- Preheat the oven to 200°C and bake for 35 min until golden.
- Mix powered sugar and citron juice and glace the Nusszopf after it has cooled down.
- How to Make and Sew Bias Tape - Melly Sews
- How To Make Bias Tape and Piping | Closet Core Patterns
- How to Make Bias Binding (with Video Tutorial!) - Suzy Quilts
- How to Make Bias Binding Tape - Two Ways - Bethany Lynne Makes
- How To Bind A Round Quilt With Bias Binding | Quilts By Jen
- How to make Bias Binding for Quilts Tutorial
- How to Sew on a Bias Tape Binding and Join the Ends – Bobbin In Quilts
- Quilt 101, Lesson 8- Binding — Joz Makes Quilts
How to Do Bias Binding Math
So how do you know how many yards of bias binding you’ll need for a quilt?
Get your calculators ready, because here is the simple equation!
Add up the length of all four sides of your quilt.
Add 18 to the total (this is to give you enough for mitered corners and joining up your ends).
Divide that total by 36 (because 36 inches in a yard) and then round up to the next whole number.
For example, if you have a throw quilt that is 50x50:
50+50+50+50 = 200
200 + 18 = 218
218 ÷ 36 = 6.1
So, rounding up, you would need 7 yards of binding to complete the quilt!


The Gold Collection → pour acheter les CPs
Easy Folding Guide


Ingredients
Sponge
- 4 1/2 tsp (16 g) active dry yeast
- 1 tbsp (12 g) all purpose flour
- 1 tbsp (16 g) granulated white sugar
- 3 tbsp (45 g) warm water
- 4 cups (544 g) sifted flour (if measuring by volume, sift first, then measure)
- 2 cups (455 g) warm milk
Dough
- 3 whole eggs
- 8 egg yolks
- 2/3 cup (140 g) granulated white sugar
- 1/4 tsp salt
- 1 tsp vanilla
- the grated zest of 1 orange and 1 lemon
- 3 tbsp (30 g) rum or brandy (or bourbon, if that’s all you have in your cupboard…)
- 1/2 cup (113 g) melted unsalted butter
- 1/2 cup (108 g) vegetable oil
- up to 8 cups (1088 g) sifted all purpose flour (again, if measuring by volume, sift first)
Instructions
Sponge
- In a large bowl, mix together the yeast, 1 tbsp of flour, the sugar and the water.
- Let the mixture sit for 10 – 20 minutes until it is all foamy.
- Stir in the sifted flour and the milk.
- Cover the bowl with plastic wrap and let the sponge is a warm spot for 30 minutes, until doubled in size.
Dough
- In the bowl of a mixer fitted with the paddle attachment, combine the eggs and the sugar.
- Beat on high until pale and thickened.
- Add the risen sponge mixture and stir to combine.
- Mix in the salt, the vanilla, the grated zest, the rum, the butter and the oil.
- Change out the paddle attachment for the dough hook and gradually (1 cup at a time) stir in the sifted flour.
- You will probably run out of room in your mixer before you add even half of the flour. Transfer the dough to a very large bowl and work in enough flour with your hands until you have a soft dough that doesn’t stick to the bowl (you may not need all the flour – but if you need more, that’s OK too).
- Turn out the dough onto a work surface and knead the dough, adding in any remaining flour as necessary, until it is very smooth, soft, and elastic (about 15 minutes).
- Oil your giant bowl and place the dough inside, turning it over to coat it lightly with oil.
- Cover with a tea towel and let rise somewhere warm for 1 – 2 hours, until doubled in volume.
- Prepare your baking tins (two 9″ round springform pans would be perfect) by buttering the bottom and sides, then fold a piece of parchment paper in half lengthwise to make a collar around the inside of the tin. Press it to stick to the buttered sides of the tin.
- Gently punch down the risen dough and reserve 1/3 of it for the decorations.
- Portion off the remaining 2/3 of the dough (depending on how many tins you have) and form it into balls by pinching all the edges in towards the center. Poke the dough all over with a skewer to remove any air pockets.
- Place the dough smooth side up in the prepared baking tins. Cover the formed dough and the reserved dough with a tea towel and let rise for about 30 minutes.
- After 30 minutes, shape the reserved dough into decorations for the paska. Mix together an egg wash of 1 egg + 1 tbsp water and use it to glue on the decorations.
- For each loaf, make a twisted rope around the edge by rolling out two long snakes of dough and twisting them together. Form the rope into a circle and lay it around the edge of the loaf.
- To make the 4-cornered cross, roll out a log of dough with fat ends. Split each end of the log into two strands, then roll them into tapered lengths and coil up each one.
- For a sun-motif (sorta – it should have a few more arms), roll out a strand dough into a thin snake. Coil the ends in opposite directions and attach to the top of the paska. Repeat with another strand of dough (up to 4 strands total) and arrange on top of the paska so it overlaps the first one and the ends point in all four directions, like a compass.
- For the twisted strand, make two long thin stands of dough and twist them together, leaving several inches untwisted at each end. Coil up the ends. You could also make two of these and overlap them to make another 4-cornered cross symbol.
- To make a flower/rosette, roll out a long snake of dough, then flatten it with a rolling pin. Make little notches down one side with a knife, then roll it up from one end, letting the notched side fall open to form the petals. Pinch the closed end together to secure.
- Secure all decorations with toothpicks so they stay put while rising and baking. Cover with a tea towel and let the decorated dough rise for about 30 minutes more, until it is a few inches from the top of the parchment paper collar. While the dough rises, preheat the oven to 350˚F (325˚F convection).
- Brush the risen dough with the remaining egg wash.
- Bake for 10 minutes in the preheated 350˚F (325˚F convection) oven, then reduce the heat to 325˚F (300˚F convection) and bake another 50 or so minutes, until well-browned on top and hollow-sounding when tapped. Leave in the tins until almost cool, then remove while still slightly warm and place on a rack. Carefully remove the toothpicks, and cool completely before slicing the paska into wedges.
Ingredients
For the Dough
- 1 1/2 cups milk
- 1/2 cup plus 1/2 teaspoon sugar
- 1/2 cup water, lukewarm
- 1 (0.25-ounce) package active dry yeast
- 7 1/2 cups all-purpose flour, divided
- 3 large eggs, at room temperature, beaten
- 1/3 cup unsalted butter, melted
- 1 1/2 teaspoons fine salt
For the Egg Wash
- 1 large egg, at room temperature
- 2 tablespoons water
Instructions
- In a heavy-bottomed saucepan, scald the 1 1/2 cups milk and set aside to cool until lukewarm.
- In a large bowl, dissolve 1/2 teaspoon sugar in the 1/2 cup water (lukewarm) and sprinkle the 1 (0.25-ounce) active dry yeast over it. Mix and let stand for 10 minutes.
- Add the lukewarm scalded milk and 2 1/2 cups of flour to the yeast mixture. Beat until smooth. Cover and let rise until light and bubbly.
- Add 3 large eggs, the remaining 1/2 cup sugar, 1/3 cup melted unsalted butter, 1 1/2 teaspoons salt, and 4 1/2 to 5 cups of the remaining flour to make a dough that is not too stiff and not too slack.
- Knead until dough no longer sticks to the hand and is smooth and satiny (about 7 minutes in a stand mixer, longer by hand).
- Place dough in a greased bowl, turn to grease both sides, cover with greased plastic wrap, and let rise until doubled.
- Punch down, cover, and let rise again.
- Reserve a third of the dough for decorating. Shape the rest into a round loaf and place in a 10- to 12-inch greased round pan.
- Shape the reserved dough into decorations of choice—a cross, swirls, rosettes, braiding, etc.—and arrange on top of the dough.
- Cover the pan with greased plastic wrap and let rise until almost doubled.
- Heat oven to 400 F. Brush bread with 1 large egg beaten with 2 tablespoons water.
- Bake 15 minutes. Reduce temperature to 350 F and bake an additional 40 minutes, or until an instant-read thermometer registers 190 F. If necessary, cover the top of the bread with aluminum foil to prevent over-browning.
- Remove from the oven and turn out onto a wire rack to cool completely.
Ingredients
Sourdough Leaven (You are not using it all in the recipe, you need to save some for next bake)
- 200 g sourdough/starter (the starter you keep in the refrigerator and feed every other week)
- 400 g water
- 2 dl (110 g) rye flour
- 2 dl (120 g) all-purpose flour
Berries and seeds
- 2 dl (135 g) flaxseeds
- 2 dl (135 g) sunflower seeds
- 2 dl (140 g) cracked rye
- 2 dl (180 g) rye berries
- 2 dl (160 g) bulgur (100% whole grain quick cooking bulgur wheat)
- 2 dl (190 g) wheat berries (hard red spring wheat berries)
Dough
- 1500 g water (use this to soak the berries and seeds)
- 600 g sourdough leaven
- 3 tablespoons salt
- 1 splash food coloring (kulør) - optional
- 2 teaspoons malted barley flour
- 8 dl (440 g) rye flour (dark rye flour)
- 4 dl (240 g) all-purpose flour
Sprinkles
- sunflower seeds, pumpkin seeds, sesame seeds or poppy seeds.
Instructions
Day 1, morning
- Feed the starter to make the leaven. The leaven will be ready to use when the leaven is bubbling and smells like beer, after about 8 hours at room temperature. Cover the leaven with a clean towel.
- Soak the berries and seeds in water in a large bow (I use to bowl because of the big amount). Cover the bowls with large plates. Let them soak at room temperature until the leaven is ready.
Day 1, night
- Add the leaven to the soaked berries and seed. Cover the bowls with large plates. Let the mixture ferment overnight at room temperature .
- Save the leftover leaven and put it in the refrigerator in a sealed container. This will be your sourdough starter for the next batch of bread. It will keep without feeding for about 14 days in the refrigerator. *
Day 2, morning
- Add the salt, coloring and the flours to the dough and mix thoroughly, to make sure all the flour is fully incorporated, let rise for about two hours.
- Add the dough to two rye bread baking forms. (I use Eva Professionel Rye Bread Tin which holds 3,3 liters).
- Let the bread rise for about an hour, covered with a clean towel. The longer you let it rise, the more sour the bread becomes.
- Poke a few holes with a cake tester or a knitting needle, to prevent the crust to rise and crack.
- Brush the bread with water and sprinkle with your favorite seeds.
- Place the baking form in a preheated oven for 1 hour 15 minutes at 350°F (175℃).
- Turn off the heat, remove the breads from the baking forms, spray with water on all sides and place them back in the oven directly on the rack for about an hour, while the oven cools.
- Take the breads out and wrap them in an clean kitchen towel. This will help softening the crust. Let breads cool completely.
- It's best to wait cutting the bread until the next day.
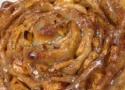
Ingredients
Dough
- ¼ Cup warm water
- 1 pkg/Tbsp.Red Star Platinum yeast
- ½ Cup milk, warmed
- 2 Cups unbleached all-purpose flour
- 2 Tbsp. butter, softened
- 2 Tbsp. sugar
- ½ tsp. salt
- ¼ tsp. cinnamon
Filling
- 2-3 Apples, peeled cored and thinly sliced. Each slice should then be cut in half
Topping
- 3 Tbsp. melted butter
- 2 Tbsp. cinnamon sugar
Glaze
- 2 Tbsp. butter
- ¼ Cup packed brown sugar
- 1-2 Tbsp. apple cider (or apple juice)
- ½ Cup powdered sugar
Instructions
- Place warm water in EZ DOH bucket.
- Add yeast and stir to dissolve.
- Let rest one minute.
- Add warmed milk, then remaining dough ingredients.
- EZ DOH-it until the dough is smooth and all ingredients are incorporated, about 2-3 minutes.
- Remove dough from bucket, “smooth” the dough by patting, spray bucket with cooking spray.
- Replace dough in bucket, cover and let rise until doubled.
- Remove dough from bucket and divide into 2 equal portions.
- Roll out each ball into an 8x11” rectangle.
- Cut each in 9 strips (lengthwise).
- Using cooking spray, grease 2- 8” round pans.
- Starting at the center of one pan, coil 9 dough strips with apple slices into a spiral, securely pinching ends as you add the strips.
- Repeat with second pan and other 9 strips and remaining apple pieces.
- Cover pans and let rise for 30-45 minutes.
- Preheat oven to 365. (350 doesn’t seem hot enough and 375 is almost too hot J ).
- Bake for 20-25 minutes until golden. (While bread is baking, make glaze: see below)
- Remove bread from oven.
- Gently turn upside down and remove from pan, placing it “right-side-up” on a cooling rack.
- Brush each spiral with 1 ½ Tbsp. melted butter, then sprinkle generously with cinnamon sugar.
Glaze
- Melt butter in a small saucepan.
- Stir in brown sugar and heat to boiling, stirring constantly.
- Reduce heat and boil for 2 minutes.
- Stir in cider.
- Heat to boiling.Remove from heat and let cool.
- Stir powdered sugar into mixture.
- Add more cider, if necessary to thin the glaze.
- Drizzle glaze over the spirals.
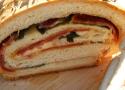
Ingredients
Dough
- 2 tsp. dry yeast
- 1 ¼ c. water
- 3 ½ c. unbleached flour
- 1 ½ tsp. salt
- 3 Tbs. olive oil
For the filling and topping
- 8 oz. smoked swiss cheese
- 3 cloves garlic, minced
- 8 oz. Prosciutto, sliced thin
- 4 oz. pepperoni, sliced thin
- Handful of fresh basil leaves
- ~1 tsp. coarse salt
- 3 sprigs rosemary, stems removed
- ~1 tsp. freshly ground black pepper
Instructions
- Sprinkle yeast into 1 c. of the water, in small bowl. Leave for 5 minutes to then stir to dissolve.
- Mix the flour and salt in a large bowl. Make a well in center and pour in dissolved yeast and the oil. Mix in flour from sides of well. Stir in reserved water, as needed, to form a soft, sticky dough.
- Turn dough out onto a lightly floured surface. Knead until smooth, silky, and elastic...~10 mins.
- Pour dough in a clean, oiled bowl and cover with clean kitchen towel. Let rise until doubled in size, 1 1/2-2 hours. Punch down and chafe* for 5 minutes. Let rest 10 minutes.
- Shape into a 14" x 8" rectangle. Cover w/ clean towel and let rest another 10 minutes.
- Spread your cheeses, meats, garlic and basil evenly over dough. Roll up the dough like a swiss roll, starting at one of the shorter sides, but without rolling too tightly. Place on oiled baking sheet. Use a skewer or a carving fork to pierce several holes through the dough to the baking sheet. Sprinkle with 1 Tbs. of olive oil, salt, rosemary and pepper.
- Bake in preheated (400 degrees F) oven for 1 hour, until golden.
Ingredients
Dough
- 1 packet active dry yeast
- 1¼ cups water
- 3½ cups unbleached flour
- 1½ teaspoons salt
- 3 tablespoons olive oil
Filling
- 1 bunch of broccoli rabe washed and woody stems removed (If you don't like broccoli rabe, use broccoli or broccolini instead, blanching it first, then sauteeing in garlic and oil per directions.)
- 2 tablespoons olive oil
- 2 garlic cloves, minced
- hot chili flakes (optional)
- Kosher salt and fresh ground black pepper
- 2 or 3 large red bell peppers, roasted seeded, and peeled - each one sliced flat into 3 or 4 pieces, then blotted dry
- 12 oz mozzarella cheese, sliced
- 8 oz thinly sliced prosciutto
- 8 oz thinly sliced provolone cheese
- Olive oil
- Asiago or any Italian hard cheese *
Instructions
- Make the dough. Sprinkle yeast into 1 cup of tepid water in a bowl. Let sit for 5 minutes until foamy.
- Mix the flour and salt in a large bowl. Make a well in center and pour in dissolved yeast and the oil. Mix in flour from sides of well. Stir in reserved water, as needed, to form a soft, sticky dough.
- Turn dough out onto a lightly floured surface. Knead until smooth, silky, and elastic, about 10 minutes. Place the dough in a clean, oiled bowl and cover with clean kitchen towel. Let rise until doubled in size, 1½ to 2 hours.
- While dough is rising..roast your peppers and prepare the broccoli rabe. Bring a pot with about 1 quart of water, salted, to a boil and have ready a large bowl of ice water. Cut the cleaned and trimmed bunch of broccoli rabe in half, then boil in the salted water for about 3 to 4 minutes. Strain and drop the broccoli rabe into a bowl of ice water to stop the cooking. Strain again and blot dry. Heat the tablespoon of olive in a saute pan. Add the minced garlic and saute until soft but not browned. Add broccoli rabe a little at a time until wilted. Saute, stirring, for 2 to 3 minutes, adding salt and pepper to taste, plus your desired amount of hot chili flakes, if using. Remove the broccoli rabe from the pan to a plate to cool.
- Punch down the risen dough and place it on a floured board. Cover and let it rest for 10 to 15 minutes to relax the gluten. Roll the rested dough into a 14" x 8" rectangle. Cover with a clean towel and let rest another 10 minutes.
- Spread the mozzarella cheese, prosciutto, roasted red peppers (sprinkle roasted red peppers with kosher salt and pepper), provolone cheese, and broccoli rabe evenly over dough, layer by layer in the order listed. Roll up the dough, starting at one of the shorter sides, but without rolling too tightly. Seal all ends well, pinching the dough together.
- Place on a baking sheer lined with a silpat or parchment paper. Use a skewer or knife to pierce several holes through the dough all the way down to the baking sheet but not all the way through. Brush loaf with olive oil, then top with peels of asiago cheese (or any hard Italian cheese you prefer).
- Bake at 400 degrees F for about an hour until golden brown. Let rest a few minutes before slicing.
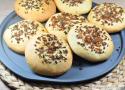
Ingredients
Bread
- 2 cup/ 280g/ All purpose flour
- 2 cup/ 320g/ Bread flour
- 2 ½ teaspoon/8g Instant yeast
- 1 teaspoon /5g Salt
- 10.5 oz /1-⅛ cup Water
- 2 tablespoon Olive oil
Topping
- ½ cup Chopped Onion
- 2 tablespoon chopped mint
- 1 ¼ teaspoon Cumin powder
- 1 ¼ teaspoon Coriander powder
- ¼ teaspoon Red Chili Powder
Instructions
- In a bowl of kitchen aid stand mixer add both flour, salt and yeast and gradually add to water to form a sticky dough.
- Knead the dough for about 8-10 minutes to form smooth dough.
- Transfer the dough to lightly greased bowl and cover with plastic wrap and set aside for rise or doubled in volume. It took about 75 minutes.
- Punch down the dough and turn into lightly floured work bench.
- Divide the dough (934g) into 9-12 pieces.
- Roll it into 5-6 inch round.
- Make them slightly concave.
- Prick the disc with fork all over to prevent puffing in the oven.
- Space the rolled disc into lightly floured baking sheet with 1-2 inch space in between.
- Set aside covering with kitchen towel for about 20 minutes.
- While dough is doing its second rise, preheat oven to 400F.
- In a small bowl add chopped onion, mint, cumin, coriander powder and chili powder and mix everything so that spices get mixed well.
- When you are ready for baking, brush circles with olive oil and sprinkle topping mixture from a little height to get uniform topping.
- Bake for about 30 minutes or until sides becomes brown.
- Serve warm.

Ingredients
Over night sponge
- 72 grams bread flour
- 2 1/4 teaspoons osmotolerant yeast (instant worked just as well too)
- 114 milliliters potato water, or whey or water (potato water or whey really make it extra tender & soft)
Dough
- 6 tablespoons butter, room temp.
- 30 to100 grams brown sugar
- lemon zest
- 1 teaspoon salt
- 3 large eggs, room temp.
- 120 milliliters milk, room temp.
- 460 grams bread flour (you can use part whole wheat if you like)
- 2 tablespoons flax seeds, ground
Instructions
- Beat sugar and butter until creamy.
- Add zest and salt and beat.
- Beat in each egg separately and completely; mix will appear curdled.
- Stir in milk and sponge.
- Stir in 2 1/2 cups flour and beat vigorously (in a stand mixer it would clear the sides of the bowl, by hand lifting the spoon up should stretch the dough about a foot.)
- Add remaining flour to make stiff dough.
- Knead 5 minutes or more to incorporate all the flour.
- Dough should be smooth, soft and very supple with a slight stickiness. Looks a little like very thick cake batter or a brioche dough.
- Shape into ball, oil bowl and dough ball.
- Cover and allow to rise about 2 hours, should almost or triple in size.
- Divide into loaves, shaped into balls.
- Allow to rest 20 to 30 minutes before final shaping with rolling pin.
- Press in a + and a x with a rolling pin. For best demarcation of indents be careful to dust dough ball well with flour.
- Shape and place into well oiled cake pans seam side down.
- Allow to rise an hour to 2 hours; more than double in size.
- Brush with egg wash if you want that beautiful glossy finish.
- Bake 350°F: 50 minutes as two loaves, 35 minutes as four loaves.
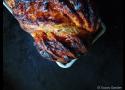
Ingredients
Beer bread
- 4 tablespoons (55 grams) unsalted butter
- 110 ml beer, I used a golden ale – not too dark, not too light
- 90 grams sourdough starter with 50% hydration (ie, 60 grams of flour and 30 grams of water)
- 1 cup plus 2 tablespoons (about 150 grams) plain/AP flour
- 1 cup (about 130 grams) wholemeal flour
- 2 tablespoons (25 grams) granulated sugar
- 2 teaspoons (1/4 ounce or 7 grams) instant yeast
- 1 teaspoon or a fat pinch (6 grams) salt
- 2 large eggs, at room temperature
Filling
- 2-4 tablespoons gochujang (depending on your tolerance for spicy food)
- 1 ripe persimmon flesh (if using the fuyu or oval variety, the fruit should be so ripe it is bursting and you can scoop out the flesh with a spoon)
- 2 tablespoons smoky paprika, or to taste
- 1 large clove garlic, finely minced or chopped in a food processor
- approximately 1 1/2 cups (170 grams) grated hard-ish cheese, such as cheddar, parmesan, pecorino. We didn’t like the loaf with goat cheese – too many flavours clashing and competing, but it may be your thing.
Instructions
- Dough: Heat the butter and about half of the beer together, just until the butter has melted. Remove from heat and add the remaining beer. Set aside to cool until it’s warm to the touch, about 110F/40C (the liquid shouldn’t make you pull your fingers away quickly). Stir in the sourdough starter until there are only a few lumps.
- Mix together the plain and wholemeal flours. Stir together 1.5 cups flour, and all of the sugar, yeast and salt. If using a stand mixer, pour in the butter-beer-sourdough starter mixture, mix on low just until the flour is moistened. If mixing by hand, stir the ingredients together until flour is just moistened.
- Add eggs, one at a time, and mix until combined. The batter looked a bit shaggy and lumpy at this point. Add the remaining flour, and mix until combined. If using a stand mixer, knead with your dough hook on low for 3 to 4 minutes. If mixing by hand, this is the time to imagine you are playing with mud pies at school, pour/push/coax the dough onto a well floured bench and knead energetically for about 10 minutes – everything will be sticky, shaggy, and despairing. Persevere, and all will be well, eventually. The dough will come together, though it will remain soft.
- Transfer the dough to an oiled medium/large bowl. Cover and set aside for about 60 minutes, or until doubled (mine took a bit longer).
- Filling: Add the first four filling ingredients to a food processor, and mix until well combined to an orange-red paste. Taste and adjust seasoning as needed, ie, if you prefer more paprika or gochujang. I found the persimmon added enough sweetness, but you could add sugar if you like. Then, mix the paste with the grated cheese and leave in the fridge until using.
- Assemble: Lightly oil one loaf pan or two mini loaf pans. Punch down the dough and divide it in half if making two mini loaves. Preheat the oven to 350F / 175C.
- Pullapart: If making mini loaves, turn half of the dough out onto a well-floured counter and roll the dough into a rectangle, maybe 15×8 inches, re-flouring the counter as needed. Sprinkle just under half of the filling mixture over the rectangle, right up to the edge. Cut the dough crosswise into 3 strips, then cut into squares/rectangles that will fit into the loaf pan. Place the loaf pan on its short side so you can stack the squares/rectangles, and begin stacking. If you have too little bread, don’t worry as the slices will expand when proofing. If you have too many slices, just tap the loaf pan and squeeze another few. Sprinkle another tablespoonful of filling over the top. Set aside, cover loosely and let it rise for 30-40 minutes.
- Braid: Roll out the dough as above, spread the filling over the dough rectangle, leaving an edge. Roll up the dough, then, with your best chef’s knife, cut the roll in half lengthwise, leaving one end in tact. Braid the two strands together by placing one over the other. Pick this up and haphazardly place it in the loaf pan. Also set aside, cover and let rise for about 30 minutes.
- Place loaf pans in the oven. If baking one large loaf, bake for 25-35 minutes; if making two small loaves, I found 15-20 minutes was sufficient. The loaves should be golden on top, with darker bits where the gochujang filling has caramelised. Cool and serve.
Ingredients
- 3 to 3 1/2 cups all-purpose flour
- 1 1/2 tsps yeast instant
- 1 tbsp honey
- 1 tsp salt A little over
- 1/2 to 3/4 cups cranberries chopped dried
- 1/2 cup walnuts broken , chopped fine
- 1 1/4 cranberry juice (sweetened)*
Instructions
- *I initially used Tropicana’s Cranberry Delight which is readymade sweetened beverage that is a mix of apple, grape and cranberry juice. It is a bit sweet with a somewhat pronounced sharpness and tang and also has a lighter red colour, all of which to my mind made it a good candidate to be my “fake Beaujolais”. However, I found a combination of 2 parts of Cranberry Delight and one part orange juice made a bread which we liked better as it had a less “fruity” taste and aroma than my first choice.
- Put 3 cups of flour, yeast, honey, salt and chopped cranberries in the processor bowl and run a couple of times to mix well. Warm the juice slightly and then pour into the dry ingredients. Knead until you have a soft elastic and smooth dough that’s just short of sticky. Add just enough extra flour or juice, if necessary, to get this consistency of dough.
- Form the dough into a ball and place it in an oiled bowl, and cover loosely. Le t it rise until almost double in volume. This will take about 2 to 3 hours. Lightly deflate the dough by pressing it out into a square. Pull up the 4 corners and tuck the edges together to shape it into a ball making sure to tuck and pinch all the seams.
- Put hits back in the bowl and cover loosely, and let it rise till almost double in volume. Lightly flour your working surface and press out the dough into a rectangle about 10” by 4 to 5 inches wide. Make sure the dough isn’t sticking to the surface. Cut it into 16 equal pieces (or more if you want smaller “grapes”) with the bench scraper. I cut mine into twenty and used 16 for the grapes and the rest for the vine and leaves.
- Lightly grease your baking sheet or line it with parchment. Roll out 14 pieces into smooth balls which will form the grapes and the other two pieces can be used to make the grape vine and leaves.
- Create a triangle by setting four balls together in a line followed by a line of three balls then two balls and finally one ball. Angle the remaining four balls to one side of the triangle so that the entire piece resembles a large cluster of grapes with the smaller one to the side, or create your own bunch of grapes as you prefer.
- With the remaining pieces of dough, roll out one into a rope about 10 inches long and shape it into a curved grape vine shape that you attach to the top of the grape cluster. Shape the others into leaves and arrange on the cluster.
- Place the shaped dough in a draft-free place and let it rise for about an hour or so. If it over proofs the dough will be unusable. Determine the dough is ready to be baked by uncovering and making a small indentation in the centre of the role with your fingertip. The dough is ready to be baked if the indentation slowly and evenly disappears.
- Just before your shaped dough is ready for the oven, pre-heat the oven to 230C (450F) with a flat baking tray turned upside down in it or a baking stone if you have one. Slide your baking tray with the dough on it onto the heated baking sheet. An effective and cheap way to achieve a crisp crust is to cover the bread with a stainless steel bowl or a rectangular pan when it is first placed in the oven.
- Bake for 10 minutes then remove the bowl or pan. Continue to bake for another 15 to 20 minutes until the bread is golden brown has a thick crust. Let the bread cool before serving.


Ingredients
- 2 large eggs
- 1/2–1 tbsp orange zest
- 2 tbsp (30 g) fresh orange juice
- 1/3 cup (73 g) olive oil
- 1 tsp (5 g) vanilla extract
- 1/4 cup (85 g) honey
- 2 cups (192 g) almond flour
- 1/4 cup (30 g) almond meal
- 1/2 tsp (2 g) baking powder
- 1/2 tsp (2.5 g) baking soda
Instructions
- Preheat oven to 350°F (175°C). Grease 6”x3”3” loaf pan or a 8-inch round cake pan.
- In a large bowl, whisk the eggs until lightly frothy. Add the orange zest, orange juice, olive oil, vanilla, and honey. Whisk until smooth and fully combined.
- In a separate bowl, combine the almond flour, almond meal, baking powder, and baking soda.
- Gently fold the dry ingredients into the wet mixture until just incorporated. Do not overmix.
- Pour the batter into the prepared pan and smooth the top with a spatula.
- Bake for 30–35 minutes, or until a toothpick inserted into the center comes out clean.
- Allow the cake to cool completely in the pan before slicing.
Ingredients
- 2 1/4 cups (313 g) all-purpose flour
- 1 1/2 tsp baking powder
- 1 tsp baking soda
- 1 tsp cornstarch
- 3/4 cup (150g) dark brown sugar
- 1/4 cup (50g) granulated sugar
- 2 cold eggs
- 2 teaspoons vanilla extract
- 1 cup (225g) unsalted butter, slightly softened
- Pinch of salt
- 1 1/2 cups (250g) semi-sweet chocolate chips
- 1 cup (200g) dark chocolate chips
Instructions
- Preheat oven to 350°F (180°C). Line a baking sheet with parchment paper.
- Whisk together flour, baking powder, baking soda, and cornstarch in a medium bowl. Set aside.
- Cream together brown sugar, granulated sugar, and butter in a large bowl until light and fluffy.
- Beat in eggs one at a time, followed by vanilla extract, for 3-4 minutes until the batter turns pale and the sugar is well incorporated.
- Gradually mix in dry ingredients until just combined, being careful not to overmix.
- Stir in chocolate chips.
- Scoop 2 tablespoon-sized balls of dough onto the prepared baking sheet. Leave the dough balls slightly rough and stacked, with a rustic texture. Place 4 cookies on each pan, leaving 4 inches of space between each one. Top with extra chocolate chips.
- Bake for 13-16 minutes on middle rack or until edges are lightly golden brown.
- Remove from oven and let cool on the baking sheet for 5 minutes before transferring to a wire rack to cool completely.
Ingredients
Rhubarb layer
- softened unsalted butter, for greasing the cake pan
- 50 g (¼ cup) caster/superfine or granulated sugar
- 450 g (1 pound) rhubarb, about 8-10 stalks, trimmed (For the prettiest end result, use rhubarb stalks that are as red as possible.)
Vanilla cake
- 150 g (¾ cup) caster/superfine or granulated sugar
- 85 g (¾ stick) unsalted butter, softened
- 1 tsp vanilla bean paste (or 2 tsp vanilla extract)
- 3 US large/UK medium eggs, room temperature
- 180 g (1½ cups) plain gluten free flour blend (I used Doves Farm Freee gluten free plain white flour that doesn't have any xanthan gum added. You can also mix your own gluten free flour blend using this recipe. Note that for this homemade blend, 1 cup = 150g, so ideally use a digital food scale and the weight measurements for best results.)
- 50 g (½ cup) almond flour
- 1½ tsp baking powder
- ½ tsp xanthan gum (Omit if your gluten free flour blend already contains xanthan gum or other binders.)
- ¼ tsp salt
- 115 g (½ cup) full-fat plain or Greek-style yoghurt, room temperature
- 150 g (⅓ pound, about 1½ cups) rhubarb stalks, cut into roughly ½-inch (1cm) pieces
Instructions
Rhubarb layer
- First, trim the rhubarb stalks to make sure that they fit snugly into a 9-inch (23cm) cake pan. I recommend doing a test run, where you arrange them on the bottom of the pan before you line it with parchment/baking paper. That way, you’ll be confident that all the rhubarb stalks fit snugly on the bottom of the pan, without having to do any additional trimming later on.
When it comes to the rhubarb topping, you can make the “pattern” on top as simple or as complex as you want. I just cut the rhubarb stalks to size and arranged them in a simple parallel fashion (see blog post for photos). - Adjust the oven rack to the middle position and pre-heat the oven to 350ºF (180ºC). Lightly butter a 9-inch (23cm) round cake pan and line its bottom with a round of parchment/baking paper. Generously butter the parchment/baking paper as well.
Tip: Don't use a springform pan, as some of the rhubarb juices could leak out during baking. - Sprinkle the sugar in an even layer on the bottom of the prepared cake pan.
- Arrange the rhubarb stalks on top of the sugar so that they completely cover the bottom of the pan. Make sure that they're packed together as tightly as possible (that’ll prevent the batter from getting underneath them and it’ll give you the prettiest end result).
Set aside until needed.
Vanilla cake
- In a large bowl, cream together the sugar, butter and vanilla until pale and fluffy. You can do this by hand with a large balloon whisk, using a stand mixer fitted with the paddle attachment or a hand mixer fitted with the double beaters.
- Add the eggs, one at a time, mixing well after each addition, until well combined.
Tip: It's very important that your eggs are at room temperature and that you add them one at a time. This way, you'll maintain the emulsion of the butter as much as possible. If you forgot to take your eggs out of the fridge, place them in warm water for 5-10 minutes before using them. - In a separate bowl, whisk together the gluten free flour blend, almond flour, baking powder, xanthan gum and salt.
- Add half of the dry ingredients to the butter-sugar mixture, and whisk well to combine. Add the yoghurt and whisk until smooth. Finally, add the rest of the dry ingredients and whisk well until you get a smooth cake batter with no flour clumps.
Tip: This alternating way of adding dry and wet ingredients helps to maintain the emulsion of the butter in the cake batter as much as possible. When alternating dry and wet ingredients, make sure to always end with the dry. - Add the chopped rhubarb and mix well until it's evenly distributed throughout the batter.
- Dollop the batter on top of the rhubarb layer and smooth it out into an even layer.
- Bake at 350ºF (180ºC) for about 55-60 minutes or until the cake is golden brown on top, well risen and an inserted toothpick or cake tester comes out clean. If the cake starts browning too much or too quickly, cover it with a sheet of aluminium foil (shiny side up) and continue baking until done.
Inverting & serving the upside down cake
- Allow the cake to cool in the cake pan for 10-15 minutes, then carefully invert it onto a large plate while it's still hot. (Run a knife or a small offset spatula along the edges of the cake to loosen it from the pan if necessary.)
Tip: Don’t cool it for longer than that, otherwise your cake can end up sticking to the baking pan when you try to remove it. - Serve the cake either warm or cooled completely to room temperature. It pairs beautifully with a scoop of vanilla ice cream or a dollop of lightly sweetened vanilla whipped cream.
Ingredients
- 135 g salted butter, (US = just over ½ cup, or just over 1 stick)
- 55 g cocoa powder, (plus 1 tablespoon) unsweetened, plus extra for sprinkling
- 350 g sugar
- 110 g plain flour, (actually, just less than a full cup, about 0.85 cups)
- 1 teaspoon vanilla extract
- 3 eggs, lightly whisked
Instructions
- Pre-heat the oven to 180C/355F. Line the bottom of a 7-9 inch (see note below) springform cake pan with a circle of baking paper, then grease the paper and the sides of the pan.
- Melt the butter in a medium saucepan, then take off the heat and set aside.
- Add the cocoa, sugar, flour and vanilla to the butter and stir a little. Then add the eggs and stir everything together until well combined.
- Pour the mixture into the cake pan and bake for 20 to 25 minutes (see note below) until the top is set but the centre is still gooey (the top should be firm but crack under a little pressure from your finger).
- Let the cake cool in the pan, then run a knife between the pan and the cake to loosen it. Turn out onto a plate or cake stand (see note below). Dust generously with cocoa powder and serve warm with ice cream or cream.
Note pour la version sans gluten, il suffit de remplacer la farine par de la poudre d'amandes.
C'est très facile à faire et c'est excellent. À refaire !

Ingrédients
- 500g mascarpone
- 130g sucre
- Biscuits à la cuillère
- 210g blanc d’œuf
- 40cl limoncello
- 30cl eau
- Zestes de citron non traité
Instructions
- Fouetter le mascarpone avec 80g de sucre
- Fouetter le blanc d’œuf avec 2 cuillères de sucre glace
- Mélanger les 2 préparations délicatement
- Mélanger et fouetter le limoncello avec l’eau et les 50g restant de sucre
- Disposer une couche de crème au fond du plat, imbiber les biscuits dans la préparation au limoncello et les disposer dans le plat
- Disposer une nouvelle couche de crème et recommencer avec les biscuits pour un deuxième et dernier étage de biscuit imbibé dans la préparation au limoncello
- Ajouter la dernière couche de crème, l’étaler délicatement
- Pour le service, saupoudrer de fins zestes de citron à l’aide d’un zesteur.
Des plans d'ustensiles de cuisine

Des automates de crevettes !
Ingredients
For the Overnight Starter
- 1/2 cup whole wheat flour
- 1/2 cup water
- 1/8 tsp dried yeast
For the Dough
- 1/8 cup milk
- 1 tbsp sugar
- 1 tsp dried yeast
- All the overnight starter
- 1 medium sized banana mashed
- 2 3/4 to 3 1/4 cup all-purpose flour
- 2 tbsp coconut oil
- 1 egg lightly beaten
- 1 tsp salt
For the Filling
- 50 gm salted butter soft at room temperature
- 4 tbsp brown sugar
- 1 small to medium banana mashed
- Powdered cinnamon to taste
- Powdered dried ginger to taste
- Bread crumbs or vanilla cake crumbs as required
Instructions
Make the Overnight Starter
- The previous night of baking these buns/ bread, mix together the ingredients for the overnight starter in a medium bowl. Cover and leave on the counter overnight (about 8 to 10 hours).
- The morning of making the bread, proof the yeast in lukewarm milk and sugar. Mix well and keep aside for 5 to 10 minutes till frothy.
Make the Dough
- Using your hand or a kneading machine, mix together the overnight starter, the proofed yeast, 2 and 3/4 cups of flour and remaining ingredients for the dough. Knead well, adding as much more flour as required to make a dough of soft, smooth and elastic consistency. The dough should be just short of sticky.
- Shape the dough into a ball and put in a well-oiled bowl, turning to coat it well. Cover loosely and let it rise till double in volume, about 2 hours or so. In the meanwhile make the filling by mixing together all the filling ingredients in a bowl. It should be of spreadable consistency but not gloopy. Refrigerate till ready to use, if necessary.
For Loaves
- Once the dough has doubled, turn it out onto a floured board. Divide into 2 equal pieces. For loaves, gently shape the dough into flat rectangles that are about 2 centimetres thick. Smear the filling over each rectangle and roll like jelly rolls, from the narrow side, to make 2 loaves. Put the rolls seam side down in parchment paper covered bread tins.
- Cover the tins with a damp clean tea towel and let rise at warm room temperature until almost double. To test if it has risen enough, flour your finger and press gently on the edge - it should very slowly spring back. For comparison, try pressing early on to see how it quickly springs back when the dough has not risen enough.
To Shape & Cut the Buns
- Using a lightly floured wooden rolling pin, roll one of the two pieces of dough as thinly as you can, into a long rectangle. Evenly slather the top of the rectangle with half the filling. Roll the rectangle up as tightly as you can to form a long tube. Cut diagonally and use a chopstick or finger to press down the centres so that the spiral flares out. Place well apart on parchment covered cookie sheet. Repeat with the other piece of dough.
- See the link to the video in post above to understand the shaping process better. Cover the shaped buns with a damp tea towel and let sit in until they have almost doubled.
- Pre-heat the oven to 200C (400F). Put the bread loaves in. After 15 minutes, turn the temperature down to 180C (350) and bake for another 25 to 30 minutes until they’re golden brown, done and sound hollow when tapped. Do the same for the buns but they will need a slightly shorter bake time. Half way through baking, turn the loaves/ buns around as with all that sugar, the bottoms of the buns especially, really want to burn.
- If you have made buns, place them still on the parchment paper on a footed rack on the counter to cool completely. If you have made bread, remove it from the pans, and place each loaf on its side to cool on the footed rack. If you wish to serve warm bread (of course you do), reheat it after it has cooled completely.
- To reheat any uncut bread, turn the oven to 200C (400F) for 5 minutes or so. Turn the oven OFF. Put the bread into the hot oven for about ten minutes. This will rejuvenate the crust and warm the crumb perfectly.
Ingredients
For the Dough
- 1 cup milk
- 50 gm unsalted butter
- 1 tsp instant yeast
- 3 cups all-purpose flour
- 2 tbsp sugar
- 1 tsp salt
For the Topping
- 50 gm unsalted butter
- 1/4 cup white sugar
- 1/4 cup lightly packed light brown sugar
- 1 tbsp ground cinnamon
Instructions
Make the Dough
- Scald the milk over medium heat for 3 to 4 minutes (bubbles on the edges but not boiling). Take it off the heat, add the butter and stir to melt. Let it cool to slightly warmer than room temperature. Stir in the yeast.
- Knead using a stand mixer or by hand. Whisk together the flour, sugar, and salt in a large bowl. Add the milk mixture and knead into a soft, smooth and elastic dough. If the dough seems dry, add milk, one tablespoon at a time till dough is of desired consistency.
- Place the dough into a bowl, cover loosely and let it rise for about 1 1/2 hours or so till doubled in volume. You can also let it rise in the refrigerator overnight. The rise will not be as much as regular dough because of the butter in the dough which will harden the dough. If refrigerating the dough, take it out next morning, lightly knead it, and then let it rise till double in volume.
- Line a 9 x 5 -inch loaf pan with parchment paper. Remove the parchment and set aside on a baking sheet.
Make the topping
- Melt the butter in a mall pan or bowl. Stir in the sugars and cinnamon.
- Deflate the risen dough and press it out or roll out into an 8 x 7 -inch rectangle. Roll the dough into a loaf, starting from the 8-inch edge side. Place it, seam side down, onto the parchment.
- Slit the loaf 6 to 8 times with a serrated knife, cutting about 2/3rds into the dough. Stuff the slits generously with the cinnamon-sugar-butter.
- Using the parchment, lift the loaf into the pan. Spread the remaining mixture over the top of the dough uniformly. Let it rise till almost double, for about 45 minutes.
- Bake at 180C (350F) for about 30 minutes or so until the bread is done. Do watch the top to see it doesn’t get burned. My loaf came pretty close to it, as you can see from the images. Cool on a wire rack.
C'est bon. Mais je ne suis pas sur d'en refaire. Ce n'est pas mon préféré.


Ingrédients
- 250 g de farine
- ½ sachet de levure
- 1 pincée de sel
- 1 cuillère à soupe de sucre
- 1 cuillère à soupe d' huile pour lier la pâte
- 2 cuillères à soupe de rhum
- 1 cuillère à soupe de fleur d'oranger
- 5 œufs
- 2 sachets de sucre vanillé
- 75 cl de lait
Instructions
- Mettre les 5 œufs dans un saladier et ajouter la farine, le sucre, le sel, la levure et le sucre vanillé.
- Incorporer le lait et bien mélanger pour obtenir une pâte bien liquide.
- Ajouter ensuite l'huile, le rhum et la fleur d'oranger, mélanger et laisser reposer 1h à température ambiante.

Ingrédients
Biga
- 500 g de farine blanche forte en gluten, genre Manitoba tipo «0»
- 255 g d’eau
- 5 g de levure fraîche
Pâte
- La biga
- 50 g de farine, la même que pour la biga
- 130 ml d’eau tiède en hiver, froide en été
- 10 g de sel
- Semoule de blé dur pour le façonnage
Instructions
Biga
- Dans la cuve du pétrin faire fondre la levure dans l’eau puis ajouter la farine par-dessus.
- Pétrir à la première vitesse, pendant 3 à 4 minutes, jusqu'à ce que la pâte se forme. La pâte est très compacte car très peu hydratée.
- Couvrir et laisser fermenter à température ambiante (idéalement 18 à 20°C), ceci pendant 18 à 24 heures.
- La pâte va fermenter, se développer tout en restant relativement compacte mais bien assouplie.
Pâte
- Au bout d’environ 20 heures le mélange aura fermenté avec un légère odeur acide, la pâte s’est étalée tout en restant collante.
- La transférer dans le bol du robot et démarrer le pétrissage pendant 2 minutes en première vitesse et 2 minutes en vitesse rapide, jusqu'à obtenir une pâte lisse et sans grumeaux.
- A ce stade, tout en pétrissant à la deuxième vitesse, ajouter le sel puis un peu d’eau. Ensuite il faudra ajouter l'eau par petites quantités en alternant avec un peu de farine. Ne pas ajouter la quantité suivante tant que la précédente n’a été absorbée. Cette phase va durer une bonne dizaine de minute. La pâte va devenir très élastique et bien hydratée. C’est incroyable ce que cette pâte est capable d’absorber autant d’eau.
- Huiler légèrement un récipient rectangulaire et avec vos mains mouillées, y transvaser la pâte qui va s’étaler sur toute la surface.
- À ce stade, toujours avec les mains humides, effectuer un premier pliage, en soulevant la pâte d'un côté à l'autre, sur les 4 côtés.
- Ensuite, après 30 minutes, répéter ces pliages encore à deux reprises puis laisser la pâte lever pendant 60 à 90 minutes, cela va beaucoup dépendre de la température ambiante. Elle devrait doubler de volume.
- Une fois la pâte bien développée, saupoudrer généreusement la table d’un mélange de semoule et de farine et retourner le bac délicatement.
- À ce stade, ne pas la manipuler ni la dégonfler, simplement la saupoudrer de semoule et la diviser en deux pains égaux ou plusieurs petits, à choix.
- Retourner délicatement les deux pains sur des feuilles de papier sulfurisé séparées et les saupoudrer de semoule.
- Pour une ciabatta moins épaisse ou des plus petites, étirer légèrement les pains en le tirant avec les mains.
- Laisser les pains à découvert à température ambiante pendant 30 minutes.
- Pendant ce temps, préchauffer à 250 °C. Placer une plaque de cuisson en bas et une pierre à pizza (réfractaire) sur la grille du milieu.
- Une fois le four très chaud, avec une pelle à pizza, glisser les ciabattas, avec le papier sulfurisé pour éviter de faire retomber la pâte.
- Avant de fermer la porte du four, verser un petit verre d’eau sur la plaque du bas pour générer de la vapeur, ce qui empêche la formation immédiate d'une croûte et permet aux ciabattas de lever davantage.
- Cuire à 250 °C pendant 10 minutes, puis baisser la température à 210°C et continuer la cuisson pendant encore 20 à 25 minutes.
- Une fois cuites, éteindre le four et laisser les ciabattas, porte entrouverte, pendant 5 minutes.
- Ensuite les laisser refroidir complètement sur une grille et elles sont prêtes à être dégustées. Buon appetito !

Ingrédients
-500 g de farine blanche
- 30 à 32 cl de lait entier pasteurisé
- 80 g de beurre
- 25 g de levure fraîche
- 10 g de sel
- 5 g de sucre
- 10 g d’extrait de malt
- 2 jaunes d’œuf + lait
Instructions
- Délayer la levure et le sucre dans le lait, tempéré en hiver ou froid en été.
- Dans la cuve de votre pétrin, mettre la farine, l’extrait de malt et le lait-levure. En première vitesse, pétrir 2 à 3 minutes jusqu’à ce que la pâte se forme.
- Couper le beurre froid en petits cubes et toujours en vitesse lente, l’ajouter petit à petit à la pâte.
- Ensuite en 2ème vitesse, pétrir pendant 3 à 4 minutes, la pâte va absorber tout le beurre et se détacher des parois de la cuve.
- Ajouter enfin le sel et continuer le pétrissage pendant encore 5 à 6 minutes, la pâte va devenir belle lisse et élastique.
- Contrôler l'élasticité de votre pâte en l'écartant doucement entre les doigts elle doit s'étendre et créer une fine membrane presque transparente. Si c'est le cas, c’est que le réseau de gluten s’est formé et la pâte est prête.
- Contrôler aussi la température de votre pâte, elle devrait se situer entre 23 et 25 degrés en fin de pétrissage.
- Sortir la pâte du pétrin, en faire une boule et la déposer dans un grand bol recouvert d’une feuille de plastique afin de la protéger des courants d’air. Laisser lever pendant 30 minutes à température ambiante. On appel cette phase le pointage et la pâte va commencer à fermenter.
- Reprendre la pâte à moitié fermentée puis la diviser en 15 pâtons de 60 g, les bouler et sur un torchon enfariné, laisser reposer pendant 30 minutes recouverts d’un torchon humide.
- Sur votre surface de travail enfarinée, reprendre les pâtons un à un et avec une petite baguette en bois (ici j'utilise un bout de crayon de couleur), presser fortement au milieu de chaque boule pour obtenir la forme typique du petit pain au lait, mais sans toutefois les couper.
- Ensuite les déposer sur une plaque de cuisson recouverte d’un papier sulfurisé.
- Laisser reposer les petits pains, à couvert pendant 15 minutes puis les dorer avec le jaune d’œuf mélangé à du lait.
- Dans un endroit abrité des courant d’air, laisser encore fermenter les pains pendant 20 à 30 minutes, selon la température de la pièce.
- Dorer une deuxième fois les petits pains et les enfourner dans le four préchauffé à 200 degrés. Après 5 minutes, régler le four à 180°C et continuer la cuisson pendant encore 10 minutes.
- Aussitôt cuits, laisser refroidir les pains sur une grille.

Ingredients
Dough
- 1 Tbsp/Packet Red Star Platinum Yeast
- ¾ Cup milk , warmed (not hot)
- 1/3 Cup sugar
- 3 Tbsp. softened butter
- ½ tsp. salt
- 1 egg
- 2 ½ + Cups unbleached, all-purpose flour
Filling
- 1/3 Cup peanut butter
- ½ Cup brown sugar
- If desired: mini chocolate chips
Frosting
- 1 Cup powdered sugar
- 2 Tbsp. peanut butter
- 2 Tbsp. milk
Instructions
- Place warm milk and yeast in EZ DOH bucket and stir to dissolve yeast.
- Let rest 1 minute.
- Add one cup of flour, then additional dough ingredients.
- EZ DOH-it for 2-3 minutes, or until dough is smooth and soft and all ingredients are incorporated.
- Remove dough from bucket, spray bucket with cooking spray, “smooth” dough and replace in bucket.
- Cover and let rise until doubled.
- Stir together filling ingredients.
- Remove dough from the bucket and roll out into a rectangle, about 12x9”.
- Spread with peanut butter filling ingredients.
- If desired, sprinkle with chocolate chips or chopped peanuts.
- Roll up tightly from the long side.
- Slice into 9 equal-sized rolls and place in a 9” greased round pan.
- Cover and let rise. (I like to cover with plastic wrap and place in the fridge. They will rise overnight and you can bake them in the morning).
- When risen, bake at 375 for 20-25 minutes, or until golden.
- Mix the frosting ingredients thoroughly, adding powdered sugar if too thin.
- Frost rolls while warm.