Ingredients
- 2½ cups macaroni (cooked)
- 4 tbsp butter
- 4 tbsp flour
- 1-1½ lbs of cheese (shredded)
- 2 cups warm milk
Instructions
- Preheat oven to 375°F.
- Melt butter in a skillet, add flour.
- Stir together, cooking about 1 minute.
- Add milk.
- Cook together until thick (10-15 min).
- Make sure the roux and milk are mixed together well.
- Add ¾ of the cheese to the roux.
- Melt.
- Put cooked macaroni in a casserole dish.
- Pour the roux and cheese into the macaroni.
- Mix well.
- Put rest of cheese on top.
- Cook in the oven for 20 min.
Source : la grand-mère d'un utilisateur de Imgur

Ingredients
- ⅔ cup (4 ounces) chopped milk chocolate or milk chocolate chips
- ½ cup tahini
- ⅛ teaspoon kosher salt
- ½ teaspoon vanilla extract
Instructions
- Melt the chocolate in a double boiler or by microwaving in 30-second increments, stirring after each, until melted and smooth.
- Stir in the tahini, salt, and vanilla.
- It will thicken as it cools.
Source : « Molly on the range » de Molly Yeh
Note : C'est excellent et surtout très facile à faire.

Ingredients
For the dough
- 2 and ½ cups (313g) all-purpose flour (spoon & leveled)
- 1 teaspoon cornstarch*
- 1 teaspoon baking soda
- ½ teaspoon salt
- ¾ cup (1.5 sticks; 170g) unsalted butter, softened to room temperature
- 1 cup + 2 Tablespoons (225g) granulated sugar
- 1 large egg, at room temperature
- ¼ cup (60ml) fresh or bottled lemon juice, at room temperature* — environ 1 citron
- 1 Tablespoon lemon zest* (packed Tablespoon, it’s a lot of zest!) — environ 2 citrons
- 1 teaspoon vanilla extract
For Rolling
- 3 Tablespoons (35g) granulated sugar (optional, see step 6)
- 1 cup (120g) confectioners’ sugar
Instructions
- Whisk the flour, cornstarch, baking soda, and salt together in a medium bowl. Set aside.
- In a large bowl using a hand mixer or a stand mixer fitted with a paddle attachment, beat the butter and granulated sugar together on medium-high speed until creamed, about 1 minute. Add the egg, lemon juice, lemon zest, and vanilla extract and beat on high speed until combined, about 1 minute. Mixture will appear curdled and that’s ok. Scrape down the sides and up the bottom of the bowl. Add the flour mixture and beat on low speed until combined. Dough is thick, creamy, and sticky.
- Cover dough tightly and chill in the refrigerator for at least 3 hours and up to 3 days. Chilling is mandatory for this sticky cookie dough.
- Remove cookie dough from the refrigerator. If the cookie dough chilled longer than 3 hours, let it sit at room temperature for about 10 minutes. This makes the chilled cookie dough easier to scoop and roll.
- Preheat oven to 350°F (177°C). Line baking sheets with parchment paper or silicone baking mats. Set aside.
- Roll in sugar: Scoop and roll balls of dough, about 1 Tablespoon of dough each, into balls. (Each dough ball should weigh about 20g.) Some readers have had trouble with the confectioners’ sugar melting/absorbing into the cookie dough balls, so to prevent that, you can roll the balls in the granulated sugar first. And then roll each ball very generously in the confectioners’ sugar. If you want lots of confectioners’ sugar to show on the baked cookies, roll 2-3x in sugar! Place 3 inches apart on the baking sheets.
- Bake the cookies for 12–13 minutes or until the edges appear set and the centers still look soft. Tip: If they aren’t really spreading by minute 9, remove them from the oven and lightly bang the baking sheet on the counter 2–3x. This helps initiate that spread. Return to the oven to continue baking.
- Cool cookies for 5 minutes on the baking sheet, and then transfer to a cooling rack to cool completely. The cookies will slightly deflate as they cool.
- Cookies stay fresh covered at room temperature for up to 1 week.
Un mélange des recettes suivantes :
- Faire de la pâte d’amande maison {recette facile sans oeufs} | Royal Chill - blog cuisine, voyage et photographie
- Recette de Pâte d'amande maison sans oeuf
Ingrédients
- 200 g de poudre d'amandes
- 200 g de sucre à glacer
- 35 g d'eau
- 5 g d'essence d'amande amère
Instructions
- Mélanger au robot la poudre d'amande et le sucre à glacer
- Ajouter l'eau et l'essence d'amande amère au mélange
- Mélanger au robot pour obtenir une pâte qui se décole des bords
- Finir en pétrissant à la main pour homogénéiser le mélange
Ingredients
For the crust:
- 2 packets active dry yeast
- 1 and ½ cups water, very warm (about 110 degrees)
- 2 tablespoons sugar
- 3 and ½ cups all-purpose flour, plus more if needed
- 2 teaspoons kosher salt
- ¼ cup olive oil
- Extra olive oil for greasing pan
- Grated Locatelli for sprinkling
For the sauce;
- 6 Roma tomatoes, cut in half
- 3 tablespoons olive oil
- 15 ounces tomato puree
- 2 tablespoons tomato paste
- 3 cloves garlic, finely minced
- 1 tablespoons sugar
- 1 tablespoon balsamic vinegar
- 1 teaspoon dried basil
- ¼ teaspoon dried oregano
- Salt and pepper to taste
Instructions
For the Crust:
- In the bowl of a standing mixer fitted with a dough hook, combine the yeast with the warm water. Stir to dissolve and let stand until it looks foamy, about 5 minutes. Stir in sugar, salt, and olive oil. Turn the mixer on low, and slowly add the flour to the bowl. When the dough starts to come together, increase the speed to medium. Stop the machine periodically to scrape the dough off the hook. Mix until the dough is smooth, glossy, and elastic - about 10 minutes. Form the dough into a ball and place in a well oiled bowl. Cover with plastic wrap and let rise in a warm place until doubled in size, about an hour
- When you're ready to bake! Preheat oven to 500 degrees (F). Line a large baking sheet with parchment paper and coat with olive oil. Place the dough on the baking sheet, and using your fingertips, press dough out toward edges of pan until it's a large rectangle. Using a fork or small pointed knife, poke the top of the dough, popping any large bubbles. Cover pan with plastic and let dough rest for another 30 minutes.
- Place baking sheet on your baking stone (or just the oven wrack) and lower oven temperature to 425 degrees. Bake for 15 minutes. Remove pie from oven, top with tomato sauce, rotate pan, and bake for another 10 minutes. Let cool for 5 minutes before removing the tomato pie from the pan and placing on a cooling rack to finish cooling. Top with some grated cheese and serve warm or cold. I love it both ways!
For the Sauce:
- Preheat oven to 350 degrees (F). Slice the tomatoes in half, sprinkle with salt and pepper, drizzle with olive oil, and roast in oven for 45 minutes
- While your tomatoes are roasting, combine the rest of your ingredients in a large saucepan and simmer for about 30 minutes (or until your tomatoes are done roasting. Once your tomatoes are out of the oven, give them a quick whirl in the blender, pulsing until it's a chunky consistency. Add roasted tomatoes to saucepan and continue to simmer until most of the water has evaporated and the sauce is very thick. Set aside until needed for pie.

Here is the Original Carbonara Recipe from the business card I got in 2022 at "Luciano - Cucina Italiana" in Rome.
Ingredients :
- 280g spaghetti
- 4 egg yolks
- 200g guanciale in 1cm cubes
- 30g grana padano, grated
- 20g pecorino romano, grated
Instructions :
- Cook pasta in boiling water like mentioned on package.
- Frying little guanciale cubes in order to make them crispy outside and soft inside.
- Whisk in a bowl the egg yolks, the grana padano, the pecorino and the melted fat obtained from frying guanciale.
- Let this mixture rest.
- Once pasta is cooked, mix? (mantecarla) the mixture, ground pepper, and the little cubes of guanciale in a bowl, add a little warm water, and mix to get it creamy.
- Plate the pasta, springkle pecorino cheese oon top, and grrind fresh pepper too.
- Serve at the right temperature, not too hot, not too cold, tepid.
Now, below are my personal notes on how to really make carbonara pasta like Luciano Monosilio.
EGGS
- 70g pasta per person seems a good amount since the ddish is very rich.
- Use only egg yolks (1 per person) if you want a richer, yelower colour, or use whole eggs if you want it a little more traditional.
PASTA
- Spaghettoni, thick spaghetti are prefered to spaghetti. They take longer to cook, it gives you more time to cook the sauce PLUS they are hardder to overcook. Worst you could do is cappelli, vermicelli. They would mush and soak up too much sauce anyways.
- Pasta pot should be wide more than tall, especially for cooking spaghetti/oni. Underseason the water ( a pinch is plenty). Water level should be 1/2 inch (1cm) over pasta. Stirring is mandatory.
- Undercook pasta by 2-3 minutes, this will compensate for the amount of time they spend in the bain marie afterwards.
MEAT
- Luciano cuts guanciale in cubes, not matchsticks. The card says 1cm cubes but it’s more than that. At least 1/2 inch / 1.5 cm if not 2, as they shrink a bit during frying. If you’ve ever cooked steak before, you know that obtaining perfect medium rare center is easier with a thicker piece. Overcook = dry. Cooked right = juicy.
- Don’t go high heat. Pork fat has a low smoking point. Also, the chunks are too big for this they would be burnt outside and raw inside. Go Medium high to sear first, and then low. Once they are crispy on the outside, get them off the heat. Room temperature is fine. Keep all that melted guanciale fat, we’re gonna need HALF OF IT, not all of it, for the sauce later on.
BAIN MARIE / DOUBLE BOILER METHOD
- Ingredients mix better if they are warm, and using a double boiler instead of just a frying pan, means it will be more gentle. We’ll have more control, and we’ll be able to stay below 65°C where eggs start cooking and cheese start creating lumps. Large heatproof bowl over simmering water, the bottom of the bowl can't touch water?
- Whisk hard to mimick the SABAYON technique. SABAYON is a foamy custardy dessert where eggs are whisked over a bain marie. This dish really is about the light/foamy/airy texture. Air bubbles enhance sensory properties.
- As you whisk : Drizzle pork fat in there. This is the same proccess as for HOLLANDAISE SAUCE. By gradually incorporating fat you create an foamy emulsion. Holanlldaise uses clarified butter but here it’s pork fat.
The rest you can most likely get it from my video. Practice. Practice and Hang in there. You got this !

Ingrédients
- Eau-125 ml (½ tasse)
- Sucre-125 ml (½ tasse)
- Vinaigre de vin blanc-125 ml (½ tasse)
- Feuille de laurier-1
- Branche de romarin frais, coupée en 2 -1
- Piments biquinho-500 ml (2 tasses)
Instructions
- Dans une petite casserole, portez à ébullition l’eau, le sucre et le vinaigre. Déposez le romarin et le laurier. Ajoutez les piments et laissez mijoter doucement 5 minutes.
- Versez dans des pots préalablement stérilisés d’une capacité de 250 ml (1 tasse) chacun en laissant environ 1 cm (½ po) d’espace sur le dessus. Nettoyez bien le rebord des pots avant de refermer le couvercle sans trop serrer.
- Déposez une petite grille dans le fond d’une grande casserole remplie d’eau frémissante. Déposez délicatement les pots. Ils doivent être recouverts d’au moins 2,5 cm (1 po) d’eau. Laissez frémir doucement 10 minutes à mi-couvert. Retirez délicatement les pots de l’eau à l’aide d’une pince et laissez tiédir.
- Si désiré, il est possible de retirer la branche de romarin et la feuille de laurier pour ensuite réduire en purée lisse au mélangeur les piments avec le liquide. Vous obtiendrez donc une belle sauce épicée.
- Il est possible de ne pas procéder à l’étape 3 de la recette. Si vous omettez cette étape, il faudra alors conserver les pots au réfrigérateur.

Ingredients
- 8.8 oz (250g) mascarpone
- 1 ¼ cups (10.1 fl oz/300ml) full fat milk
- 2.8 oz (80g) sugar
- ½ teaspoon vanilla extract
- 1 teaspoon instant espresso powder
- 2 ½ tbsp (40ml) marsala
- 3 large egg yolks
- 3 savoiardi biscuits lady finger
- 1 stong brewed espresso
Instructions
- Whisk the egg yolks and sugar together in a large bowl until pale and thick. Put the mascarpone and milk in a saucepan, heat the milk mixture over a low medium heat until it comes to a boil. Remove from the heat, add the vanilla extract and let it sit for 1 minute.
- Very gradually add the milk to the egg mixture whilst continuously whisking. Once it all fully incorporated transfer the custard liquid back into the saucepan on a low heat. Add the espresso powder and whisk until dissolved.
- Stir the custard for 5-10 minutes until it has thickened enough to coat the back of a wooden spoon. Remove from the heat, add the marsala, stir then set aside to cool.
- Pour the ice cream into your ice cream machine.
- Dip each side if the savoiardi biscuits into the espresso for a second and place on a chopping board. Cut into small cubes, set aside.
- When the ice cream has thickened and almost ready (usually after around 10 minutes) add the savoiardi biscuits a little at a time. Once ready, transfer to a freezer proof tub and freeze until ready to serve.
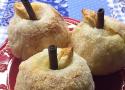
Ingredients
- 4 medium sized apples
- 4 tablespoons golden raisins and currants, mixed
- 1 tablespoon walnut pieces, chopped
- ¼ teaspoon cinnamon
- 3 tablespoon sugar, divided
- 4 tablespoons apple juice or rum
- 4 puff pastry squares (approx. 5 x 5 in.)
- 2 egg yolks
- 1 tablespoon water
Instructions
- Preheat the oven to 400F. Wash the apples, and peel and core them. Mix the raisins, walnuts, cinnamon and 1 tablespoon of sugar, and add the apple juice or rum. Set aside and soak for a couple of minutes, then fill each apple with the mixture. If you have boerenjongens, this is a good time to use them!
- Set each apple, top side down, on a square piece of puff pastry and wrap the apple, by pulling up each corner and tucking it slightly into the cored hole. Make sure all sides are covered and clinging to the apple.
- If you have some extra dough left and a couple of cinnamon sticks, you can make stems and leaves and wrap the apple with an additional decorative something or other, but it's not necessary. If you do use cinnamon sticks, make sure to wrap the top with a little aluminum foil, as they tend to burn easily.
- Make an egg wash with the yolks and the water, and brush on the dough. Sprinkle all four apples with the remaining sugar. Place each apple in a ramekin or small aluminum pie dish, smooth side up. Bake golden brown in 20-25 minutes.
Vraiment délicieux. Il faut porter attention à l'emballage de la pomme pour ne pas avoir d'épaisseurs de pâte qui ne seraient pas cuites.
Ingrédients
- 3 L de cerises à grappes
- 3 tasses (750 ml) d’eau
- 6½ tasses (1 625 ml) de sucre granulé
- 2 sachets (170 ml) de pectine liquide BERNARDIN
Instructions
- Laver et équeuter les fruits. Combiner les cerises et l’eau dans une casserole en acier inoxydable et porter à ébullition. Baisser le feu, couvrir et faire bouillir doucement 15 minutes, en remuant de temps à autre. Retirer du feu.
- Verser le mélange dans un sac à gelée humide ou dans un tamis recouvert de coton à fromage au-dessus d’un contenant profond et laisser égoutter pendant au 2 moins heures, ou toute la nuit. Pour accélérer le processus, on peut presser le sac, mais le liquide pourrait devenir trouble.
- Mettre 6 bocaux Mason propres de 250 ml sur le support d’une marmite à conserve; les couvrir d’eau et faire mijoter (180 °F/82 °C). Mettre les bagues de côté. Garder les bocaux au chaud jusqu’à leur utilisation.
- Il n'est pas conseillé de préchauffer les couvercles Bernardin®. Le composé de scellage de nos couvercles pour la mise en conserve à la maison performe mieux à température ambiante que lorsqu'il est préchauffé dans de l'eau chaude non bouillante (180 °F/82 °C). Il suffit de laver les couvercles à l'eau chaude savonneuse, de les sécher et de les mettre de côté jusqu’au moment de les utiliser. Le préchauffage peut réduire le vide obtenu lors de la mise en conserve au bain-marie et entraîner des problèmes de déformation lors de la mise en conserve sous pression.
- Mesurer 3 tasses (750 ml) de jusdans une grande casserole profonde en acier inoxydable. Incorporer tout le sucre. Pour réduire l’écume, ajouter 1/2 c. à thé (2 ml) de beurre ou de margarine. À feu vif, porter à ébullition assez forte pour qu’elle se maintienne quand on remue le mélange. Ajouter la pectine liquide, en vidant bien le sachet. Faire bouillir à gros bouillons 1 minute, en remuant constamment. Retirer du feu et écumer rapidement au besoin.
- Verser rapidement la gelée dans un bocal chaud jusqu’à 0,5 cm (1/4 po) du bord (espace libre). Retirer les bulles d’air à l’aide d’un ustensile non métallique et ajuster l’espace libre en ajoutant de la gelée au besoin. Essuyer le bord du bocal pour enlever tout résidu collant. Centrer un couvercle chaud sur le bocal. Visser la bande jusqu’au point de résistance, puis resserrer ensuite du bout des doigts. Remettre le bocal plein sur le support dans la marmite. Répéter pour le reste de la recette.
- Une fois la marmite pleine, s’assurer que les bocaux sont couverts d’au moins 2,5 cm (1 po) d’eau. Couvrir et faire bouillir à gros bouillons avant de commencer à minuter le traitement. Àune altitude de 305 m (1 000 pi) ou moins, traiter à la chaleur – faire bouillir les bocaux pleins pendant 10 minutes**.
- Le traitement terminé, éteindre le feu, enlever le couvercle et attendre 5 minutes avant de retirer les bocaux en les tenant bien droit. Les déposer debout sur une surface recouverte et les laisser refroidir 24 heures sans y toucher. NE PAS RESSERRER les bandes.
- Lorsque les bocaux auront refroidi, vérifier s’ils sont bien scellés. Les couvercles scellés sont courbés vers le bas et ne bougent pas quand on les presse. Retirer les bandes, essuyer et sécher les bandes et les bocaux. Ranger les bandes séparément ou les remettre sur les couvercles sans serrer. Étiqueter les bocaux et les entreposer dans un endroit frais et sombre. Pour une meilleure qualité, utiliser dans les 12 mois qui suivent.


Ingredients (Four 10" rolls)
- 260 g 1% Milk*
- 6 g Instant Dry Yeast (about 1 packet)
- 8 g Diastatic Malt powder (optional)
- 400 g Bread Flour (all-purpose works too)
- 10 g Honey (or sugar)
- 20 g Olive Oil
- 8 g Salt
- Egg wash: 1 egg white + spoonful of water
- Cornmeal for sprinkling
*Note: You could use a liquid mixture of equal parts whole milk and water. I prefer using all skim or 1% milk.
Instructions
- Warm 260 g milk in the microwave for about 50 seconds. Ideally, the temperature is between 105-110 F to optimize yeast activity. Add 6 g of yeast along with 8 g diastatic malt powder and stir to combine. Let stand for 3-5 minutes until light foam surfaces and bubbles are visible.
Note: Proofing the yeast is done to test the viability of the yeast. If there is no foam surface or little bubbles the yeast is likely dead and should be discarded for new yeast. - Meanwhile, add 400 g flour, 10 g honey, 20 g olive oil, and 8 g of salt to a large mixing bowl. Once the yeast is proofed, pour in the mixture and vigorously mix the dough with your hands until no dry flour remains in the bowl and a cohesive mass forms, about 2 minutes. Cover with plastic wrap and let rest for 15 minutes.
Note: Resting will allow the flour to start hydrating all on its own, and make the dough a little bit easier to work with when we start kneading. - Kneading (Gluten development) - 5:20 pm to 5:30 pm
- Once rested, turn the dough out onto a clean counter and knead for 8-10 minutes. I advise setting a timer to make sure ample time is spent kneading. Knead the dough until it is completely smooth and no longer sticky.
- After kneading the dough, cut off a piece and test for gluten development by carefully stretching the dough very thin to check for a see-through 'window' before tearing.
Note: The gluten window test is the key to understanding if the flour has been hydrated enough which is how gluten is developed. If the dough tears before getting to a slightly translucent window continue kneading for another couple of minutes. - Once done kneading, add the dough to the mixing bowl and cover with plastic wrap. Let rise until doubled in size, about 45-60 minutes though it could take longer depending on the yeast, room/dough temperature..
- Once doubled in size, punch the dough down and divide into 4 equal portions, roughly 175 grams each.
- Using your fingertips lightly press and stretch and piece of dough into a rectangle about 8 inches wide and 1 inch thick. Tightly roll the rough from the bottom to the top. Press and seal the seam created on the bottom of the roll. Now, you should have a log of dough with the seam side down. Applying even pressure with the palm of your hands in the center of the dough begin gently rolling the log out into a cylinder, about 10 inches long.
Note: For shaping, just take a look at the video, it's hard to explain in words. - Evenly sprinkle cornmeal on two baking sheets. Shape each hoagie roll and place 2 on each baking sheet. Cover lightly with plastic wrap or a towel and let the rolls proof until about 1.5 to 2 times in size, another 45-60 minutes.
- With 15 minutes of proofing left, preheat the oven to 375 F. Place an oven-safe pan or another baking sheet on the bottom rack of the oven.
Note: Ice will be dropped on the hot pan to help create a steamy environment for better oven spring. - Using a razor or really sharp knife, score the hoagie rolls with one long slash at a 45-degree angle to allow for oven spring.
- Whisk the egg white and spoonful of water together. Using a brush, lightly spread the egg wash on the exterior to gives us a better crust. Sprinkle a little cornmeal over top. Note: At this point, you can sprinkle on toppings like sesame seeds, or herbs and spices if you would like.
- Place the rolls into the oven on the middle rack and toss in 4 to 5 ice cubes on the hot pan on the preheated pan which will create steam.
- Bake for 10 minutes then rotate the pan. Continue baking for another 8-10 minutes until the crust is golden brown and the internal temperature reaches 200 F.
- Let cool completely on a wire rack. I actually like to store these in a plastic bag for 1 day before making a hoagie.


Ingredients
- ½ cup (43 g) sliced almonds, roughly chopped
- ½ cup (57 g) cashews, toasted, roughly chopped
- 2 tbsp (18 g) black sesame seeds
- 1½ tbsp all-purpose flour
- ½ tsp cayenne pepper
- ½ tsp kosher salt
- 2½ tbsp (36 g) unsalted butter
- 2 tbsp light corn syrup
- 1 tbsp heavy cream
- 1 tbsp cayenne pepper-based hot sauce
- ½ cup plus 2 tbsp (124 g) granulated sugar
- Toasted black and white sesame seeds, for garnish
- 2 cups (340 g) milk chocolate
Preparation
- Heat the oven to 350 F, and line two baking sheets with parchment paper or silicone mats.
- Combine the almonds, cashews, black sesame seeds, flour, cayenne pepper and salt in a bowl. Set it aside.
- Melt together the butter, corn syrup, cream and hot sauce in a medium saucepan over medium heat. Add the sugar, increase the heat to medium-high and heat to a rolling boil.
- Stir in the nut mixture. Working quickly, scoop the dough into 24 scant tablespoon portions, placing them on the prepared baking sheets. Using the dampened backside of a spoon, press the dough to flatten slightly. Bake for 8 to 10 minutes or until the cookies are a dark caramel colour.
- Remove the cookies from the oven and let cool for 2 minutes. Dip a 2-inch-round cookie cutter in water and cut the cookies into uniform rounds. Allow them to cool and harden.
- Temper the chocolate according to the brand specifications.
- Flip each cookie over so the flatter side is facing up. Brush half of the surface with chocolate. Working quickly, sprinkle a strip of the toasted sesame seeds over the chocolate. Set aside until the chocolate has set.
Makes 24 cookies

Ingredients
Cake
- ½ cup whole milk
- 2 eggs, at room temperature
- 3 tbsp (37 g) granulated sugar
- 1¾ cups (249 g) all-purpose flour
- 1¾ tsp instant yeast
- ¾ tsp kosher salt
- 7 tbsp (100 g) unsalted butter, cubed and softened
- ⅓ cup (47 g) currants
- 2 tbsp dark rum
Spiced Rum Syrup
- 1¼ cups water
- ¾ cup (149 g) granulated sugar
- 6 (2-inch) strips orange zest
- Juice of a small orange or ½ a small orange
- 4 (2-inch) strips lemon zest
- 1½-inch piece ginger, cut into coins
- 4 whole cloves
- 2 star anise pods
- Seeds of 1 vanilla pod (halve pod and scrape out seeds with a knife, reserving pod for garnish)
- ⅔ cup dark rum
Cake Pan Preparation
- 1 tbsp (14 g) unsalted butter, softened
- 1½ tsp all-purpose flour
Apricot Jam Glaze
- 450 g apricots; halved and pitted, each half cut into eight slices
- ⅔ cup plus 2 tbsp (157 g) granulated sugar
- 1 tbsp lemon juice, divided
Spun Sugar Ball and Candied Fruit
- 2½ cups (495 g) granulated sugar
- ⅓ cup glucose syrup
- ¾ cup water
- 3 Cape gooseberries
Caramelized Apricot
- ¼ cup (50 g) granulated sugar
- 1 apricot, halved and pitted
Stabilized Chantilly Cream
- 1 sheet gelatin
- 1 tbsp water
- 1 cup 35% cream, divided
- 3 tbsp icing sugar
- 1½ tsp vanilla
Preparation
Cake
- If using a proofing drawer, heat to 100°F.
- In a large bowl, whisk the milk, eggs and sugar with a fork.
- Stir in the flour, yeast and salt until a ragged dough forms.
- Turn it out onto a work surface and using two bench scrapers, flip and work the dough until elastic, about 5 minutes.
- Add the butter, 1 tablespoon at a time, scraping and flipping until the dough is smooth and keeps its shape.
- Place the dough in an oiled bowl, cover with plastic, and place in a warm area or proofing drawer until slightly puffed, about 30 to 45 minutes.
Cake Pan Preparation
- While the dough is proofing, mix the butter and flour in a small ramekin to form a paste.
- Brush it on the inside of the Bundt pan.
Spiced Rum Syrup
- Place all of the ingredients except the rum in a small saucepan and bring to a boil.
- Cook until the syrup is reduced to 1 cup.
- Let cool, reserving the vanilla pod and star anise for the garnish.
- Stir in the rum.
Cake
- Combine the currants and rum in a small ramekin and let soak (or microwave them for 20 seconds and let cool).
- Strain the currants and gently fold them into the dough after the first proof.
- Spoon the batter into the prepared Bundt pan, smoothing the top.
- Cover and proof until almost doubled, about 25 minutes.
- Heat the oven to 375°F.
- Bake until golden brown and a cake tester inserted in the center comes out clean, 25 to 28 minutes.
- Let it cool in the pan for 2 minutes while you warm the rum syrup on low heat.
- Brush the cake with some of the syrup, then invert the cake onto a cooling rack, place the rack on a baking sheet and soak the cake with the remaining syrup.
- Pour any syrup that accumulates on the baking sheet back into the saucepan and repeat until all of the syrup has absorbed into the cake.
Apricot Jam Glaze
- In a large saucepan, toss the apricots with the sugar and 1½ teaspoons of the lemon juice and set over medium-high to high heat.
- Cook, stirring a few times to prevent burning, and break up with a potato masher or wooden spoon until the jam is thick enough to coat a spoon, 15 to 20 minutes.
- Stir in the remaining lemon juice.
- Strain through a fine-mesh sieve set over a bowl and set aside to cool slightly.
- Brush onto rum-soaked cake.
Spun Sugar Ball and Candied Fruit
- Oil two wooden dowels and tape them to your work surface side by side and extended over the edge (or use wooden spoons with the handles facing out).
- Cover the floor underneath with newspaper.
- Fill a large bowl halfway with ice water, and fill a second smaller bowl with cold water for brushing the inside of your saucepan.
- Combine the sugar, glucose syrup and water in a medium saucepan and allow the water to absorb into the sugar.
- Heat over medium-high without stirring.
- Once the mixture comes to a boil, use a pastry brush to coat the sides of the pan with cold water to stop sugar crystals from forming.
- Brush water on any sugar crystals on the side of the saucepan and heat to 329°F.
- Immediately place the pan in the ice-water bath and let cool, then place it on a trivet or kitchen towel.
- Place two forks back-to-back, then dip them into the syrup and swing them back and forth over the dowels, letting the syrup fall in threads.
- Gather the threads and form them into a ball.
- Working quickly, dip the Cape gooseberries into the syrup to coat.
- Place them on parchment paper to cool.
Caramelized Apricot
- Sprinkle sugar in a small non-stick frying pan set over medium-high.
- When it becomes very dark, place the apricot halves face down, making sure they’re coated evenly, and let them caramelize.
- Carefully flip them with a spatula and transfer to a plate.
Stabilized Chantilly Cream
- Place the sheet of gelatin in a bowl of cold water and let stand for 5 minutes.
- Right before serving, use the whisk attachment of a mixer to whip all but 1 tablespoon of the cream with the icing sugar and vanilla until the whisk leaves a trail.
- Combine the gelatin with 1 tablespoon of water and microwave in 10-second intervals until fully melted.
- Stir it into the whipped cream until it dissolves.
- With the mixer on low speed, drizzle in the remaining tablespoon of cream and beat until it forms medium peaks.
- Immediately put the cream into a piping bag fitted with a large star tip (No. 829) and pipe it into the hole in the middle of the cooled cake. (If you wait too long, the gelatin will set and the cream won’t be soft enough to pipe.)
Assembly
- Decorate the cake with the reserved vanilla pod, star anise, spun sugar ball, Cape gooseberries and apricot halves.

Une recette zéro déchet. J'avais déjà fait quelque chose de similaire avec des écorces de pastèques.
Ingrédients
- 1 kg d’écorces de melon bio
- 350 g de sucre pour confiture (à ajuster à votre convenance)
- Un zeste de citron jaune bio
- Un peu d’eau
Instructions
- À l’aide d’un couteau tranchant, détaillez les écorces de melon en petits morceaux ou en fines lanières. Prélevez le zeste du citron et réservez.
- Dans une casserole ou une marmite à confiture, faites fondre à feu doux le sucre avec un peu d’eau. Poursuivez la cuisson jusqu’à obtenir un sirop.
- Ajoutez le zeste de citron et les écorces de melon dans la casserole et laissez cuire 1 heure 30 environ, toujours à feu doux. La texture de la confiture doit s’apparenter à celle d’une gelée.
- Versez le mélange dans votre blender et mixez grossièrement. Vous pouvez utiliser un mixeur plongeant, ce qui vous facilitera la tâche.
- Remettez la confiture à cuire 30 minutes, puis transvasez dans un ou plusieurs pots en verre.
- Laissez les pots de confiture reposer au moins 48 heures dans un endroit sec puis dégustez à l’heure du petit-déjeuner, du goûter ou du dîner !

Ingrédients
- 2 belles grappes de fleurs de lilas à leur apogée
- 2 citrons
- 2 cuillères à soupe de sirop d’érable
- 1 litre d’eau
- 1 pichet ou pot Mason de 1 L
Instructions
- Détacher chaque fleur et les déposer ensuite sur un tissu propre afin de vérifier qu’aucune bestiole ne s’y trouve.
- Presser le jus des deux citrons et le verser dans un pichet.
- Ajouter l’eau, le sirop d’érable et les fleurs. Mélanger.
- Laisser infuser au frais pendant au moins 6 heures.
- Déguster!
Ce pain est vraiment très bon. Il est un peu sucré à cause du miel mais ce n'est pas trop. Il se marie très bien avec du beurre salé.
Ingredients
Dough
- 1 ¼ Cup warm milk (should be just warmed to the touch)
- 1 Tbsp/packet Red Star Platinum Yeast
- ⅓ Cup honey
- 3 Tbsp. butter, softened
- 1 ¼ Cup white whole wheat flour
- 1 ¾ Cup unbleached, all-purpose flour
- 1 ½ tsp. kosher salt
- ¾ Cup old-fashioned oats
Topping
- Small amount of honey, warmed
- Small amount of old-fashioned rolled oats
Instructions
- Place warm milk and yeast in EZ DOH bucket and stir to dissolve yeast. Let rest 1 minute.
- Add one cup of flour, then additional dough ingredients. EZ DOH-it for 2-3 minutes, or until dough is smooth and soft and all ingredients are incorporated (add small amounts of additional flour if dough is too sticky).
- Remove dough from bucket, spray bucket with cooking spray, “smooth” dough and replace in bucket.
- Cover and let rise until doubled.
- Remove dough from bucket and deflate.
- Roll dough into a small rectangle, then roll up from long side. Pinch seams. Gently fold ends under and place, seam-side down in a large greased loaf pan (or form two smaller loaves and place in two smaller pans).
- Cover with a clean dishtowel and let rise until the loaf is nearly doubled.
- Gently brush the melted honey onto the top of the loaf and sprinkle the old-fashioned oats over the honey.
- Bake at 350°F for 35-45 minutes. You may want to tent the top of the bread after ½ hr. to prevent over-browning.