- Au Petit Poucet → charcuteries
- Érablière du Coeur Sucré → produits de l'érable biologiques
- Gourmet Sauvage → produits sauvages
- La Manufacture → gins
- La Veillée → bières de microbrasserie
- Miel de la Garde → miels biologiques
- Pascal Le Boulanger → boulangerie
- Tabarnasco → sauces piquantes
- Tribe Kombucha → kombucha

Ingrédients
Sirop
- 210 g d’eau
- 6 g d’anis étoilé
- 18 g d’écorce de citron, citron vert et orange ou de zestes
- 210 g de miel
- 100 g de cassonade
- 1 pincée de fleur de sel
Pâte
- 150 g de farine de seigle
- 70 g de farine T55 (ou T45)
- 3 g de cannelle moulue (3/4 de cuillère à café)
- 2 g de mélange à pain d’épices (1/2 de cuillère à café)
- 12 g de bicarbonate alimentaire
- 135 g de beurre
Finition
- ½ cuillère à soupe de gelée de coing
- 1 ou 2 bâtons de cannelle
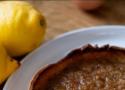
Ingrédients
Crème citron
- 190g de sucre
- 120g de beurre fondu
- 3 œufs
- Jus + zeste de 3 citrons
- 1 pincée de sel
Pâte
- 300g de farine
- 175g de beurre
- 150g de sucre
- 75g de poudre d’amande
- 1 œuf + 1 jaune
- 1 c. à c. de levure
- 1 pincée de sel
- Quelques gouttes d’arôme d’amande mais pas obligé
Instructions
- Mélange farine, sucre, sel et beurre.
- Ajoute levure, œufs, arôme et poudre d’amande.
- Fonce ton moule et précuis 10 min à 180°C avec billes.
- Retire les billes et remets au four pour 10 min pour une base bien dorée.
- Mélange les ingrédients de la crème citron.
- Verse sur la pâte précuite et enfourne 30 à 40 min à 180 °C.
- Laisse bien refroidir avant de couper.

Des ingrédients endémiques de l'Australie. À essayer si un jour je me retrouve là-bas.


Ingrédients
- 500g de farine
- 10g de sel
- 10g de levure fraiche
- 350g d'eau
- 500g de beurre
- 500g de sucre
Voir aussi Recette de Kouign Amann. Le véritable Kouign amann - YouTube
Ingredients
- 1 cup butter
- 1 cup brown sugar
- 1 cup white sugar
- 2 eggs
- 1 tsp vanilla
- ¾ tsp salt
- 1 tsp baking soda
- 2 cups flour
- 1 cup chocolate chips
Instructions
- Melt butter in a cast iron.
- Turn off the heat
- Add remaining ingredients and mix.
- Bake on 325°F for 25 minutes.
Testé. Ce n'est pas concluant.
- 4 Non Blondes - What's Up (Official Music Video) - YouTube
- Amyl and The Sniffers - "U Should Not Be Doing That" (Official Music Video) - YouTube
- Amyl and The Sniffers - Guided By Angels - YouTube
- Bonnie Tyler - Total Eclipse of the Heart (Turn Around) (Official Video) - YouTube
- Comfort To Me | Amyl and the Sniffers
- Da Hool - meet her at the Loveparade - Official Video (HQ) - YouTube
- Disturbed - The Sound Of Silence (Official Music Video) [4K UPGRADE] - YouTube
- Europe - The Final Countdown (Official Video) - YouTube
- New Order - Blue Monday (Live at Alexandra Palace) - YouTube
- Ram Jam - Black Betty (Official Video) - YouTube
- RUN DMC, Jason Nevins - It's Like That (Official HD Video) - YouTube
- Sash! - Encore Une Fois (Official Video) - YouTube
- The Cloverhearts - Heartbreaker (Official Video) - YouTube
- The Prodigy - Firestarter (Official Video) - YouTube
- The Rolling Stones - Paint It, Black (Official Lyric Video) - YouTube
- Virile - YouTube
- Plastic Bertrand - Ça plane pour moi (Official Audio) - YouTube
- Marre, Marre, Marre | Sexy Sushi
- Tu l'as bien mérité ! | Sexy Sushi
Ingrédients
- 1 bouteille de crémant de Loire
- 1 citron
- 15 cL de cointreau
- 12 cL de sirop de sucre de canne
Instructions
- Mettre au frais la bouteille de crémant de Loire.
- Presser le citron.
- Une fois que la bouteille est bien fraîche, verser le contenu dans un saladier et y ajouter le Cointreau, le sirop de sucre de canne et le citron pressé.
- Servir bien frais.
Des flûtes à construire soi-même.
-
Are you planning to climb Mont Blanc and wondering what you should wear? (Part 1)
Mont Blanc is at 4806m, or almost 5000m, so you’ll need warm, appropriate clothing that’s not too heavy.
✅ One pair of crampon boots that are warm enough and, if possible, not too heavy
✅ One pair of socks that are warm but not too thick, that you’ve tested beforehand and that won’t give you blisters
For the body, we prefer the system of different layers.
✅ A long-sleeved merino or synthetic (avoid cotton) first layer
✅ Some Merino or synthetic tights
✅ fleece, with or without a hood (a hood will provide extra warmth in windy conditions)
✅ Down jacket
✅ Down vest (optional)
✅ Shell jacket for protection in rain or snow and against the wind
✅ Shell or softshell pants, depending on the temperature and weather forecast
✅ One pair of warm gloves
✅ One pair of thinner gloves
✅ One pair of warm, compact mittens as a back-up (optional)
✅ One pair of glasses with category 4 lenses
✅ One category 4 mask (optional, depending on the weather)
✅ Cap
✅ Buff
✅ Hat that goes under the helmet
Don’t take anything superfluous or too heavy. The lighter you are, the more fun you’ll have! -
You’re planning to climb Mont Blanc and you’re wondering what non-technical equipment you need in addition to clothing for the ascent? (Part 2).
✅ When it comes to your hydration system, a lightweight thermos flask and/or water bottle is preferable to a camelback. A camelback’s tube will freeze above 4000m in the cold and wind and you won’t be able to keep hydrated.
✅ Snacks. There are plenty of nice snacks to take with you, as well as a small savoury snack. You’ll need to last between 7 and 10 hours on foot
✅ A small tube of sun cream and sun protection lip stick
✅ A first-aid kit with a small toothbrush, a small tube of toothpaste and a sample of cream. Don’t take your complete toiletries kit with a towel, as there isn’t always water in the refuge
✅ One Lightweight change of dry underwear for the upper body when you get sweaty to the hut
✅ A spare pair of dry socks for the hut
✅ A small extra-light fabric bag (avoid the plastic bag, which makes a lot of noise and wakes everyone up when you touch it) to fit all the small items you won’t need for the ascent day
✅ Headlamp (fully charged)
✅ Liner bag for the hut
✅ One back pack of at least 30 liters, light when empty, functional and equipped for the high mountains, with ice axe holders
Remember to pack light - you’ll get a lot more out of your ascent of Mont Blanc -
You’re wondering what technical gear to take for climbing Mont Blanc?
✅ Crampons-compatible boots that are warm enough for the temperatures up there. Sometimes it can be quite warm to climb Mon Blanc and some other times It can be very cold. So, choose your boots accordingly. Don’t hesitate to rent a pair suitable for the temperatures you’ll face at 4,800 meters. Remember to get boots slightly larger than your usual size. Your feet shouldn’t be compressed, or blood won’t circulate properly.
✅ Crampons. For Mont Blanc, we’ll use classic mountaineering crampons such as Vasak model. They have a semi-automatic attachment system that’s efficient, practical, and quick to put on.
✅ Light weight pouch to pack your crampons. It’ll protect everything else in your bag from the crampon points.
✅ Harness. Choose a lightweight, simple harness that you can put on with crampons, like this one with opening leg loop buckles.
✅ Personal Anchor
✅ Screw carabiner, preferably directional
✅ Ice screw with a small, lightweight carabiner. No need for another screw carabiner;
✅ Small carabiner to hang gloves or an ice axe when you need both hands free.
✅ A classic, mountaineering ice axe. Choose one that’s long enough for your height, with a good pick at the bottom. A short ice axe won’t provide proper support.
✅ Helmet : to protect your head from possible falling rocks and/or from a crevasse fall.
✅ Lightweight, foldable poles that fit in your bag without sticking out.
✅ 30-liter backpack with ice axe holders, comfortable back, simple and light
Really consider the weight. Find light, safe gear that suits your needs. With the right gear, you’ll be safer and enjoy your Mont Blanc climb more. -
How do you pack a backpack for mountaineering?
The principle is always the same: put the heaviest items at the bottom of the bag and against your back.
For example, I’m heading to Refuge Tête Rousse before climbing Mont Blanc. I’ll put my crampons in a pocket to protect my gear and place them at the bottom.
I also consider what I’ll need first and what I won’t. To hike up to a mountain hut, you rarely need very warm gloves. So we’ll put warm gloves at the back, against our spine, to avoid sharp objects there.
Then we’ll fill in the small spaces.
I do the same with my down jackets, placing them against my back for comfort.
I always put my thermos on the left side of my backpack. That way, I know exactly where to find it every time. I’ll do the same with my water bottle, placing it on the opposite side.
Other items we won’t use right away: spare clothes, headlamp, first-aid kit… All these can go near the bottom of your backpack since you won’t need them immediately.
Small items and snacks go in a pocket for easy access.
The sleeping bag liner also goes in front; we won’t use it soon.
Lastly, I’ll put technical gear on top with light gloves in case it’s cold.
To attach the ice axe, thread the elastic anchor through its head and secure it. There’s another elastic here; pull it and adjust the ice axe as needed.
You can either put your helmet on top of the backpack - it’s neat and tidy when you close the bag. Some prefer to attach the helmet on the outside. The key is to secure the helmet so it doesn’t bounce around. Fasten it properly to prevent swinging with each step.
Now you’re all set and organized.
With a compact pack and heavy items low against your back, you’re ready for hours of hiking.
Ingredients
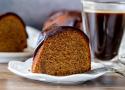
Coffee Bundt Cake
- 3 cups all-purpose flour (375 grams)
- 1 teaspoon baking powder
- ½ teaspoon baking soda
- ¼ teaspoon salt
- ½ cup unsalted butter (112 grams) softened
- ½ cup vegetable oil (120 ml) or canola
- 2 cup light brown sugar* (400 grams) packed
- 4 large eggs room temperature
- 1 cup sour cream (240 ml) room temperature
- 3 tablespoons instant coffee powder feel free to use 2 tablespoons for a less intense flavor
- 2 tablespoons hot water (30 ml)
Chocolate Ganache
- 4 ounces dark chocolate (112 grams) around 50%, or feel free to use semi-sweet`
- ½ cup heavy cream (120 ml)
Instructions
Coffee Bundt Cake
- Preheat the oven to 350F (180C or 160C fan forced).
- Whisk together the flour, baking powder, baking soda and salt.
- In a very large mixing bowl, beat together the butter, brown sugar and oil until creamy (seeing sugar granules is fine).
- Beat in the vanilla extract and eggs 1 at a time. Stop mixing when you no longer see pieces of egg in the batter.
- Turn off the mixer and scrape down the sides and bottom of the bowl. Add in about 1/2 of the flour mixture and beat on a low speed until just combined.
- Add the coffee grounds to the hot water int a small cup or bowl and stir. Add the coffee and sour cream to the cake batter and mix with the beater on a low speed until combined.
- Turn off the mixer and add in the rest of the flour mixture. With a hand held whisk, whisk until smooth.
- Brush a non-stick bundt pan with pan release/cake goop or grease and lightly dust with flour.
- Pour the batter into the prepared pan.
- Bake in the preheated oven for 45-55 minutes, or until an inserted toothpick comes out clean.
- Let the cake cool in the pan for about 15 minutes, then carefully invert the pan and slide the cake out.
Chocolate Ganache
- Chop the chocolate into very fine pieces and place in a heatproof bowl.
- Heat the cream until almost boiling.
- Pour the hot cream over the chopped chocolate. Let sit for 3-5 minutes, then whisk until smooth.
- If there are still some lumps of chocolate, microwave for 30-second intervals at medium heat (not high heat, which is often the default) and whisk between each interval until smooth.
Assembly
- If the bottom of the cake is very domed (what was the top while the cake was baking), gently saw off the rounded top using a serrated knife.
- Place the cake on a plate or cake stand that you plan to serve it on.
- Pour/drizzle the chocolate ganache over top, letting it drip over the sides.

Private Artifacts Never To Share ou Bug Out Bag :)