Ingrédients
Gâteau
- 430g de fromage à la crème, tempéré
- 120g de cassonade
- 4 œufs
- 1 gousse de vanille
- 280g de crème 35%
- 20g de farine tout usage
- une pincée de sel
Poires
- 1 poire bien mûre, en dés
- 3 càs de cassonade
- le jus d'un citron
- la gousse de vanille utilisée
Instructions
- Préchauffer le four à 445°F.
- Au batteur, combiner le fromage à la crème, la cassonade, les œufs et l'intérieur de la gousse de vanille.
- Une fois le mélange bien lisse, y ajouter la crème 35%, le sel et la farine, puis mélanger jusqu'à ce que le mélange soit homogène.
- Graisser et parcheminer un moule de 8 pouces, puis y verser le mélange.
- Cuire au four environ 25 minutes, jusqu'à ce que la croûte soit bien dorée et foncée, mais pas brûlée !
- Retirer du four et laisser tempérer 15 minutes, avant de le transférer au réfrigérateur pour le refroidir complètement (un minimum de 2 heures de repos).
- Pendant ce temps : ajouter la gousse de vanille vide dans un petit chaudron avec le jus de citron et la cassonade. Porter à ébullition et y ajouter la poire coupée en dés.
- Mélanger pour bien enrober les morceaux de poires et retirer du feu. Laisser tempérer jusqu'au moment de servir sur le gâteau.

Ingrédients
Génoise au chocolat
- 200 g de sucre
- 6 œufs
- 180 g de farine
- 60 g de cacao en poudre non sucré
- 1 cuillère à café de levure chimique
- 1 pincée de sel
Garniture et montage
- 800 g de cerises dénoyautées en conserve (égouttées et réservant le jus)
- 500 ml de crème fouettée
- 100 g de sucre glace
- 1 cuillère à café d'extrait de vanille
- 100 g de copeaux de chocolat pour la décoration
- Cerises entières pour la décoration (facultatif)
Instructions
- Préchauffez le four à 180°C (350°F). Beurrez et farinez un moule à gâteau de 26 cm de diamètre.
- Dans un grand bol, battez les œufs et le sucre jusqu'à ce que le mélange soit léger et mousseux. Tamisez la farine, le cacao, la levure et le sel, puis incorporez-les délicatement au mélange d'œufs et de sucre.
- Versez la pâte dans le moule préparé et faites cuire au four pendant 30 minutes, ou jusqu'à ce qu'un cure-dent inséré au centre du gâteau en ressorte propre. Laissez le gâteau refroidir complètement avant de le démouler et de le couper en trois couches horizontales égales.
- Pendant que le gâteau refroidit, préparez la crème fouettée en battant la crème, le sucre glace et l'extrait de vanille jusqu'à ce qu'elle forme des pics fermes.
- Imbibez légèrement les couches de gâteau avec le jus de cerise réservé
- Placez la première couche de gâteau sur un plat de service, garnissez-la de crème fouettée et répartissez la moitié des cerises égouttées par-dessus. Répétez avec la deuxième couche de gâteau, la crème fouettée et les cerises restantes. Placez la dernière couche de gâteau sur le dessus et recouvrez le gâteau entier de crème fouettée sur les côtés et le dessus.
- Décorez le gâteau avec les copeaux de chocolat sur les côtés et le dessus du gâteau. Si vous le souhaitez, ajoutez quelques cerises entières pour garnir le dessus. Réfrigérez le gâteau pendant au moins 2 heures avant de le servir pour permettre aux saveurs de se mélanger.
Ingredients
- ¾ cup organic cane sugar
- ½ cup skim milk powder
- 1 2⁄3 cups whole milk
- 1 2⁄3 cups heavy cream
- 3 egg yolks
Instructions
- Prepare an ice bath (see note below) in your sink or in a large heatproof bowl.
- In a medium saucepan, combine the sugar, skim milk powder and milk. Stir with a hand mixer or whisk until smooth.
- Make sure the skim milk powder is wholly dissolved into the mixture and that no lumps remain (any remaining sugar granules will dissolve over the heat). Stir in the cream.
- Clip a candy thermometer to the saucepan and set the pan over medium heat.
- Cook, stirring often with a rubber spatula and scraping the bottom of the pan to prevent sticking and burning, until the mixture reaches 110 degrees, 5 to 10 minutes. Remove the pan from the heat.
- Place the egg yolks in a medium bowl. While whisking, slowly pour in ½ cup of the hot milk mixture to temper the egg yolks.
- Continue to whisk slowly until the mixture is an even color and consistency, then whisk the egg-yolk mixture back into the remaining milk mixture.
- Return the pan to the stovetop over medium heat and continue cooking the mixture, stirring often, until it reaches 165 degrees, 5 to 10 minutes more.
- Transfer the pan to the prepared ice bath and let cool for 15 to 20 minutes, stirring occasionally. Pour the ice cream base through a wire-mesh strainer into a storage container and place in the refrigerator for 1 to 2 hours, or until completely cool.
- Now you're ready to make ice cream. Transfer the cooled base to an ice cream maker and churn it according to the manufacturer's instructions. Or, if you want, you can keep it in the refrigerator for up to 3 days before churning.
- After churning, serve immediately or harden in your freezer for 8 to 12 hours for a more scoopable ice cream.
Note: The easiest place to create an ice bath is in your kitchen sink. Fill the sink a quarter of the way with cold water and add a few handfuls of ice. Then gently lower the ice cream base into the ice bath. Let cool for 15 to 20 minutes, stirring occasionally. Make sure your base has cooled completely before churning.
Pour changer de la base Ben & Jerry que j'affectionne particulièrement.
Ingrédients
- 500 g de marrons glacés (ou marrons au sirop)
- 5 marrons supplémentaires
- 25 cL de lait
- 15 cL de crème liquide type fleurette
- 1 cuillère à soupe de rhum (facultatif)
Instructions
- Utiliser des ingrédients bien froids.
- Mélanger le lait, la crème et le rhum. Couper grossièrement les 500 g de marrons et les ajouter au mélange.
- Mixer finement jusqu’à ce que ce soit parfaitement homogène.
- Mettre à turbiner.
- Pendant ce temps, couper les 5 marrons restant en cubes d’environ 1 cm de côté. Les ajouter à la glace en fin de turbinage.
Ingrédients
- 30 cL de lait entier
- 20 cL de crème
- 85 g de sucre
- 3 jaunes d’œufs
- 180 g de beurre de cacahuète (Dakatine ou équivalent)
Instructions
- Mettre le lait, la crème et le beurre de cacahuète dans une casserole.
- Faire chauffer lentement en remuant de temps en temps pour faire dissoudre le beurre de cacahuète.
- Couper le feu dès les premiers bouillons.
- Mettre le sucre et les jaunes d’œufs dans un saladier.
- Fouetter jusqu’à faire blanchir les jaunes d’œufs.
- Verser le contenu de la casserole sur les jaunes, tout en mélangeant pour homogénéiser.
- Remettre le tout dans la casserole et faire chauffer à feu moyen. Ne pas cesser de mélanger avec une cuillère en bois et stopper le feu dès que le mélange nappe la cuillère.
- Verser l’appareil dans le saladier et laisser refroidir quelques minutes.
- Réserver une nuit au réfrigérateur.
- Turbiner.
Ingrédients
- 35 cL de lait
- 15 cL de crème liquide (fleurette)
- 90 g de sucre
- 120 g de raisins secs
- 4 jaunes d’oeufs
- 1 gousse de vanille
- 2 cuillères (30 mL) à soupe de rhum (pour la glace)
- Du rhum en quantité suffisante (pour les raisins)
Instructions
- Dans une casserole, faire chauffer à la limite de l’ébullition le lait et la crème.
- Couper une gousse de vanille en deux et la raclée avec la pointe d’un couteau pour récupérer un maximum de grains de vanille. Mettre le tout (gousse et grains) dans la casserole. Laisser infuser une dizaine de minutes.
- Pendant ce temps, fouetter les jaunes d’oeuf avec le sucre dans un saladier jusqu’à blanchiment du mélange.
- Tout en filtrant, verser le lait sur les jaunes d’oeufs. Mélanger.
- Rincer la casserole et y remettre la préparation. Faire épaissir sur feu moyen tout en remuant. La préparation doit napper la cuillère. En fin de cuisson, ajouter les 2 cuillères à soupe de rhum et mélanger.
- Mettre les raisins dans un bol. Recouvrir de rhum.
- Laisser les deux préparations reposer une nuit au réfrigérateur.
- Mettre la préparation à turbiner.
- Pendant ce temps ,égoutter soigneusement les raisins réhydratés au rhum et les ajouter en fin de turbinage.
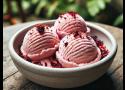
Ingrédients
- Fleurs d’hibiscus séchées : 50g
- Lait entier : 500ml
- Crème liquide : 250ml
- Sucre : 150g
- Jaunes d’œufs : 4
- Vanille : 1 gousse ou 1 cuillère à café d’extrait de vanille.
Instructions
- Infusion des fleurs d’hibiscus : Portez le lait à ébullition dans une casserole. Ajoutez les fleurs d’hibiscus séchées, couvrez et laissez infuser hors du feu pendant environ 20 minutes. Filtrez le mélange pour retirer les fleurs d’hibiscus et récupérez le lait infusé. Vous remarquerez que le lait aura pris une jolie teinte rose.
- Préparation de la crème anglaise : Dans un bol, fouettez les jaunes d’œufs avec le sucre jusqu’à ce que le mélange blanchisse. Remettez le lait infusé à chauffer doucement. Incorporez progressivement ce lait chaud au mélange d’œufs et de sucre, en remuant constamment pour éviter que les œufs ne cuisent. Versez ce mélange dans la casserole et faites cuire à feu doux en remuant constamment avec une spatule en bois jusqu’à ce que la crème nappe la spatule. Ne laissez pas bouillir.
- Incorporation de la crème et de la vanille : Une fois la crème anglaise épaissie, retirez-la du feu et ajoutez la crème liquide ainsi que les graines de la gousse de vanille ou l’extrait de vanille. Mélangez bien et laissez refroidir complètement. Pour accélérer le processus, vous pouvez placer le mélange au réfrigérateur.
- Turbiner la glace : Une fois le mélange bien froid, versez-le dans une sorbetière et laissez turbiner selon les instructions de l’appareil, généralement 20 à 30 minutes. La glace doit être onctueuse et bien prise. Si vous n’avez pas de sorbetière, vous pouvez verser le mélange dans un récipient adapté et le placer au congélateur en remuant toutes les 30 minutes pendant environ 3 heures pour éviter la formation de cristaux.
- Conservation et service : Transférez la glace dans un récipient hermétique et laissez-la prendre au congélateur pendant au moins 2 heures avant de servir. Servez la glace aux fleurs d’hibiscus séchées dans des coupes ou des cornets, décorée éventuellement de quelques fleurs séchées d’hibiscus pour une touche esthétique supplémentaire.
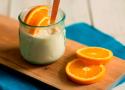
Ingredients
- 300ml Double cream
- 300ml Whole milk
- 6 Large free range egg yolk(s)
- 110g Silver Spoon Caster Sugar
- 1 Orange (zest of)
- 2 tbsp Orange juice (freshly squeezed)
- 2 tbsp Cointreau
Instructions
- Heat the cream, milk and orange zest in a large pan until just boiling.
- Take off the heat and leave to infuse for 10-15 minutes.
- Whisk the egg yolks and sugar until pale and thick. Whisk the cream mixture into the eggs, then pour back into the pan and return to the heat.
- Add the orange juice and Cointreau and cook until the custard has thickened, stirring continuously. Taking care not to boil.
- Leave to cool, then chill in the fridge for 4 hours or overnight.
- Churn in an ice cream maker OR place in the freezer, stirring every hour until frozen.
Ingrédients
- 30 cL de lait entier
- 20 cL de crème liquide
- 75 g de sucre
- 4 jaunes d’œufs
- 1 gousse de vanille
- Du kirch
- 130 g de fruits confits (choisissez le mélange de fruits confits qui vous donne le plus envie !)
Instructions
- Hacher grossièrement les fruits confits avec un gros couteau pour obtenir des petits dés.
Les mettre dans un bol et recouvrir de kirch. Filmer et réserver au réfrigérateur. - Mettre le lait et la crème dans une casserole.
- Couper la gousse de vanille en deux dans la sens de la longueur. Racler les graines avec la pointe d’un couteau et mettre le tout (gousse + graines) dans la casserole.
- Faire chauffer doucement et couper le feu dès le début de l’ébullition. Laisser infuser une quinzaine de minutes.
- Pendant ce temps, mettre les jaunes d’œufs et le sucre dans un saladier.
- Fouetter jusqu’à ce que le mélange devienne blanc et mousseux.
- Tout en filtrant pour retirer la gousse de vanille, verser le mélange lait / crème sur les jaunes fouettés.
- Homogénéiser avec le fouet.
- Remettre la préparation dans la casserole et faire chauffer lentement, tout en remuant, pour que la préparation épaississe légèrement. Elle doit napper la cuillère.
- Remettre le tout dans le saladier et laisser tiédir.
- Réserver une nuit au réfrigérateur.
- Mettre la préparation à turbiner.
- Pendant ce temps, égoutter les fruits confits.
- Les ajouter dans la sorbetière lorsque la glace commence à prendre.
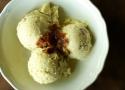
Ingredients
- 1 cup whole milk
- 2 cups heavy cream
- 1/2 cup sugar (100g)
- a pinch of salt
- 1 cup whole bean coffee (80g)
- 4 large egg yolks
- 4 Tbs maple syrup (the real stuff, not that Aunt Jemima shit)
- 4 strips of candied bacon, coarsely chopped
Instructions
- In a medium saucepan over medium heat, mix together the milk, 1 cup of cream, the sugar, salt and coffee. Stir until sugar is dissolved. Cover with a lid and remove from heat. Let steep for 1 hour.
- When the coffee mix has finished steeping, put it back on medium heat until warmed again. Strain the coffee beans and discard. Slowly add the heated coffee-cream into the egg yolks, whisking constantly. Return it all to the pan and cook, stirring constantly and scraping the bottom of the pan, until thick enough to coat the back of a spoon, about 12 minutes.
- Strain the custard and stir over an ice bath until cool. Refrigerate until well chilled, or up to three days. When chilled, whisk in the maple syrup.
- Churn the custard according to your ice cream maker’s instructions. At the end of churning, toss in the candied bacon bits.
- Store, covered in plastic wrap, in an airtight container, for up to 1 month.
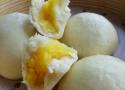
Ingrédients
Farce à la crème-œuf
- 1 œuf
- 30 g de beurre mou
- 35 g de sucre glace
- 20 g de custard powder
- 18 g de fécule de maïs
- 45 g de lait entier
Pâte
- 150 g de farine T 45
- 1,5 g de levure boulangère sèche
- 80 à 85 g d'eau tiède
- 10 g de sucre
- 1 pincée de sel
- 1 c. à café d'huile végétale
Instructions
Pâte
- Mélangez l'eau et la levure, laissez mousser pendant 5 à 10 min.
- Mélangez tous les ingrédients à sec, versez le mélange levure-eau petit à petit.
- Pétrissez pendant 5 min pour avoir une boule lisse et homogène.
- Ajoutez l'huile, pétrissez de nouveau.
- Laissez pousser dans un endroit doux (en couvrant d'un linge humide) et pas trop sec pendant 1 heure.
Farce
- À préparer de préférence la veille et conserver au frais.
- Battez l'oeuf.
- Mélangez le beurre mou avec du sucre, ajoutez l’œuf en plusieurs fois, mélangez bien entre chaque ajout d’œuf.
- Tamisez la fécule et la custard powder, ajoutez dans la préparation précédente, mélangez bien.
- Ajoutez du lait.
- Faites cuire ce mélange au micro-onde pendant 1 min 15, sortez toutes les 20 secondes pour bien mélanger.
- Passez au tamis pour avoir une texture plus fine (pas obligatoire).
- Réservez la farce au frais.
Pliage et cuisson
- Sortez la pâte, dégazez, formez en forme de boudin.
- Divisez en 6 morceaux équivalents.
- Abaissez chaque morceau en petite galette, le bord doit être plus fin que le centre.
- Mettez une belle c. à café de farce au centre de la galette, pliez pour avoir la forme d'un baozi.
- Placez les petits pains dans la panier vapeur, côté plis vers le bas.
- Laissez pousser pendant 30 à 40 min.
- Mettez le panier sur une casserole ou un wok pré-rempli d'eau froide.
- Faites cuire à la vapeur pendant 12 min à partir d'ébullition (départ d'eau froide).
Ingredients
Topping
- ¼ cup (60 g) salted butter, melted
- ½ cup (100 g) brown sugar, light or dark (I usually use light) tightly packed
- 10 pineapple slices, patted dry (a 20oz can is typically enough)
- maraschino cherries
Vanilla Cake
- ½ cup (115 g) unsalted butter, softened to room temperature
- ¾ cup (150 g) granulated sugar
- 2 large eggs, room temperature preferred
- 1 teaspoon vanilla extract
- 1 ½ cups (195 g) all-purpose flour
- 1 ½ teaspoons baking powder
- ¼ teaspoon salt
- ½ cup (120 ml) whole milk, room temperature preferred
Instructions
- Preheat oven to 350F (175C)
- Pour melted butter into 9.5-10" pie plate or deep cake pan, make sure it entirely covers the bottom of the pan and use a spoon or spatula to grease the sides of the pan.
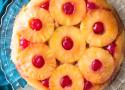
- Sprinkle brown sugar evenly over butter mixture. Arrange pineapple slices over the bottom of the pan, slice leftover slices in half and arrange up the sides of the pan, as seen in photo.
- Place cherries in center of pineapple rings and as desired in empty spaces. Set aside.
- To prepare vanilla cake, beat butter and sugar in medium-sized bowl until creamy and well-combined.
- Add eggs, beating one at a time until combined.
- Stir in vanilla extract.
- In a separate bowl, whisk together flour, baking powder, and salt.
- Alternate adding flour and milk to the wet ingredients, starting and ending with flour and mixing until just combined after each addition (I prefer to do this part by hand with a spatula to be sure not to overmix).
- Pour batter evenly over prepared cake pan over the pineapple/cherry layer.
- Bake on 350F (175C) for 30 minutes. At the 30 minute mark, loosely cover with foil and continue to bake (still on 350F/175C) for another 15 minutes, until a toothpick inserted in the center comes out mostly clean with few crumbs (total cook time for cake will be 45 minutes).
- Allow to cool for 10-15 minutes and then carefully invert cake onto serving platter (careful, it will still be very hot!).
- Allow to cool before cutting and enjoying, but don’t wait too long as this cake tastes wonderful (best!) warm from the oven!

Ingredients
- 3 large eggs, at room temperature
- 3/4 cup (94g) all-purpose flour
- 3/4 cup (180ml) whole milk, at room temperature (or nondairy)
- 1 teaspoon lemon zest*
- 2 Tablespoons (25g) granulated sugar
- pinch salt
- 1/2 teaspoon vanilla extract
- 3 Tablespoons (43g) unsalted butter
Toppings
- 2 Tablespoons confectioners’ sugar, for sifting
- optional toppings: berries, whipped cream, maple syrup, and/or strawberry sauce
Instructions
- Place the eggs in a blender and blend on medium-high speed until frothy and fluffy, about 45 seconds. Add flour, milk, lemon zest, sugar, salt, and vanilla, and blend until combined. The batter is thin. Set aside and allow to rest for 15 minutes at room temperature, or cover and refrigerate it for up to 24 hours. (No need to bring to room temperature before baking.)
- Preheat the oven to 400°F (204°C). Place butter in a 10-inch oven-safe skillet (or any 3-quart baking dish), and place in the oven for just 5 minutes to melt the butter. (Be sure not to leave it in the oven to burn!) Remove from the oven and use a pastry brush to spread the melted butter up the sides of the pan.
- Pour the batter into the center of the hot pan. No need to swirl it around. Place it in the oven and bake for 15 minutes. Keeping the Dutch baby pancake in the oven, reduce the temperature to 350°F (177°C) and bake for 10 more minutes, or until the edges and center are browned.
- Remove from the oven and cool for 5 minutes before adding desired toppings. Slice and serve.
- The pancake is best enjoyed right away, but you can cover and store leftovers in the refrigerator for up to 5 days, or in the freezer for up to 2 months.
C'est vraiment très bon. Je vais en refaire !
Ingredients
- 125 g (4.4 oz) dark chocolate (from 50% to 70% cocoa). The higher the percentage of cocoa, the more intense the chocolate flavor.
- 185 g (6.5 oz) whole blanched almonds or almond flour
- 125 g (1 stick) unsalted butter
- 3 medium eggs, at room temperature
- 125 g (7 tablespoons) granulated sugar
- powdered sugar, for decoration
Instructions
- Melt the butter and chocolate in a double boiler and set aside.
- Meantime, separate the yolks from the whites and let the yolks aside for the moment.
- Place the whites in a bowl and beat them up with an electric mixer or with a stand mixer until stiff. Set aside: they will be added to the torta caprese mixture at the end.
- Beat the egg yolks with the sugar until you get a fluid and pale yellow cream. It takes about 5 minutes.
- Now if you are using whole blanched almonds, you must first mince them finely and reduce them to flour.
- Add the almond flour little by little to the yolks and sugar cream and mix well.
- Then add the melted chocolate to the mixture and stir.
- Add the beaten egg whites, stirring with a wooden spoon from the bottom up.
- Grease and flour a 20 cm/8 inch non-stick springform pan with removable bottom, then pour the torta caprese mixture.
- Level well with a spoon.
- Then preheat the oven to 350°F (180°C).
- Bake in a static oven on the middle rack for about 30 minutes.
- At the end, remove from the oven and let the cake cool in the pan for at least 30 to 40 minutes.
- Let it cool completely on a cooling rack so that it chills quickly without moistening the bottom of the cake.
NOTE -- Baking times may vary from oven to oven, but be aware that torta caprese should be moist inside. So usually, for a 20 cm/8 inch baking pan, the baking time never exceeds 35 to 38 minutes.
Ingrédients
- 250 g de farine de blé
- 80 ml de lait
- 2 oeufs
- 80 g de sucre de canne
- 1/2 sachet de levure de boulanger (soit 10 g sec ou 20 g de levure fraîche)
- 30 g de crème fraîche
- 10 g de beurre
- 1 pincée de sel
Instructions
- Diluez la levure dans le lait et laissez reposer 5 minutes.
- Fouettez les oeufs et 30 g de sucre en poudre.
- Disposez la farine dans un grand saladier. Creusez un puits, ajoutez le mélange oeufs-sucre et le sel.
- Pétrissez d'une main en versant petit à petit le lait. Quand la boule de pâte est élastique et homogène, continuez de la malaxer sur le plan de travail en la soulevant pour incorporer de l'air.
- Mettez le pâton dans le saladier, couvrez avec un torchon et laissez lever dans une pièce chaude, jusqu'à ce qu'il triple de volume.
- Beurrez une plaque à pâtisserie. Étalez la pâte avec la paume de la main pour lui donner une forme de galette. Couvrez avec un torchon. Laissez lever 45 minutes dans une pièce chaude.
- Préchauffez le four à 200°C. Badigeonnez la surface avec la crème fraîche. Saupoudrez avec le reste de sucre. Faites cuire pendant 15/20 minutes jusqu'à ce que la galette soit dorée sur les bords.
- Sortez-la du four et laissez refroidir sur une grille.
Ingredients
- 2 large eggs
- 1/2–1 tbsp orange zest
- 2 tbsp (30 g) fresh orange juice
- 1/3 cup (73 g) olive oil
- 1 tsp (5 g) vanilla extract
- 1/4 cup (85 g) honey
- 2 cups (192 g) almond flour
- 1/4 cup (30 g) almond meal
- 1/2 tsp (2 g) baking powder
- 1/2 tsp (2.5 g) baking soda
Instructions
- Preheat oven to 350°F (175°C). Grease 6”x3”3” loaf pan or a 8-inch round cake pan.
- In a large bowl, whisk the eggs until lightly frothy. Add the orange zest, orange juice, olive oil, vanilla, and honey. Whisk until smooth and fully combined.
- In a separate bowl, combine the almond flour, almond meal, baking powder, and baking soda.
- Gently fold the dry ingredients into the wet mixture until just incorporated. Do not overmix.
- Pour the batter into the prepared pan and smooth the top with a spatula.
- Bake for 30–35 minutes, or until a toothpick inserted into the center comes out clean.
- Allow the cake to cool completely in the pan before slicing.
Ingredients
- 2 1/4 cups (313 g) all-purpose flour
- 1 1/2 tsp baking powder
- 1 tsp baking soda
- 1 tsp cornstarch
- 3/4 cup (150g) dark brown sugar
- 1/4 cup (50g) granulated sugar
- 2 cold eggs
- 2 teaspoons vanilla extract
- 1 cup (225g) unsalted butter, slightly softened
- Pinch of salt
- 1 1/2 cups (250g) semi-sweet chocolate chips
- 1 cup (200g) dark chocolate chips
Instructions
- Preheat oven to 350°F (180°C). Line a baking sheet with parchment paper.
- Whisk together flour, baking powder, baking soda, and cornstarch in a medium bowl. Set aside.
- Cream together brown sugar, granulated sugar, and butter in a large bowl until light and fluffy.
- Beat in eggs one at a time, followed by vanilla extract, for 3-4 minutes until the batter turns pale and the sugar is well incorporated.
- Gradually mix in dry ingredients until just combined, being careful not to overmix.
- Stir in chocolate chips.
- Scoop 2 tablespoon-sized balls of dough onto the prepared baking sheet. Leave the dough balls slightly rough and stacked, with a rustic texture. Place 4 cookies on each pan, leaving 4 inches of space between each one. Top with extra chocolate chips.
- Bake for 13-16 minutes on middle rack or until edges are lightly golden brown.
- Remove from oven and let cool on the baking sheet for 5 minutes before transferring to a wire rack to cool completely.
Ingredients
Rhubarb layer
- softened unsalted butter, for greasing the cake pan
- 50 g (¼ cup) caster/superfine or granulated sugar
- 450 g (1 pound) rhubarb, about 8-10 stalks, trimmed (For the prettiest end result, use rhubarb stalks that are as red as possible.)
Vanilla cake
- 150 g (¾ cup) caster/superfine or granulated sugar
- 85 g (¾ stick) unsalted butter, softened
- 1 tsp vanilla bean paste (or 2 tsp vanilla extract)
- 3 US large/UK medium eggs, room temperature
- 180 g (1½ cups) plain gluten free flour blend (I used Doves Farm Freee gluten free plain white flour that doesn't have any xanthan gum added. You can also mix your own gluten free flour blend using this recipe. Note that for this homemade blend, 1 cup = 150g, so ideally use a digital food scale and the weight measurements for best results.)
- 50 g (½ cup) almond flour
- 1½ tsp baking powder
- ½ tsp xanthan gum (Omit if your gluten free flour blend already contains xanthan gum or other binders.)
- ¼ tsp salt
- 115 g (½ cup) full-fat plain or Greek-style yoghurt, room temperature
- 150 g (⅓ pound, about 1½ cups) rhubarb stalks, cut into roughly ½-inch (1cm) pieces
Instructions
Rhubarb layer
- First, trim the rhubarb stalks to make sure that they fit snugly into a 9-inch (23cm) cake pan. I recommend doing a test run, where you arrange them on the bottom of the pan before you line it with parchment/baking paper. That way, you’ll be confident that all the rhubarb stalks fit snugly on the bottom of the pan, without having to do any additional trimming later on.
When it comes to the rhubarb topping, you can make the “pattern” on top as simple or as complex as you want. I just cut the rhubarb stalks to size and arranged them in a simple parallel fashion (see blog post for photos). - Adjust the oven rack to the middle position and pre-heat the oven to 350ºF (180ºC). Lightly butter a 9-inch (23cm) round cake pan and line its bottom with a round of parchment/baking paper. Generously butter the parchment/baking paper as well.
Tip: Don't use a springform pan, as some of the rhubarb juices could leak out during baking. - Sprinkle the sugar in an even layer on the bottom of the prepared cake pan.
- Arrange the rhubarb stalks on top of the sugar so that they completely cover the bottom of the pan. Make sure that they're packed together as tightly as possible (that’ll prevent the batter from getting underneath them and it’ll give you the prettiest end result).
Set aside until needed.
Vanilla cake
- In a large bowl, cream together the sugar, butter and vanilla until pale and fluffy. You can do this by hand with a large balloon whisk, using a stand mixer fitted with the paddle attachment or a hand mixer fitted with the double beaters.
- Add the eggs, one at a time, mixing well after each addition, until well combined.
Tip: It's very important that your eggs are at room temperature and that you add them one at a time. This way, you'll maintain the emulsion of the butter as much as possible. If you forgot to take your eggs out of the fridge, place them in warm water for 5-10 minutes before using them. - In a separate bowl, whisk together the gluten free flour blend, almond flour, baking powder, xanthan gum and salt.
- Add half of the dry ingredients to the butter-sugar mixture, and whisk well to combine. Add the yoghurt and whisk until smooth. Finally, add the rest of the dry ingredients and whisk well until you get a smooth cake batter with no flour clumps.
Tip: This alternating way of adding dry and wet ingredients helps to maintain the emulsion of the butter in the cake batter as much as possible. When alternating dry and wet ingredients, make sure to always end with the dry. - Add the chopped rhubarb and mix well until it's evenly distributed throughout the batter.
- Dollop the batter on top of the rhubarb layer and smooth it out into an even layer.
- Bake at 350ºF (180ºC) for about 55-60 minutes or until the cake is golden brown on top, well risen and an inserted toothpick or cake tester comes out clean. If the cake starts browning too much or too quickly, cover it with a sheet of aluminium foil (shiny side up) and continue baking until done.
Inverting & serving the upside down cake
- Allow the cake to cool in the cake pan for 10-15 minutes, then carefully invert it onto a large plate while it's still hot. (Run a knife or a small offset spatula along the edges of the cake to loosen it from the pan if necessary.)
Tip: Don’t cool it for longer than that, otherwise your cake can end up sticking to the baking pan when you try to remove it. - Serve the cake either warm or cooled completely to room temperature. It pairs beautifully with a scoop of vanilla ice cream or a dollop of lightly sweetened vanilla whipped cream.
Ingredients
- 135 g salted butter, (US = just over ½ cup, or just over 1 stick)
- 55 g cocoa powder, (plus 1 tablespoon) unsweetened, plus extra for sprinkling
- 350 g sugar
- 110 g plain flour, (actually, just less than a full cup, about 0.85 cups)
- 1 teaspoon vanilla extract
- 3 eggs, lightly whisked
Instructions
- Pre-heat the oven to 180C/355F. Line the bottom of a 7-9 inch (see note below) springform cake pan with a circle of baking paper, then grease the paper and the sides of the pan.
- Melt the butter in a medium saucepan, then take off the heat and set aside.
- Add the cocoa, sugar, flour and vanilla to the butter and stir a little. Then add the eggs and stir everything together until well combined.
- Pour the mixture into the cake pan and bake for 20 to 25 minutes (see note below) until the top is set but the centre is still gooey (the top should be firm but crack under a little pressure from your finger).
- Let the cake cool in the pan, then run a knife between the pan and the cake to loosen it. Turn out onto a plate or cake stand (see note below). Dust generously with cocoa powder and serve warm with ice cream or cream.
Note pour la version sans gluten, il suffit de remplacer la farine par de la poudre d'amandes.
C'est très facile à faire et c'est excellent. À refaire !
Ingrédients
- 500g mascarpone
- 130g sucre
- Biscuits à la cuillère
- 210g blanc d’œuf
- 40cl limoncello
- 30cl eau
- Zestes de citron non traité
Instructions
- Fouetter le mascarpone avec 80g de sucre
- Fouetter le blanc d’œuf avec 2 cuillères de sucre glace
- Mélanger les 2 préparations délicatement
- Mélanger et fouetter le limoncello avec l’eau et les 50g restant de sucre
- Disposer une couche de crème au fond du plat, imbiber les biscuits dans la préparation au limoncello et les disposer dans le plat
- Disposer une nouvelle couche de crème et recommencer avec les biscuits pour un deuxième et dernier étage de biscuit imbibé dans la préparation au limoncello
- Ajouter la dernière couche de crème, l’étaler délicatement
- Pour le service, saupoudrer de fins zestes de citron à l’aide d’un zesteur.