Ingredients
Cake
- 1 cup plus 1 1/2 tablespoons (250 grams) unsalted butter (2 sticks plus 1 1/2 tablespoons), at room temperature and cut into cubes, plus extra for greasing the pan
- 7 ounce (200 grams) dark chocolate (70% cocoa solids), chopped into 3/4-inch/2-centimeter pieces
- 1 1/2 teaspoon instant coffee granules, dissolved in 1 1/2 cups/350 milliliters boiling water
- 1 1/4 cup (250 grams) granulated sugar
- 2 large eggs, lightly beaten
- 2 teaspoon vanilla extract
- 1 3/4 cup plus 2 tablespoons (240 grams) self-rising flour *(If you can't find self-rising flour, whisk together 240 grams AP flour and 2 3/4 teaspoons baking powder.)
- 1/3 cup (30 grams) Dutch-processed cocoa powder, plus 1 1/2 teaspoons, for dusting
- 1/4 teaspoon kosher salt
Chocolate Ganache (optional)
- 7 ounce (200 grams) dark chocolate (70% cocoa solids), broken or chopped roughly into 3/4-inch/2-centimeter pieces
- 3/4 cup (180 milliliters) heavy cream
- 1 tablespoon light corn syrup
- 1 tablespoon unsalted butter, at room temperature
Espresso Cinnamon Mascarpone Cream (optional)
- 1 1/2 cup plus 1 tablespoon (375 milliliters) heavy cream
- 3/4 cup (190 grams) mascarpone
- 1/2 vanilla pod, scraped
- 2 1/2 teaspoon finely ground espresso
- 3/4 teaspoon ground cinnamon
- 2 1/2 tablespoon confectioners’ sugar
Instructions
- Heat oven to 350°F (170°C). Grease a 9-inch round springform pan with butter and line with parchment paper, then set aside.
- Make the cake: Place butter, chocolate, and hot coffee in a large heatproof bowl and mix well until everything is melted, combined and smooth. Whisk in sugar by hand until dissolved. Add eggs and vanilla extract and whisk again until thoroughly combined and smooth. Sift flour, cocoa powder, and salt together into a bowl. Whisk this into the melted chocolate mixture. The batter here is liquid, but don’t think you have missed something; this is how it should be.
- Pour batter into the prepared pan and bake for 1 hour, or until the cake is cooked and a skewer inserted into the center comes out clean or with just a few dry crumbs attached. The top will form a crust and crack a little, but don’t worry, this is expected. Leave the cake to cool for 20 minutes before removing from the pan, then set aside until completely cool.
- Make the chocolate ganache, if desired: Place chocolate pieces in a food processor; process until fine and set aside. Combine cream and corn syrup in a small pan and place over medium-high heat. As soon as bubbles begin to appear (just before it comes to a boil), remove from the heat. Get the food processor running again, with the chocolate still inside, and pour in the hot cream in a steady stream. Process for 10 seconds, then add butter. Continue to process until mixture is shiny and smooth. (You can also make the ganache by hand; just make sure the chocolate is chopped fairly finely before adding the cream mixture. Stir with a wooden spoon until almost melted, then add the butter. Stir again until the ganache is smooth.)
- Use a rubber spatula to scrape the ganache into a bowl and cover with plastic wrap, with the plastic actually touching the top of the ganache. Set aside until it has set to the consistency you want. If you want a thin layer to spread over the cake, it can be poured over while liquid so that you get an even, light and shiny coating. For a thicker ganache with a spreading consistency, leave it for about 2 hours at room temperature. (The ganache can be stored at room temperature, providing it’s not too warm, for 3 days or kept in the fridge for up to 2 weeks. It can also be frozen, although it will lose a bit of its shine when defrosted.)
- Make the espresso cinnamon mascarpone cream, if desired: Place all the ingredients in the bowl of an electric mixer fitted with the whisk attachment. Beat for 1 to 2 minutes, or until soft peaks form.
- Peel the parchment from the cake and discard. Transfer to a serving platter and spread the ganache, if using, on top of the cake. Slice into wedges, divide the cake among plates and, if using, spoon the mascarpone cream alongside. With or without icing, the cake will keep well for 4 to 5 days in an airtight container.

Ingredients
For the chocolate based version:
- 70g rice krispies / rice bubbles
- 50g desiccated coconut
- 20g powdered sugar
- 4 tsp cocoa powder (any kind is fine, I used dutch process)
- Pinch of salt
- 160g chopped chocolate (I used half milk and half dark)
- 25g refined coconut oil
For the Cocoa / Coconut Oil based version:
- 70g rice krispies / rice bubbles
- 70g powdered sugar
- 50g desiccated coconut
- 2 Tbsp Cocoa (any kind is fine, I used dutch process)
- Pinch of salt
- 125g refined coconut oil, melted
Instructions
For the chocolate based version:
- Grease an 8" (20cm) square pan and line with a piece of parchment that extends over the ends slightly to help remove the slice once set.
- In a large bowl, combine the rice bubbles, coconut, powdered sugar, cocoa powder, and salt.
- In a heatproof bowl set over a pot of simmering water (make sure the bowl does not touch the water), or in a microwave, melt the chocolate. Add the coconut oil and mix until well combined. The heat of the chocolate should be enough to melt the coconut oil, but re-warm very briefly to help incorporate if needed.
- Pour the chocolate mixture into the bowl of dry ingredients, and mix well with a spatula until well combined.
- Transfer to the prepared pan and spread out and then use an offset spatula or spoon to spread smooth.
- Refrigerate until set, about 45 minutes to an hour, then cut or break into pieces. Store in the fridge in an airtight container.
For the Cocoa / Coconut Oil based version:
- Grease an 8" (20cm) square pan and line with a piece of parchment that extends over the ends slightly to help remove the slice once set.
- In a large bowl, combine rice bubbles, powdered sugar, desiccated coconut, cocoa, and salt. Add the coconut oil and mix well to combine.
- Transfer to the prepared pan and spread out and then use an offset spatula or spoon to spread smooth.
- Refrigerate until set, about 45 minutes to an hour, then cut or break into pieces. Store in the fridge in an airtight container.
Ingredients
- 150g rice bubbles or rice krispie cereal
- 180g granulated sugar
- 180g unsalted butter, cold from the fridge is fine
- 60g honey
- ½ tsp vanilla bean paste, optional
- Pinch of salt (leave out if using salted butter)
Instructions
- Grease and line an 8" (20cm) square pan with parchment paper, leaving the parchment extending over the sides of the pan to form a sling. Secure with binder clips if desired.
- Place the rice bubbles into a large bowl.
- In a heavy bottomed saucepan, combine the sugar, butter, and honey.
- Place over medium heat and heat, stirring often with a spatula, until the butter melts and the mixture comes to a boil.
- Reduce the heat slightly and continue to cook the mixture for 2 and a half minutes, stirring with a rubber spatula.
- Remove from the heat and add the vanilla and salt and mix to combine, then pour the caramel mixture over the rice bubbles.
- Stir well until the rice bubbles are evenly coated.
- Transfer the mixture to the prepared pan and smooth down with a spatula. If you would like to get it extra flat you can take a piece of parchment paper and use it to flatten down the top surface.
- Leave the rice bubble slice to set either at room temperature or in the fridge. When it is close to being cool (after about 30 to 45 minutes), slice into pieces using a sharp knife.
- Store either in the fridge or at room temperature in an airtight container. Rice bubble slice will keep for a few days but it is best eaten in the first 1-2 days.
Ingrédients
- 500g de chocolat
- 450g de beurre
- 650g de sucre
- 650g d’œufs (environ 13 œufs)
- 200g de farine
Instructions
- On commence par faire fondre notre beurre.
- Pendant ce temps, on mélange le sucre, la farine, et on ajoute les œufs.
- Une fois que le beurre est bien fondu et chaud, on le verse dans le chocolat.
- On mélange jusqu’à ce que le chocolat soit complètement fondu.
- On verse le chocolat et le beurre dans le mélange.
- On poche la pâte directement dans des moules individuels.
- L’astuce, c’est que ça tu vas pouvoir le conserver dans ton frigo facilement 15 jours et les cuire quand tu veux pour le goûter des enfants.
- Cuisson : 10 minutes, 170 degrés Celsius.
Moins vous cuisez, plus ça sera moelleux au milieu. Voir coulant.
Si tu veux un cœur ultra coulant : 8 minutes.
Si tu veux moelleux partout : 12 minutes.
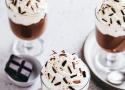
Ingrédients
Crème au chocolat
- 480 g lait demi écrémé
- 120 g crème liquide entière 30%mg
- 15 g sucre cassonade
- 30 g maïzena
- 90 g chocolat noir pâtissier à 65-70% cacao
- 70 g chocolat au lait pâtissier
Chantilly mascarpone
- 200 g crème liquide entière 30%mg très froide
- 100 g mascarpone très froid
- 25 g sucre glace
- 0,5 cc extrait naturel de vanille
Préparation
Crème au chocolat
- Dans un bol, verser la maïzena. Délayer en ajoutant 150g de lait petit à petit en fouettant bien pour ne plus avoir de grumeaux.
- Dans une casserole, verser le reste de lait (330g), la crème liquide et le sucre cassonade. Commencer à chauffer à feu doux.
- Ajouter rapidement la maïzena délayée. Continuer de fouetter tout en chauffant le mélange.
- Avant ébullition (ne pas chauffer trop fort), ajouter le chocolat noir et le chocolat au lait en morceaux pour qu'il fonde. Ne pas cesser de fouetter jusqu'à ce que le crème se forme, environ 4-5 minutes à feu doux.
- Verser le mélange dans un verre doseur puis dans 4 verres à dessert en les remplissant aux 3/4 pas plus (vous pourrez peut-être faire plus de verres selon leur taille).
- Laisser tiédir puis placer au réfrigérateur 2 heures.
Chantilly mascarpone
- Dans un large récipient ou bol du robot, verser la crème liquide très froide, le mascarpone, le sucre glace et la vanille. Commencer à fouetter vitesse moyenne jusqu'à ce que la chantilly se forme. Une fois que la chantilly se forme, bien lisse, elle est prête. Ne pas insister au risque qu'elle graine.
- Verser la chantilly dans une poche à douille munie d'un gros embout cannelé (voir matériel ci-dessus). Placer la poche à douille au dessus de la crème au chocolat froide. Dessiner un cercle de l'extérieur vers l'intérieur du verre, en faisant plusieurs tours pour créer un joli dôme de chantilly.
- Râper quelques copeaux de chocolat gratter la tranche d'une tablette de chocolat à l'aide d'un économe. Déposer les copeaux sur la chantilly.
- Garder les verres au réfrigérateur jusqu'à dégustation.
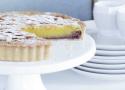
Ingrédients
Pâte sucrée
- 150 g de beurre mou
- 100 g de sucre glace
- 50 g de poudre d'amande
- 1 œuf battu
- 250 g de farine
Garniture
- 125 g de sucre glace
- 100 g de beurre mou
- 3 oeufs
- 1 c. à c. d'extrait naturel d'amande amère
- 150 g de poudre d'amande
- 6 c. à s. de confiture de framboise
- 40 g d'amandes efillées
Instructions
- Mettez le beurre mou, le sucre et la poudre d’amande dans la cuve du robot équipé de la feuille. Faites fonctionner l’appareil pour travailler ce mélange jusqu’à ce qu’il soit homogène. Ajoutez l’œuf, puis la farine et battez jusqu’à ce que la pâte forme une boule. Enveloppez-la dans du film alimentaire et réservez-la 1 h au réfrigérateur.
- Préchauffez le four à 160 °C (th. 5) en chaleur ventilée.
- Sur un plan de travail fariné, abaissez la pâte sur 4 mm d’épaisseur au rouleau à pâtisserie et garnissez-en un moule à tarte beurré de 25 cm de diamètre (de préférence à fond amovible). Cette pâte est très fragile et se casse facilement : il faut l’enrouler autour de votre rouleau à pâtisserie et la dérouler délicatement au-dessus du moule. Piquez le fond de tarte avec une fourchette et faites-le cuire pendant 12 à 15 min. Il doit à peine dorer. Laissez refroidir sur une grille.
- Abaissez la température du four à 150 °C (th. 5) en chaleur ventilée.
- Nettoyez la cuve et la feuille. Mettez le sucre et le beurre dans la cuve et rééquipez le robot de la feuille. Travaillez à petite vitesse la préparation jusqu’à ce qu’elle s’aère et éclaircisse. Ajoutez les œufs l’un après l’autre en battant bien entre chaque ajout. Incorporez l’amande amère et la poudre d’amande.
- Étalez la confiture de framboise sur le fond de tarte et recouvrez de crème aux amandes. Lissez et décorez avec les amandes effilées. Enfournez pour 20 à 25 min. La garniture doit avoir une jolie couleur doré clair. Laissez refroidir 15 min avant de démouler sur une grille. Saupoudrez de sucre glace avant de servir.
For an apple pie filling of tender but intact chunks of fruit, balanced perfectly between tart and sweet, not all apples are created equal.
I'm not much of a sweets person. Would I rather eat apple pie, or pizza pie? I often ask myself. You can guess what I reward myself with for answering that question correctly.*
*Okay, I'll tell you: It's pizza.
But fall is the one time of year that I genuinely look forward to baking pies, if only because I truly love apple-picking and need some way to get rid of all the excess apples I inevitably bring home. Being allergic to the raw fruit, and having a wife who thinks that nontropical fruits are not worth her time, I usually end up putting them in baked desserts.
Thing is, if you think that making an apple pie is as simple as picking any old apple up from the orchard or the supermarket, chopping it up, then tossing it with some sugar, cinnamon, perhaps a bit of cornstarch or flour to thicken up its juices, and baking it—well, then I can only assume that you've probably ended up baking a few bad pies in your lifetime. I know that I have.
What Makes the Best Apple Pie?
Like burgers and pizza, I believe pie to be one of the truly perfect foods. A culinary endpoint that can be improved incrementally, but not fundamentally. The true beauty of a pie comes from that magical interaction between crust and filling. One sweet, tart, and fruity, the other buttery and rich, they complement each other in flavor and texture and create a dish that is so much greater than the sum of its parts. As such, each part deserves respect.
What I want in my apple pie filling is, first and foremost, apples that are completely tender, yet stay in distinct chunks, with just a bit of al dente bite to them. Apples that turn to mush or, worse, are mealy can ruin a good pie for me.
I want those apples to be bound together with just a bare hint of a shiny glaze—not a torrent of juice that soaks the bottom crust or a sauce so thick that it becomes gloppy. (If you want that, you can get it at McDonald's, two for $1.) Apple pie should be sweet but never cloying, with a bare hint of cinnamon—this is an apple pie, after all, not a cinnamon pie. Finally, it should taste overwhelmingly of fresh apples, with a bright, clean flavor.
Picking the Right Type of Apple
Some apples just don't make good pies. They're too sweet, too mealy, or too tart. They disintegrate when you cook them, they release too much liquid, they just taste funny. The task in front of me was to find out which apples were up to the task of meeting the criteria I've laid out above—apples that would stay in distinct slices as they softened in the oven, and that struck the right balance of sweet and tart.
I rolled up my sleeves, made a few dozen batches of pie crust, then headed into the kitchen for some serious baking.
I started with two batches of 10 pies each, using 10 of the most common apple cultivars widely available in the United States. My apologies if your favorite apple type was left off this list—with over 7,500 known cultivars of apples, it's absolutely impossible to test every single one of them.
I figured with these 10 varieties, I should be able to find at least one that is available to everyone in the United States. (You overseas readers will have to do this research on your own.)
Here's what I tried:
- Braeburn
- Cortland
- Empire
- Fuji
- Golden Delicious
- Granny Smith
- McIntosh
- Red Delicious
- Rome
- Gala
To test them, I weighed out identical batches of each apple, cut them into quarter-inch-thick slices, and tossed them with sugar, just a touch of cinnamon, and a bit of cornstarch to thicken their juices. I purposefully left the cinnamon level very low and left out any other flavorings, like vanilla or lemon juice, in order to make sure that the apple flavor came to the forefront of each pie.
After baking them all off, I allowed them to cool and rest at room temperature for eight hours, to ensure that all of them had cooled down completely before I tasted them.
Color-Coding: How Browning in Apples Provides a Key to Texture
The array of textures and flavors that emerged was truly remarkable—even more varied than the differences between raw apples. Some, like Granny Smith and Empire, were great at keeping their shape, resulting in the tender-but-firm chunks I look for in good apple pie. But Granny Smiths are too tart, and Empires are too sweet. Other apples showed the opposite problem—decent flavor, but lacking in texture.
Unfortunately, I didn't find a single apple that was completely successful both in flavor and in texture.
But I did notice an interesting phenomenon when I accidentally left out a few bags of sliced apples for a bit too long.
I noticed as the apples were sitting that, depending on the variety, they browned to a different degree. Some, like Red Delicious, turned dark brown almost immediately. On the other hand, even after several hours, Granny Smiths showed only a hint of browning.
I arranged the apples on a plate in order of their level of browning.** What immediately struck me was that the least tart apple—the Red Delicious—was all the way at one end, while the most tart apple—the Granny Smith—was all the way at the other end.
** The order they are arranged in in the photograph is by level of browning relative to their original color, which is why some appear to be out of order.
This makes sense: Acid can inhibit the browning oxidation reactions that take place in fruit flesh when it is exposed to the air. For the same reason, cooks will store trimmed artichokes in acidulated water—it prevents browning.
But what did that mean for my fillings?
Well, there's another thing that acid does: It strengthens pectin, the cement-like glue that holds together the cells of fruit. So, looking at this arranged spectrum of apples is actually a pretty good indication of how well each fruit is going to hold up during baking. The farther to the right along the browning scale, the firmer the apple should be in the finished pie.
After arranging the baked pies in this same order and examining their fillings, turns out that this is indeed true. As you'll see in the photos below, the pies start off with very mushy fillings that get progressively firmer.
The Results
Here are all of my tasting notes. Afterward, I'll discuss how flavor is a factor.
Red Delicious
Flavor: Very sweet and one-dimensional.
Texture: Mealy flesh that turns to mush when cooked. Skin is thick and can be quite bitter. It may look good on the supermarket shelf for a long time, but is really only tasty when fresh-picked.
Pie Rating (1–10): 1. Completely mushy, with a very one-dimensional, cloying flavor. This reminded me of bad applesauce.
Best Uses: Eating out of hand, but only when very fresh.
McIntosh
Flavor: Sweet and mildly tart, with very white flesh.
Texture: Tender and slightly grainy.
Pie Rating (1–10): 3. It holds up better than, say, Red Delicious in pies, but still turns quite brown and mushy.
Best Uses: Applesauce or eating out of hand.
Braeburn
Flavor: Very sweet and mildly tart, with a unique citrusy aroma, similar to Granny Smith (of which it is a descendant). It becomes almost pear-like in flavor when it cooks.
Texture: Quite crisp and not much graininess. This texture seems to indicate that it indeed has a fairly strong structure of pectin.
Pie Rating (1–10): 7. It manages to soften fully while still retaining a good deal of texture when baked into an apple pie, due to its density. It could be slightly firmer when baked. Great golden color.
Best Uses: Pies, tarts, sauce, eating plain.
Rome
Flavor: Very mild when eaten out of hand; not very sweet, but develops in flavor when cooked.
Texture: It has a thick skin and very firm flesh. Though it has a reputation as a good baking apple, I found it unsuitable.
Pie Rating (1–10): 3. It turns dark brown and mushy as it bakes.
Best Uses: Sauce.
Fuji
Flavor: Quite sweet and fresh-tasting; not cloying.
Texture: Crisp flesh that stays good for a long time. The texture is almost pear-like in its moisture level and crunchiness.
Pie Rating (1–10): 2. The mild flavor does not get enhanced by baking. Watery but tart.
Best Uses: Eating out of hand.
Golden Delicious
Flavor: Sweet, tart, and almost buttery. Well balanced and rich, especially when cooked.
Texture: Very fresh and quite crisp, but can border on mealy when held for too long off the tree. When baked, it softens but retains a bit of texture.
Pie Rating (1–10): 8. The best flavor I got out of any single apple—this is what apple pie should taste like. I just wish it were slightly firmer.
Best Uses: Pies, sauce, apple butter.
Cortland
Flavor: Similar to that of a McIntosh, but much sweeter and more tart. Like its cousin, it's got very white flesh and a mild flavor.
Texture: Tender and slightly grainy.
Pie Rating (1–10): 4. It does quite well in pies texturally—softening without breaking down—but lacks in flavor.
Best Uses: Applesauce or eating out of hand.
Empire
Flavor: Very sweet and very tart, with a good level of juiciness, it's a cross between a McIntosh and a Red Delicious and shows flavors from both.
Texture: Despite its tender/grainy ancestry, its texture is quite firm and crunchy.
Pie Rating (1–10): 3. When baked, it has nice texture, but becomes cloyingly sweet. The acid is still present, but it's not enough to fight against the sugar level.
Best Uses: Eating out of hand.
Gala
Flavor: Mild and sweet, with a fair amount of tartness, it's one of the most popular apples around for its small size and good resistance to bruising.
Texture: Very thin-skinned, with a grainy texture.
Pie Rating (1–10): 6. When baked, it holds its shape, but the graininess can get overwhelming. I prefer my pie apples to be supple and smooth-textured.
Best Uses: Eating out of hand.
Granny Smith
Flavor: Very bright and tart, with a distinct citrus aroma and white wine–like nose.
Texture: Very firm, crunchy, and slightly grainy.
Pie Rating (1–10): 5. It holds up almost indefinitely when cooking. It has good brightness, but not much apple-y flavor.
Best Uses: Eating out of hand.
Now, some very astute readers might have noticed the one glaring exception here: Braeburns are low in acid, yet remain relatively firm as they bake. Why is this?
It all has to do with air. Braeburns are relatively dense apples, with not much air in between their cells. (You can see this if you drop one into a bucket of water along with, say, a McIntosh: Braeburns will float up much more slowly.) Apples with lots of air will collapse on themselves, like a deflating balloon, as they cook. Very dense apples—like Braeburns—will retain their shape better, even as they completely soften.
"...good texture alone does not make a good pie."
As you can see from my tasting notes, for the most part texture certainly does improve with more tartness, but good texture alone does not make a good pie.
Some folks suggest mixing two varieties of apple—one to provide texture, the other for flavor—but this never made sense to me. Say we combine some Granny Smiths with some Romes. What you end up with is a pie that's got nice firm chunks of apple interspersed with brown apple mush.
Nope, a single apple would have to do it for me, and the best ones in the running are the Golden Delicious and the Braeburn. They're the ones I use for all of my baking purposes.
The question is, since both Golden Delicious and Braeburns have great, well-balanced flavor, but neither is quite firm enough when baked, is there something I can do to improve upon their texture?
Indeed there is, and this article is riddled with hints on how to do it. To get the full explanation, check out the final installment in our pie-a-thon, where I'll describe how to turn your apples into the best pie filling they can be.
Are In-Season Apples Better?
You may think that the whole "local, seasonal" movement is getting a bit out of hand, and oftentimes, I tend to agree. But there are certain foods for which it truly makes sense. Apples for pies are one of them.
See, if you aren't buying apples directly from the orchard or picking them yourself in the fall, chances are that they've been in long-term storage. Apples are stored in atmospherically controlled rooms for up to 10 months before being put on supermarket shelves. This holding wreaks havoc with their cell structure, causing them to ripen at a vastly increased pace once they're taken out of storage.
This means that if you buy an apple from the supermarket in, say, June, most likely that apple was picked last October. Within a day or two, it goes from being crisp and bake-able to mushy and unsuitable for pies.
Tip
Don't bake apple pies except in the fall and early winter. If you absolutely must have that spring or summer pie, look for apples that are refrigerated, and get them into your own refrigerator as soon as possible. Do not let them sit at room temperature for too long before cooking them.
As for what to do with the leftovers of 20 pies? If you ask me nicely, I might share with you a great way to make friends with your neighbors.
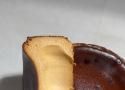
Ingredients
- 1,150 g full-fat cream cheese
- 260 g granulated sugar
- 350 g heavy cream
- 8 large eggs
- 45 g cornstarch
- 1 high-quality vanilla bean or 1 teaspoon vanilla bean paste
- 2 g salt
Instructions
- Preheat the oven to 220°C (430°F), conventional heat, and line a 24 cm cake ring or pan with parchment paper.
- Heat the heavy cream and vanilla in a saucepan until just below boiling.
- Place the sugar in a wide saucepan and caramelize gradually until it reaches a deep amber color.
- Carefully pour the hot cream into the caramel in several additions, stirring continuously. Cook until any hardened caramel has completely dissolved and the sauce is smooth.
- Add the salt and allow the caramel to cool until lukewarm.
- Mix the cream cheese on low speed until smooth. Add the lukewarm caramel and mix until fully combined.
- Gradually add the eggs, mixing on low speed to avoid incorporating air.
- Sift in the cornstarch and mix until the batter is smooth and uniform.
- Strain the batter into the prepared pan and bake for 25–30 minutes, until the top is deeply browned, the edges are set, and the center is still very jiggly.
- Allow the cake to cool completely at room temperature, then refrigerate for at least 8 hours, preferably overnight.
- Slice with a sharp knife for clean, neat portions.

Ingrédients
- 450 g de raisin secs
- 450 g de canneberges séchées
- 225 g d’abricot secs hachés
- 225 g d’ananas secs hachés
- 100 g de zeste d’orange confit
- 1 ou 2 tasses de rhum ou de brandy
- 225 g de cerises glacées
- 225 g de noix de Grenoble hachées
- 225 g d’amandes hachées
- 1 ¼ tasse de mélasse
- 2 culières à café de macis
- 2 culières à café de cannelle
- 2 culières à café de clous de girofle
- 2 culières à soupe de cacao
- 3 ½ tasses de farine
- 1 culières à café de poudre à pâte
- 450 g de beurre
- 450 g de cassonade foncée
- 8 gros œufs
Instructions
- Dans un grand bol, mélanger les raisins secs, les canneberges, les abricots, les ananas, les zestes d’oranges et de citrons et les cerises.
- Couvrir de l’alcool choisi, mettre un couvercle sur le bol et laisser macérer toute la nuit.
- Ajouter les noix et les amandes le lendemain.
- Dans une casserole, mettre la mélasse, les épices et le cacao à chauffer.
- Laisser mijoter 10 minutes puis retirer du feu.
- Battre le beurre jusqu’à ce qu’il devienne léger.
- Incorporer le sucre.
- Continuer de battre jusqu’à ce que le mélanger soit mousseux et que les ingrédients soit bien mélangés.
- Ajouter les fruits et la mélasse et bien remuer.
- Tamiser la farine et la poudre à pâte et battre les œufs légèrement.
- Bien mélanger à la cuillère de bois.
- Verser dans trois ronds et profonds de 24 cm de diamètre, garnis de papier ciré beurré des deux cotés, ou trois moules à poudings de 2 litres bien graissés.
- Placer au centre du four, chauffer à 110 degrés Celsius, pendant 4 ou 5 heures.
- Laisser les refroidir avant de démouler.
- Quand le gâteau est tout à fait froid, le badigeonner d’un peu de rhum ou de brandy.
- Envelopper dans un linge imbibé de rhum ou de brandy et mettre dans un endroit frais.

Ingrédients
- 150 gr de farine blanche
- 150 gr de sucre blanc
- 40 gr d'amandes amères moulues (sinon amandes normales mondées et moulues)
- 2 c c de levure chimique
- le zeste rapé et le jus d'un demi-citron
- 150 à 200 gr de baies de sureau noir égrenées
- 3 oeufs battus à la fourchette
- 150 gr de beurre fondu
- 1 yaourt nature (125 gr)
- 2 c s d'eau de fleur d'oranger
Instructions
- Dans un grand bol, mélanger la farine, le sucre, les amandes moulues, la levure chimique, le zeste de citron et les baies de sureau, sans les écraser.
- Dans un 2e bol, mélanger les oeufs, le beurre, le yaourt, le jus de citron, l'eau de fleur d'oranger.
- Mélanger ensuite le contenu des 2 bols, et laisser reposer une heure au frais.
- Répartir dans des moules en silicone, et faire cuire 12 à 15 minutes au four préchauffé à 220°.
- Laisser tiédir avant de démouler.

Ingrédients
Pour le sablé
- 1 tasse (120 g) de farine
- 7 cuillères à table (100 g) de beurre salé, ramolli
- 1/2 gousse de vanille
- 7 cuillères à table de sucre démérara
- 2 cuillères à table d’amandes en poudre
- 2 jaunes d’œuf
- 1/2 cuillère à thé de poudre à pâte ( levure chimique )
Pour la compotée de pommes
- 8 pommes évidées et coupées en 6
- 6 cuillères à table de sucre démérara
- 2 moitiés de coings pochés, coupées en lamelles ( recette ici ( clic ) )
- 1/4 tasse ( 60 ml ) de sirop chaud de cuisson des coings
Instructions
Pour le sablé
- Mélanger la farine, la poudre à pâte, les graines de vanille, la poudre d’amande et le sucre.
- «Sabler» les ingrédients secs avec le beurre, c’est-à-dire en roulant la pâte entre les mains (il faut travailler rapidement, pour ne pas faire fondre le beurre), jusqu’à l’obtention d’une pâte à la texture sableuse, mais homogène.
- Ajouter les jaunes d’œufs, pétrir une dernière fois, couvrir la pâte d’un linge propre et laisser reposer 15 minutes au frais.
- Étaler la pâte dans un moule à fond amovible, en la travaillant avec les doigts.
- Cuire au four à 300 F ( 150 C ), de 20 à 25 minutes ou jusqu’à ce que la pâte commence à blondir.
- Laisser refroidir avant de démouler.
Pour la compotée de pommes
- Mettre les pommes à cuire dans une casserole avec un fond d’eau (pour ne pas que ça colle en début de cuisson) et le sucre pendant environ 15 minutes ou jusqu’à ce que les pommes soient compotées.
- Réserver sans les écraser.
Montage
- Étendre les pommes compotées sur la pâte refroidie.
- Ajouter les lamelles de coings sur les pommes, puis badigeonner au pinceau de sirop de cuisson des coings.

Ingrédients
- 300g de chocolat de bonne qualité
- 20 cl de crème à fouetter à 35%
- environ 50g de beurre de qualité
- cacao amer en poudre
Instructions
- Faire fondre le tout à petit feu, ou au mieux au bain-marie
- Laisser refroidir
- Faire des boulettes et les rouler dans le cacao

Ingrédients
- 190g de chocolat noir
- 150g de crème liquide
- 30g de beurre en pommade
- 25g de miel
- 5cl d'alcool (poire , mirabelle, chartreuse ...)
- nougatine
Instructions
- Tailler la nougatine en petits morceaux.
- Hacher le chocolat à l'aide d'un grand couteau.
- Le réserver dans un bol.
- Porter à ébullition la crème et le miel.
- Verser un tiers du liquide bouillant sur le chocolat, bien mélanger à la spatule ou au fouet, puis ajouter le reste en deux fois.
- Incorporer ensuite le beurre mou, lisser et l'alcool.
- Placer la préparation dans une poche à douille.
- Laisser refroidir.
- Faire ensuite des boules en versant directement un peu de ganache dans le pralin ou le chocolat en poudre.
- Ajouter quelques petits morceaux de nougatine.
- Former une boule bien ronde à la main.
- Réserver au frais dans une boite métallique.
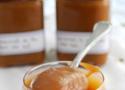
Ingrédients
- 2 tasses (400 ) de sucre
- 1/2 tasse (125 ml) de sirop de maïs blanc ou du glucose
- 3 et 1/3 tasses (830 m ) de crème 35 % chaude
- 1 1/2 tasse (375 g) de beurre salé, à température ambiante
- 2 c. à café de fleur de sel
Instructions
- Remplir le fond de l'évier d'eau froide.
- Dans une casserole à fond épais et haute de 5 litres, combiner le sucre et le sirop de maïs.
- Cuire en remuant jusqu'à ce que la température atteigne 365 F (185 C) sur le thermomètre à bonbon.
- Aussitôt la température atteinte, déposer le fond de la casserole dans le bain d'eau froide pour arrêter la cuisson.
- Ajouter peu à peu la crème chaude en remuant, la température réduira.
- Poursuivre la cuisson jusqu'à 225 F (108 C) en remuant.
- Laisser refroidir jusqu'à 104 F (40 C).
- Incorporer le beurre en brassant vigoureusement à l'aide d'une cuillère en bois.
- Ajouter la fleur de sel et mélanger.
- Remplir des bocaux et conserver au réfrigérateur.

Ingrédients
- 400g de lait concentré sucré (1 boîte)
- 250g de noix de coco râpée (2 sachets)
- 200g de chocolat (j'ai utilisé du chocolat au lait à pâtisser, Nestlé, impeccable)
- 30g de beurre
Instructions
- Verser la noix de coco et le lait concentré sucré dans un saladier. Bien mélanger.
- Répartir dans des petits moules rectangulaires en silicone (ou bien faire des boudins ou des bâtonnets à la main) sur une épaisseur d'environ 1,5cm.
- Mettre au réfrigérateur pendant 12 heures (pour que la pulpe de coco s'imprègne bien du lait concentré).
- Mettre au congélateur pendant 12 heures (pour faciliter le démoulage).
- Faire fondre le chocolat et le beurre au bain-marie (ou, comme moi, au micro-ondes), mélanger jusqu'à ce que le tout soit bien lisse. Si ce chocolat est trop épais, incorporer une cuillère à soupe de lait.
- Démouler les barres de coco.
- Plonger les bâtons de coco un par un dans le chocolat, bien les enrober, sortir à l'aide d'une fourchette, et laisser figer sur du papier sulfurisé (ou alu, à défaut).
- Réfrigérez vos Bounty si vous êtes vraiment très pressé(e) de les dévorer.
Ingredients
Dough
- 8 ounces (2 cups) sliced blanched almonds
- 3 cups confectioners' sugar
- ½ teaspoon coarse salt
- 2 large egg whites
- Unsalted butter, softened, for molds
Royal Icing
- 1 pound confectioners' sugar
- 3 large egg whites or 5 tablespoons meringue powder mixed with ½ cup water
- Paste or gel food coloring (optional)
Instructions
- Dough: Place almonds in a food processor and process to form fine crumbs, about 2 minutes. Add sugar and salt and process until well combined and powder-like, about 1 minute. Add egg whites and process until a dough forms (it will have the texture of cookie dough). Wrap tightly in plastic wrap and refrigerate overnight.
- Preheat oven to 300°F with oven rack in the middle. Brush a set of 6 kransekake molds with butter. Divide dough in half. Working with one half of dough at a time, cut into small portions and roll into ropes that are slightly thicker than the diameter of a pencil (about 3/8-inch-to-1/2-inch thick). Fit ropes into rings of 3 molds, trimming to fit. Place molds on an unrimmed baking sheet and bake until puffed and lightly golden brown, about 30 minutes.
- Transfer molds to a wire rack and let cool completely on baking sheet. Repeat shaping and baking process with remaining half of dough and remaining 3 molds. Carefully remove rings from molds.
- Royal Icing: In the bowl of an electric mixer fitted with the paddle attachment, combine confectioners' sugar and egg whites. Mix on medium-high speed until combined and thickened, about 8 minutes. If decorating with more than one color, divide icing into batches. Using the end of a toothpick, add food coloring until the desired shade is achieved.
- To Assemble: Sort rings in order of size. Fill a piping bag with icing and pipe a few dots onto the base of the largest ring and adhere to a cake plate. Pipe icing onto the base of next largest ring, and stack on top of the first ring. Repeat process, continuing to stack rings in decreasing size to form a tower of 18 rings. Decorate as desired. Allow icing to set before serving.

Ingredients
Filling
- 454 g pitted prunes
- 1¾ cups water (approx.)
- ¾ cup (149 g) granulated sugar
- ¾ tsp ground cardamom
- ½ tsp cinnamon
- ¼ tsp ground cloves
- ¼ tsp kosher salt
- 1 tbsp lemon juice
- 2 tsp vanilla extract
Biscuits
- ¾ cup (171 g) unsalted butter, softened
- 1 cup (198 g) granulated sugar
- 3 eggs
- 2 tbsp 35% cream
- 1½ tsp almond extract
- 4¼ cups (604 g) all-purpose flour
- 2 tsp baking powder
- ¾ tsp kosher salt
- ½ tsp ground cardamom
Buttercream Frosting
- ½ cup (113 g) unsalted butter, softened
- 2¼ cups (283 g) icing sugar
- Pinch of kosher salt
- 1 tsp vanilla extract
- ½ tsp almond extract
- 2 to 3 tbsp 35% cream (approx.)
Candied Kumquats
- 3 or 4 kumquats
- ¼ cup (50 g) granulated sugar
- ¼ cup water
- 2 tsp liquid honey
Sugared Currants and Rosemary
- Red and golden currants
- Rosemary sprigs
- ¼ cup (48 g) superfine sugar
- No-melt powdered sugar
Instructions
Filling
- In a large shallow saucepan, combine the prunes with enough water to cover them and bring to a boil. Cook until the prunes are tender, about 10 minutes (most of the liquid should be absorbed). Meanwhile, combine the sugar, cardamom, cinnamon, cloves and salt in a small bowl. Set aside.
- Transfer the prunes to a food processor and pulse until they’re finely chopped. Return them to the saucepan, stir in the sugar and spice mixture, and cook over medium-low heat. Stir the mixture frequently, every 2 to 3 minutes, until it’s thick and mounds when stirred, 7 to 9 minutes.
- Stir in the lemon juice and vanilla. Transfer the filling to a shallow container and refrigerate it until slightly cooled, about 20 minutes. The mixture should be very thick and spreadable.
Biscuit
- Heat the oven to 375 F.
- Cream the butter and sugar in the bowl of a stand mixer fitted with a paddle attachment on medium-high until it’s very light and fluffy, about 5 minutes.
- Add the eggs, one at a time, scraping the bottom and sides of the bowl with each addition. Add the cream and almond extract.
- In another bowl, whisk together the flour, baking powder, salt and cardamom. Add them to the bowl of the stand mixer and beat on low until almost combined.
- Scrape the dough onto a work surface and gently knead it to combine. Divide the dough into seven equal portions.
- Shape one portion of dough into a rectangle using a pastry scraper. On a lightly floured surface, roll out the dough into a 9¼-by-7-inch rectangle, about ⅛-inch thick. Using a fork, dock all over the entire surface. Repeat with another portion of dough.
- Place each rectangle on its own parchment-lined rimless cookie sheet. Bake one sheet at a time on the centre rack of the oven until the dough is just baked and still pale, 7 to 9 minutes.
- Repeat with the remaining dough portions, making sure they are uniform in size and thickness. Let the biscuits cool completely on their trays.
Assembly
- Divide the prune filling into six equal portions.
- Place one biscuit on a cake turntable or small cutting board. Spread one-sixth of the prune filling evenly on top, taking it out to the edges. Top with another biscuit, pressing down lightly, and spread another sixth of the prune filling on top. Repeat until all seven layers are assembled, leaving the top layer bare.
- Cover the cake with two layers of plastic wrap and refrigerate for 15 minutes. This will soften the biscuit layers.
- Remove the plastic from the cake and tidy up the edges by trimming them with a long serrated knife.
- Re-wrap the completed cake in two layers of plastic wrap and store in a pantry at room temperature for up to 2 days. This will allow the cake to soften further and for the flavours to come together.
Buttercream Frosting
- Beat the butter and icing sugar in the bowl of a stand mixer on medium-low to combine. Increase the speed to medium-high and beat until very light, about 5 minutes. Beat in the salt, vanilla, almond extract, and enough cream to create a smooth and spreadable icing.
- Spread the frosting evenly on the top layer of the cake. Using a melon-baller, make even indentations across the frosting.
Garnish
- To make the candied kumquats, cut the kumquats into ⅛-inch thick rounds and remove any seeds. Combine the sugar, water and honey in a small saucepan and bring to a boil over medium-high heat. Cook until the sugar has dissolved and the syrup is thick. Add the kumquats and gently stir to coat them with syrup. Reduce the heat and simmer for 2 to 3 minutes. Remove the pan from the heat and let it stand for 15 minutes. Remove the kumquats from the syrup, place them on parchment paper and set aside. Continue cooking the syrup until it’s thick enough to coat the rosemary and currants.
- To make the sugared rosemary, brush some of the kumquat syrup on the rosemary sprigs, then roll them in the superfine sugar. Let the sprigs dry on parchment paper.
- To make the sugared red currants, brush them with the kumquat syrup, then gently toss them in the superfine sugar to coat. Let the currants dry on parchment paper.
- Arrange the candied kumquats on the cake with the currants and rosemary. Arrange holiday green foliage around the cake, if you have some, then dust with the no-melt icing sugar.
Ingrédients
- 400 g de cream cheese (type fromage à tartiner, aussi trouvable en fromagerie en version artisanale)
- 400 g de mascarpone
- 300g de crème de marron
- 150 g de sucre semoule
- 5 œufs
- 30 cl de crème fleurette
- 25 g de fécule de maïs
Instructions
- Verser le cream cheese, le sucre, le mascarpone et la crème de marron dans la cuve d’un batteur et mélanger à vitesse moyenne. Quand le mélange est bien homogène, ajouter les oeufs un par un en laissant le batteur mélanger en même temps, toujours à vitesse moyenne.
- Incorporer la fécule et mélanger à nouveau. Ajouter ensuite la crème en filet et augmenter la vitesse pour homogénéiser l'appareil. Il est normal que l’appareil soit liquide.
- Beurrer un moule rond de 24 cm de diamètre. A l’aide d’un morceau de beurre, chemiser le moule avec du papier sulfurisé ; le papier doit dépasser tout autour du moule et adhérer aux parois. Y verser la préparation.
- Donner un coup sec avec le moule sur le plan de travail afin de chasser les bulles d’air. Enfourner et cuire 40 minutes à 220 degrés, chaleur tournante. La préparation doit brunir, mais le centre doit rester très crémeux.
- À la sortie du four, le cheesecake doit reposer. Une fois que le gâteau a refroidi, réserver 4 heures au frais ou, mieux, une nuit entière. Démouler avant de servir.
Ingrédients
Gâteau
- 430g de fromage à la crème, tempéré
- 120g de cassonade
- 4 œufs
- 1 gousse de vanille
- 280g de crème 35%
- 20g de farine tout usage
- une pincée de sel
Poires
- 1 poire bien mûre, en dés
- 3 càs de cassonade
- le jus d'un citron
- la gousse de vanille utilisée
Instructions
- Préchauffer le four à 445°F.
- Au batteur, combiner le fromage à la crème, la cassonade, les œufs et l'intérieur de la gousse de vanille.
- Une fois le mélange bien lisse, y ajouter la crème 35%, le sel et la farine, puis mélanger jusqu'à ce que le mélange soit homogène.
- Graisser et parcheminer un moule de 8 pouces, puis y verser le mélange.
- Cuire au four environ 25 minutes, jusqu'à ce que la croûte soit bien dorée et foncée, mais pas brûlée !
- Retirer du four et laisser tempérer 15 minutes, avant de le transférer au réfrigérateur pour le refroidir complètement (un minimum de 2 heures de repos).
- Pendant ce temps : ajouter la gousse de vanille vide dans un petit chaudron avec le jus de citron et la cassonade. Porter à ébullition et y ajouter la poire coupée en dés.
- Mélanger pour bien enrober les morceaux de poires et retirer du feu. Laisser tempérer jusqu'au moment de servir sur le gâteau.
Ingrédients
Génoise au chocolat
- 200 g de sucre
- 6 œufs
- 180 g de farine
- 60 g de cacao en poudre non sucré
- 1 cuillère à café de levure chimique
- 1 pincée de sel
Garniture et montage
- 800 g de cerises dénoyautées en conserve (égouttées et réservant le jus)
- 500 ml de crème fouettée
- 100 g de sucre glace
- 1 cuillère à café d'extrait de vanille
- 100 g de copeaux de chocolat pour la décoration
- Cerises entières pour la décoration (facultatif)
Instructions
- Préchauffez le four à 180°C (350°F). Beurrez et farinez un moule à gâteau de 26 cm de diamètre.
- Dans un grand bol, battez les œufs et le sucre jusqu'à ce que le mélange soit léger et mousseux. Tamisez la farine, le cacao, la levure et le sel, puis incorporez-les délicatement au mélange d'œufs et de sucre.
- Versez la pâte dans le moule préparé et faites cuire au four pendant 30 minutes, ou jusqu'à ce qu'un cure-dent inséré au centre du gâteau en ressorte propre. Laissez le gâteau refroidir complètement avant de le démouler et de le couper en trois couches horizontales égales.
- Pendant que le gâteau refroidit, préparez la crème fouettée en battant la crème, le sucre glace et l'extrait de vanille jusqu'à ce qu'elle forme des pics fermes.
- Imbibez légèrement les couches de gâteau avec le jus de cerise réservé
- Placez la première couche de gâteau sur un plat de service, garnissez-la de crème fouettée et répartissez la moitié des cerises égouttées par-dessus. Répétez avec la deuxième couche de gâteau, la crème fouettée et les cerises restantes. Placez la dernière couche de gâteau sur le dessus et recouvrez le gâteau entier de crème fouettée sur les côtés et le dessus.
- Décorez le gâteau avec les copeaux de chocolat sur les côtés et le dessus du gâteau. Si vous le souhaitez, ajoutez quelques cerises entières pour garnir le dessus. Réfrigérez le gâteau pendant au moins 2 heures avant de le servir pour permettre aux saveurs de se mélanger.