


Ingredienti
- 500g farina tipo 0 (forza W350 o almeno 13g di proteine)
- 500g acqua fredda (100% idratazione)
- 3g lievito di birra secco (o 5g fresco)
- 12g sale
- 20g olio extravergine d’oliva
Procedimento
- Sciogli il lievito e il sale nell’acqua, poi aggiungi la farina. Mescola fino a ottenere un impasto grezzo.
- Dopo 20 min, aggiungi l’olio e fai delle pieghe in ciotola fino a renderlo liscio.
- Copri e lascia riposare 30 min, ripeti le pieghe(3 pieghe tot ogni 30 min).
- Trasferisci in frigo per 12–24 ore.
- Riporta a temperatura ambiente, versa in teglia ben oliata e fai lievitare ancora 2 ore.
- Aggiungi i pomodorini, olio, sale grosso e origano. Inforna a 230°C per circa 20–25 min (fino a doratura).
- Lascia intiepidire e… goditi questa nuvola! 🤌
Ingrédients
- 500g de chocolat
- 450g de beurre
- 650g de sucre
- 650g d’œufs (environ 13 œufs)
- 200g de farine
Instructions
- On commence par faire fondre notre beurre.
- Pendant ce temps, on mélange le sucre, la farine, et on ajoute les œufs.
- Une fois que le beurre est bien fondu et chaud, on le verse dans le chocolat.
- On mélange jusqu’à ce que le chocolat soit complètement fondu.
- On verse le chocolat et le beurre dans le mélange.
- On poche la pâte directement dans des moules individuels.
- L’astuce, c’est que ça tu vas pouvoir le conserver dans ton frigo facilement 15 jours et les cuire quand tu veux pour le goûter des enfants.
- Cuisson : 10 minutes, 170 degrés Celsius.
Moins vous cuisez, plus ça sera moelleux au milieu. Voir coulant.
Si tu veux un cœur ultra coulant : 8 minutes.
Si tu veux moelleux partout : 12 minutes.
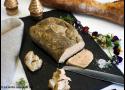
Ingrédients
- Un foie gras de qualité éveiné ou non
- gros sel 1 ou 2 kg
- poivre
- 4 épices
- sucre
- sel fin
- porto ou autre alcool type armagnac, pineau
- gaze ou compresses
Instructions
- Éveiner le foie si ce n’est déja fait et le reconstituer.
- Saupoudrer le foie d'une pincée de 4 épices et d'un peu de sucre en poudre, salez le normalement
- L’entourer de 2 couches de gaze ( faire attention à ce qu’il soit bien enfermé dans la gaze )
- Déposer un lit de gros sel dans un récipient, poser le foie gras dessus et recouvrir totalement de gros sel. Réserver au frais 15h pour un foie de 500 gr mi-cuit.
- Ôter le foie du sel et ôter la gaze
- Saupoudrer le foie de beaucoup de poivre moulu.
- Imprégner un peu de gaze de 2 à 3 cuillères à soupe d’alcool et emballer à nouveau le foie avec.
- Rouler le tout dans un torchon propre et bien serré et laisser reposer 24 à 48 h avant dégustation.
Notes : Il faut compter deux heures de " cuisson" au sel pour 100g de foie. 12h pour un foie de 600g, 14h pour un foie de 700g, etc...

Today, I have the pleasure of talking about one of my most favorite things in the world…interfacing! This post will be concentrated on the particular Pellon Interfacings that I use while making bags. Interfacing makes up 25% of my stash…no lie! It’s one of those things that you just need to have on hand at all times, because you’ll use it in most any project – to make quilted items, bags, garments, you name it
| Pellon Interfacing | Vilene Conversion |
|---|---|
| 987F Fusible Fleece | H630 Iron On Lightweight Fleece |
| TP971F Fusible Thermolam | H640 Iron On High Loft Fleece or 272 Thermolam |
| SF-101 Shape Flex Fusible Woven | G700 Woven Fusible |
| 520 Deco-Fuse Firm | S520 Firm Interlining |
| 70 Peltex Sew-in | S80 Heavy Sew-in |
| 71F Peltex Single-sided Fusible | S520 Firm Iron-on |
| 809 Decor Bond | H250 Iron-on |
I assembled this chart with the help of the lovely folks at Pellon.
Edit 10/01/14 – Pellon is now widely available in Australia under the Legacy brand. Many of the names and item numbers are the same, with one small change (for example, Fusible Fleece under the Legacy brand has number L-987F, so basically they are just adding an ‘L’ in front of the original Pellon number). The main change is that Decor Bond under the Legacy brand is L-809 Fuse-N-Shade).
So let’s get started! Note: always use a pressing cloth when fusing your interfacing to fabric! Pellon interfacing is also available in boxes of product, usually around 2-3 yards per box. You can see examples of boxed interfacing in my photo above; most specialty quilt shops will stock the packaged interfacing!
Pellon 987F Fusible Fleece
Pellon 987F Fusible Fleece can be found by-the-yard at your local fabric store packaged on a bolt with a pale green label on it. It is fusible on one side, which means you can feel the ‘glue’ on one side, and this is the side that should go against the wrong side of your fabric. This interfacing has a bit of a loft to it. I like using it, but usually reserve it for either the lining of a bag (to add extra body), for straps (so that they are padded, but without any extra bulk), for small flaps, etc. I don’t often use it for the exterior of a bag because I have found that over a large area, it can possibly make the fabric look slightly crinkly because of the loft of the fleece.
One way that you can smooth out your fabric when using fusible fleece is to first fuse a layer of Shape Flex (which I’ll talk about later) to the fabric, then follow it with a layer of fusible fleece.
Another great use for fusible fleece is that you can cut small squares of it (approximately 2″ x 2″) to reinforce a magnetic snap that you might be using in your bag. Every time you open and close a magnetic snap, it puts pressure on your fabric. To resist against everyday wear-and-tear, slide the prongs of your snap through your fabric, and then put the square of fleece on top before you close the prongs. You shouldn’t have any worries about your fabric tearing under the strain of the magnetic snap now!
Pellon TP971F Fusible Thermolam
I absolutely love Thermolam. It also comes on a bolt with a light green label on it. It is also fusible on one side, so the tacky side should go against the wrong side of the fabric. Thermolam is fleece, but it is a needled fleece, which means it is denser and lies flat. It has a ton of uses. If I’m making a smaller quilted project like a mini quilt, mug rug, or oven mitts, I use Thermolam before I quilt the project. It eliminates the need for using pins or spray baster.
But this article is for bag-making. When I’m making a bag or other accessory, I like it to have body. Even if I was making a simple tote bag, I would not be happy if it was just 2 layers of fabric. Just too thin for me. I know it boils down to personal preference, but if I make a bag, I want it to be able to carry 20lb. without tearing at the bottom. It needs to feel like it has some substance to it.
So, if I am making a soft bag, I always always use Thermolam. I would, say, use the Thermolam fused to the exterior fabric of the bag, and possibly either Shape Flex or fusible fleece fused to the lining fabric of the bag. Thermolam, once fused, will make your fabric look nice and smooth. Depending on your iron, you might need to fuse it for a little bit longer than the manufacturer instructions (I’d suggest testing on a small piece first if you’ve never used it before). I find I sometimes need to iron it up to double the time as directed. Another personal tip is that I like to iron it (misting with a bit of water) with the interfacing side toward my iron, and when I’m sure it’s properly fused, I like to flip it over and iron on top of the fabric (with my pressing cloth in place, of course!). This will give your fabric an incredibly flat and smooth look.
Pellon SF-101 Shape Flex Fusible Woven
I use this in 100% of my bags. I might use it in different ways, but bar none, it is the most important interfacing in my stash. I fuse Shape Flex to every single pocket that I make. I fuse it to facings in garments. I for sure fuse it to an area around a zipper to help reinforce that area. You can find this interfacing in your local shop with a light purple label on the bolt.
Shape Flex will make a quilt-weight cotton have the feel, once fused, of a decor-weight or canvas-weight fabric. It will give the fabric a bit of sturdiness. As with the previous interfacings, the rough tacky side should go against the wrong side of your fabric before ironing. It is perfect as a stand-alone interfacing if you are making a small pouch or other smaller accessory. You can even combine it with other interfacings. Someone asked me the other day what is the most interfacing I have used on one piece of fabric, and the answer is 3. I like to experiment a lot, and there is no right or wrong answer. I might use a layer of Shape Flex, one of Thermolam, and another of 520. I get a little crazy sometimes.
520 Deco-Fuse Firm
Although this interfacing is great, it is not widely available (I believe you can get it at Hancocks and on their site on-line). If you are looking to make a very stiff bag, then this is the interfacing for you. Even though it is very stiff, it is about as thick as a piece of construction paper, which makes it reasonably easy to sew. Another good thing about this interfacing is that once it is fused, it never has that ‘fused’ look. So your fabric will look nice and smooth. It also holds a finger press, so I usually never have to iron any seams, I just use my fingers.
As with any stiff interfacing, it can be tricky to maneuver your bag through your sewing machine. I would strongly suggest cutting this interfacing 1/2″ smaller than your fabric pieces, in order to reduce bulk in the seam allowance. I say sew slowly, and come up with creative ways to get the stitching done. For instance, if you have to sew half a line of stitching, stop, feed the bag in from the opposite side to continue stitching, do that. Honestly, no one is going to see the wrong side of your bag, so it doesn’t have to be the prettiest stitching in the world (in my opinion).
520 Deco-Fuse is a great way to get a store-bought look to your bags. However, I think that Peltex #70 sew-in interfacing is a perfect substitute (see below).
Peltex 70 Sew-in
This interfacing is a little bit thicker than the 520 Deco-Fuse, and it is stiff as well. It comes on a bolt with a yellow label. Because it is a sew-in interfacing, it will not fuse to your fabric. You can either baste the interfacing to your fabric using a small seam allowance, OR (and this is my favorite method)…you can cut a piece of Shape Flex that is the same size as your pattern piece. Then cut a piece of Peltex sew-in from your pattern piece, but trim it 1/2″ smaller all the way around. Center the Peltex sew-in on the wrong side of your fabric, then place the fusible side of your Shape Flex on top. When you fuse the Shape Flex, it will seal the Peltex sew-in along the 1/2″ edges against your fabric. Having a smaller piece of Peltex sew-in will also help to reduce the bulk in your seam allowance.
The bottom of my Aeroplane Bags sewing pattern, pictured above, has Peltex in it (the small printed panel on the bottom of the bag). Since the bag was designed to carry a weekend’s worth of clothing or a featherweight sewing machine, I thought it was a necessity to have the bottom panel be extra-strong.
Another great reason to have some Peltex #70 around is for bag handle inserts. Some sewing patterns for bags call for you to create sort of a double-bias piece for each handle, meaning that your raw edges would not be exposed. I cut a strip of 1-1/2″ wide Peltex #70 for each of the handles in the bag below, and slide them into each handle piece before topstitching along each long edge. It makes the handles very stable. I’ve also used fusible fleece and Thermolam as handle inserts before. I suppose it just depends on what look you’re going for, but any will work.
Peltex 71 Single-sided Fusible
This interfacing is great when you want to fuse a small area of a project (such as the flap of a bag or clutch), but I find that sometimes when you are using it on a larger area of a project (for example, the exterior of a bag), it *can* give the fabric a ‘fused’ (aka crinkly) look.
It is a stiff interfacing like the Peltex Sew-in and the 520 Deco-Fuse. If you need a heavy/stiff interfacing that you’d like to fuse, I’d recommend the Peltex Sew-in.
809 Decor Bond
I began using this interfacing quite a bit, late last year. If there are panels or handles of a bag that you would like to give a stiff appearance to, but not want to look crinkly if you happen to fold or crease them, this is the interfacing for you.
Actually, I use this interfacing in 2 layers. I will first fuse a layer of Shape Flex against the wrong side of my fabric, and then follow up with 2 layers of Decor Bond. However, the Decor Bond I will cut approximately 1/2″ small on all sides of the particular pattern piece, to keep bulk out of the seam allowance. The yellow bag above was made using this method; the green solid panels only had the Decor Bond layers, in order to help that top panel stand up firmly.
You can also use a layer or two of Decor Bond if you want your bag to stand up by itself, but not be as stiff as Deco Shape or Peltex.
Psssttt! Did you know that if you don’t have any interfacing handy, Pellon Wonder Under (a fusible web) will turn any fabric into a fusible interfacing? For example, you can use Pellon Nature’s Touch or Warm and Natural batting in place of Pellon Thermolam, or another quilting cotton in place of Pellon Shape Flex. How’s that!!
I hope this article has shed a little bit of light on bag interfacing. I know it’s something that we don’t talk about a lot, but we probably should, because it’s one of the things that sewers can find confusing, and I get asked a lot of questions about it!
By Annie’s Soft and Stable
Also, another favorite interfacing that I started using in 2013 and use in just about every bag is By Annie’s Soft and Stable. It is my heavy favorite, and if you notice the bag patterns in my shop, you’ll see that they were all made using Soft and Stable. I invite you to read my separate blog post about Soft and Stable, and check out the video that I shot:
Many sewing patterns only name interfacing in generic terms: light-midweight interfacing, heavyweight interfacing, etc. That can make it sort of difficult to navigate. To generalize, I would say, in my opinion, that for a light-midweight notation, you can use Shape Flex, fusible fleece, or Thermolam. Heavyweight or stiff interfacing would be either of the Peltex or the Pellon 520 (possibly 2 layers of Decor Bond). Again, others might have different opinions on this.
I have washed bags made out of just about every interfacing. You can do it, some just look a bit more wrinkly than others (bring out the iron!). I’m not really a big fan of washing my bags, though, so I wouldn’t do it unless you had some sort of emergency (like grape juice).
There are no right or wrong answers to using interfacing. I find that the best way to learn more about it is to use it in all of your projects…tweak your interfacing based on your personal preference: what kind of shape are you interested in, how much stiffness, what kind of body.
Feel free to ask any specific questions about interfacing in the comments! I will answer! If you are working with a certain pattern, feel free to let me know if you’re confused on what interfacing to use, and I’ll be glad to help you navigate the waters!
Ingredients
- 1 pound of diced leg of mutton or lamb
- 1/2 cup of rendered sheep fat
- 1/2 teaspoon of salt
- 1 cup of beer
- 1/2 cup of water
- 1 small onion, chopped
- 1 cup of chopped arugula
- 1 cup of Persian shallots or spring onions
- 1/2 cup of chopped fresh cilantro
- 1 teaspoon of cumin
- 1 pound of fresh red beets, peeled and diced
- 1/2 cup of chopped leek
- 2 cloves of garlic
For the garnish
- 2 teaspoons of dry coriander seed
- 1/2 cup of finely chopped cilantro
- 1/2 cup of finely chopped kurrat or ramps/wild leek
Instructions
- Heat the fat in a pot wide enough for the diced lamb to spread in one layer.
- Add lamb and sear on high heat until all moisture evaporates.
- Fold in the onion, and keep cooking until it is almost transparent.
- Fold in red beet, arugula, cilantro, Persian shallots and cumin. Keep on folding until the moisture evaporates and ingredients emit a pleasant aroma.
- Pour in the beer. Add water. Give the pot a light stir. Bring the pot to a boil.
- Reduce heat and add leek and garlic that you crush in a mortar.
- Let the stew simmer until the sauce thickens after about an hour.
- Chop kurrat and fresh cilantro and pound it into a paste using a mortar.
- Ladle the stew into plates and sprinkle with dry coriander seed and the kurrat and cilantro paste. The dish can be served with steamed bulgur and naan-bread.

- Laugavegur Trail, Iceland
- Overland Track, Tasmania
- Annapurna Circuit, Nepal
- Mount Meru Trek, Tanzania
- Kumano Kodo, Japan
- Nahuel Huapi National Park Traverse, Argentina
- Jotunheimen National Park Historic Route, Norway
- Tongariro Northern Circuit, New Zealand
- The Walker’s Haute Route, France and Switzerland
- Sunshine Coast Trail, Canada
- The O Circuit, Chile
- Triglav National Park Traverse, Slovenia Mountain Trail, Slovenia
- Sneffels Traverse, Colorado

J'aime particulièrement sont Moaï


Ingrédients
Crème au chocolat
- 480 g lait demi écrémé
- 120 g crème liquide entière 30%mg
- 15 g sucre cassonade
- 30 g maïzena
- 90 g chocolat noir pâtissier à 65-70% cacao
- 70 g chocolat au lait pâtissier
Chantilly mascarpone
- 200 g crème liquide entière 30%mg très froide
- 100 g mascarpone très froid
- 25 g sucre glace
- 0,5 cc extrait naturel de vanille
Préparation
Crème au chocolat
- Dans un bol, verser la maïzena. Délayer en ajoutant 150g de lait petit à petit en fouettant bien pour ne plus avoir de grumeaux.
- Dans une casserole, verser le reste de lait (330g), la crème liquide et le sucre cassonade. Commencer à chauffer à feu doux.
- Ajouter rapidement la maïzena délayée. Continuer de fouetter tout en chauffant le mélange.
- Avant ébullition (ne pas chauffer trop fort), ajouter le chocolat noir et le chocolat au lait en morceaux pour qu'il fonde. Ne pas cesser de fouetter jusqu'à ce que le crème se forme, environ 4-5 minutes à feu doux.
- Verser le mélange dans un verre doseur puis dans 4 verres à dessert en les remplissant aux 3/4 pas plus (vous pourrez peut-être faire plus de verres selon leur taille).
- Laisser tiédir puis placer au réfrigérateur 2 heures.
Chantilly mascarpone
- Dans un large récipient ou bol du robot, verser la crème liquide très froide, le mascarpone, le sucre glace et la vanille. Commencer à fouetter vitesse moyenne jusqu'à ce que la chantilly se forme. Une fois que la chantilly se forme, bien lisse, elle est prête. Ne pas insister au risque qu'elle graine.
- Verser la chantilly dans une poche à douille munie d'un gros embout cannelé (voir matériel ci-dessus). Placer la poche à douille au dessus de la crème au chocolat froide. Dessiner un cercle de l'extérieur vers l'intérieur du verre, en faisant plusieurs tours pour créer un joli dôme de chantilly.
- Râper quelques copeaux de chocolat gratter la tranche d'une tablette de chocolat à l'aide d'un économe. Déposer les copeaux sur la chantilly.
- Garder les verres au réfrigérateur jusqu'à dégustation.
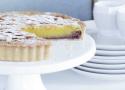
Ingrédients
Pâte sucrée
- 150 g de beurre mou
- 100 g de sucre glace
- 50 g de poudre d'amande
- 1 œuf battu
- 250 g de farine
Garniture
- 125 g de sucre glace
- 100 g de beurre mou
- 3 oeufs
- 1 c. à c. d'extrait naturel d'amande amère
- 150 g de poudre d'amande
- 6 c. à s. de confiture de framboise
- 40 g d'amandes efillées
Instructions
- Mettez le beurre mou, le sucre et la poudre d’amande dans la cuve du robot équipé de la feuille. Faites fonctionner l’appareil pour travailler ce mélange jusqu’à ce qu’il soit homogène. Ajoutez l’œuf, puis la farine et battez jusqu’à ce que la pâte forme une boule. Enveloppez-la dans du film alimentaire et réservez-la 1 h au réfrigérateur.
- Préchauffez le four à 160 °C (th. 5) en chaleur ventilée.
- Sur un plan de travail fariné, abaissez la pâte sur 4 mm d’épaisseur au rouleau à pâtisserie et garnissez-en un moule à tarte beurré de 25 cm de diamètre (de préférence à fond amovible). Cette pâte est très fragile et se casse facilement : il faut l’enrouler autour de votre rouleau à pâtisserie et la dérouler délicatement au-dessus du moule. Piquez le fond de tarte avec une fourchette et faites-le cuire pendant 12 à 15 min. Il doit à peine dorer. Laissez refroidir sur une grille.
- Abaissez la température du four à 150 °C (th. 5) en chaleur ventilée.
- Nettoyez la cuve et la feuille. Mettez le sucre et le beurre dans la cuve et rééquipez le robot de la feuille. Travaillez à petite vitesse la préparation jusqu’à ce qu’elle s’aère et éclaircisse. Ajoutez les œufs l’un après l’autre en battant bien entre chaque ajout. Incorporez l’amande amère et la poudre d’amande.
- Étalez la confiture de framboise sur le fond de tarte et recouvrez de crème aux amandes. Lissez et décorez avec les amandes effilées. Enfournez pour 20 à 25 min. La garniture doit avoir une jolie couleur doré clair. Laissez refroidir 15 min avant de démouler sur une grille. Saupoudrez de sucre glace avant de servir.
For an apple pie filling of tender but intact chunks of fruit, balanced perfectly between tart and sweet, not all apples are created equal.
I'm not much of a sweets person. Would I rather eat apple pie, or pizza pie? I often ask myself. You can guess what I reward myself with for answering that question correctly.*
*Okay, I'll tell you: It's pizza.
But fall is the one time of year that I genuinely look forward to baking pies, if only because I truly love apple-picking and need some way to get rid of all the excess apples I inevitably bring home. Being allergic to the raw fruit, and having a wife who thinks that nontropical fruits are not worth her time, I usually end up putting them in baked desserts.
Thing is, if you think that making an apple pie is as simple as picking any old apple up from the orchard or the supermarket, chopping it up, then tossing it with some sugar, cinnamon, perhaps a bit of cornstarch or flour to thicken up its juices, and baking it—well, then I can only assume that you've probably ended up baking a few bad pies in your lifetime. I know that I have.
What Makes the Best Apple Pie?
Like burgers and pizza, I believe pie to be one of the truly perfect foods. A culinary endpoint that can be improved incrementally, but not fundamentally. The true beauty of a pie comes from that magical interaction between crust and filling. One sweet, tart, and fruity, the other buttery and rich, they complement each other in flavor and texture and create a dish that is so much greater than the sum of its parts. As such, each part deserves respect.
What I want in my apple pie filling is, first and foremost, apples that are completely tender, yet stay in distinct chunks, with just a bit of al dente bite to them. Apples that turn to mush or, worse, are mealy can ruin a good pie for me.
I want those apples to be bound together with just a bare hint of a shiny glaze—not a torrent of juice that soaks the bottom crust or a sauce so thick that it becomes gloppy. (If you want that, you can get it at McDonald's, two for $1.) Apple pie should be sweet but never cloying, with a bare hint of cinnamon—this is an apple pie, after all, not a cinnamon pie. Finally, it should taste overwhelmingly of fresh apples, with a bright, clean flavor.
Picking the Right Type of Apple
Some apples just don't make good pies. They're too sweet, too mealy, or too tart. They disintegrate when you cook them, they release too much liquid, they just taste funny. The task in front of me was to find out which apples were up to the task of meeting the criteria I've laid out above—apples that would stay in distinct slices as they softened in the oven, and that struck the right balance of sweet and tart.
I rolled up my sleeves, made a few dozen batches of pie crust, then headed into the kitchen for some serious baking.
I started with two batches of 10 pies each, using 10 of the most common apple cultivars widely available in the United States. My apologies if your favorite apple type was left off this list—with over 7,500 known cultivars of apples, it's absolutely impossible to test every single one of them.
I figured with these 10 varieties, I should be able to find at least one that is available to everyone in the United States. (You overseas readers will have to do this research on your own.)
Here's what I tried:
- Braeburn
- Cortland
- Empire
- Fuji
- Golden Delicious
- Granny Smith
- McIntosh
- Red Delicious
- Rome
- Gala
To test them, I weighed out identical batches of each apple, cut them into quarter-inch-thick slices, and tossed them with sugar, just a touch of cinnamon, and a bit of cornstarch to thicken their juices. I purposefully left the cinnamon level very low and left out any other flavorings, like vanilla or lemon juice, in order to make sure that the apple flavor came to the forefront of each pie.
After baking them all off, I allowed them to cool and rest at room temperature for eight hours, to ensure that all of them had cooled down completely before I tasted them.
Color-Coding: How Browning in Apples Provides a Key to Texture
The array of textures and flavors that emerged was truly remarkable—even more varied than the differences between raw apples. Some, like Granny Smith and Empire, were great at keeping their shape, resulting in the tender-but-firm chunks I look for in good apple pie. But Granny Smiths are too tart, and Empires are too sweet. Other apples showed the opposite problem—decent flavor, but lacking in texture.
Unfortunately, I didn't find a single apple that was completely successful both in flavor and in texture.
But I did notice an interesting phenomenon when I accidentally left out a few bags of sliced apples for a bit too long.
I noticed as the apples were sitting that, depending on the variety, they browned to a different degree. Some, like Red Delicious, turned dark brown almost immediately. On the other hand, even after several hours, Granny Smiths showed only a hint of browning.
I arranged the apples on a plate in order of their level of browning.** What immediately struck me was that the least tart apple—the Red Delicious—was all the way at one end, while the most tart apple—the Granny Smith—was all the way at the other end.
** The order they are arranged in in the photograph is by level of browning relative to their original color, which is why some appear to be out of order.
This makes sense: Acid can inhibit the browning oxidation reactions that take place in fruit flesh when it is exposed to the air. For the same reason, cooks will store trimmed artichokes in acidulated water—it prevents browning.
But what did that mean for my fillings?
Well, there's another thing that acid does: It strengthens pectin, the cement-like glue that holds together the cells of fruit. So, looking at this arranged spectrum of apples is actually a pretty good indication of how well each fruit is going to hold up during baking. The farther to the right along the browning scale, the firmer the apple should be in the finished pie.
After arranging the baked pies in this same order and examining their fillings, turns out that this is indeed true. As you'll see in the photos below, the pies start off with very mushy fillings that get progressively firmer.
The Results
Here are all of my tasting notes. Afterward, I'll discuss how flavor is a factor.
Red Delicious
Flavor: Very sweet and one-dimensional.
Texture: Mealy flesh that turns to mush when cooked. Skin is thick and can be quite bitter. It may look good on the supermarket shelf for a long time, but is really only tasty when fresh-picked.
Pie Rating (1–10): 1. Completely mushy, with a very one-dimensional, cloying flavor. This reminded me of bad applesauce.
Best Uses: Eating out of hand, but only when very fresh.
McIntosh
Flavor: Sweet and mildly tart, with very white flesh.
Texture: Tender and slightly grainy.
Pie Rating (1–10): 3. It holds up better than, say, Red Delicious in pies, but still turns quite brown and mushy.
Best Uses: Applesauce or eating out of hand.
Braeburn
Flavor: Very sweet and mildly tart, with a unique citrusy aroma, similar to Granny Smith (of which it is a descendant). It becomes almost pear-like in flavor when it cooks.
Texture: Quite crisp and not much graininess. This texture seems to indicate that it indeed has a fairly strong structure of pectin.
Pie Rating (1–10): 7. It manages to soften fully while still retaining a good deal of texture when baked into an apple pie, due to its density. It could be slightly firmer when baked. Great golden color.
Best Uses: Pies, tarts, sauce, eating plain.
Rome
Flavor: Very mild when eaten out of hand; not very sweet, but develops in flavor when cooked.
Texture: It has a thick skin and very firm flesh. Though it has a reputation as a good baking apple, I found it unsuitable.
Pie Rating (1–10): 3. It turns dark brown and mushy as it bakes.
Best Uses: Sauce.
Fuji
Flavor: Quite sweet and fresh-tasting; not cloying.
Texture: Crisp flesh that stays good for a long time. The texture is almost pear-like in its moisture level and crunchiness.
Pie Rating (1–10): 2. The mild flavor does not get enhanced by baking. Watery but tart.
Best Uses: Eating out of hand.
Golden Delicious
Flavor: Sweet, tart, and almost buttery. Well balanced and rich, especially when cooked.
Texture: Very fresh and quite crisp, but can border on mealy when held for too long off the tree. When baked, it softens but retains a bit of texture.
Pie Rating (1–10): 8. The best flavor I got out of any single apple—this is what apple pie should taste like. I just wish it were slightly firmer.
Best Uses: Pies, sauce, apple butter.
Cortland
Flavor: Similar to that of a McIntosh, but much sweeter and more tart. Like its cousin, it's got very white flesh and a mild flavor.
Texture: Tender and slightly grainy.
Pie Rating (1–10): 4. It does quite well in pies texturally—softening without breaking down—but lacks in flavor.
Best Uses: Applesauce or eating out of hand.
Empire
Flavor: Very sweet and very tart, with a good level of juiciness, it's a cross between a McIntosh and a Red Delicious and shows flavors from both.
Texture: Despite its tender/grainy ancestry, its texture is quite firm and crunchy.
Pie Rating (1–10): 3. When baked, it has nice texture, but becomes cloyingly sweet. The acid is still present, but it's not enough to fight against the sugar level.
Best Uses: Eating out of hand.
Gala
Flavor: Mild and sweet, with a fair amount of tartness, it's one of the most popular apples around for its small size and good resistance to bruising.
Texture: Very thin-skinned, with a grainy texture.
Pie Rating (1–10): 6. When baked, it holds its shape, but the graininess can get overwhelming. I prefer my pie apples to be supple and smooth-textured.
Best Uses: Eating out of hand.
Granny Smith
Flavor: Very bright and tart, with a distinct citrus aroma and white wine–like nose.
Texture: Very firm, crunchy, and slightly grainy.
Pie Rating (1–10): 5. It holds up almost indefinitely when cooking. It has good brightness, but not much apple-y flavor.
Best Uses: Eating out of hand.
Now, some very astute readers might have noticed the one glaring exception here: Braeburns are low in acid, yet remain relatively firm as they bake. Why is this?
It all has to do with air. Braeburns are relatively dense apples, with not much air in between their cells. (You can see this if you drop one into a bucket of water along with, say, a McIntosh: Braeburns will float up much more slowly.) Apples with lots of air will collapse on themselves, like a deflating balloon, as they cook. Very dense apples—like Braeburns—will retain their shape better, even as they completely soften.
"...good texture alone does not make a good pie."
As you can see from my tasting notes, for the most part texture certainly does improve with more tartness, but good texture alone does not make a good pie.
Some folks suggest mixing two varieties of apple—one to provide texture, the other for flavor—but this never made sense to me. Say we combine some Granny Smiths with some Romes. What you end up with is a pie that's got nice firm chunks of apple interspersed with brown apple mush.
Nope, a single apple would have to do it for me, and the best ones in the running are the Golden Delicious and the Braeburn. They're the ones I use for all of my baking purposes.
The question is, since both Golden Delicious and Braeburns have great, well-balanced flavor, but neither is quite firm enough when baked, is there something I can do to improve upon their texture?
Indeed there is, and this article is riddled with hints on how to do it. To get the full explanation, check out the final installment in our pie-a-thon, where I'll describe how to turn your apples into the best pie filling they can be.
Are In-Season Apples Better?
You may think that the whole "local, seasonal" movement is getting a bit out of hand, and oftentimes, I tend to agree. But there are certain foods for which it truly makes sense. Apples for pies are one of them.
See, if you aren't buying apples directly from the orchard or picking them yourself in the fall, chances are that they've been in long-term storage. Apples are stored in atmospherically controlled rooms for up to 10 months before being put on supermarket shelves. This holding wreaks havoc with their cell structure, causing them to ripen at a vastly increased pace once they're taken out of storage.
This means that if you buy an apple from the supermarket in, say, June, most likely that apple was picked last October. Within a day or two, it goes from being crisp and bake-able to mushy and unsuitable for pies.
Tip
Don't bake apple pies except in the fall and early winter. If you absolutely must have that spring or summer pie, look for apples that are refrigerated, and get them into your own refrigerator as soon as possible. Do not let them sit at room temperature for too long before cooking them.
As for what to do with the leftovers of 20 pies? If you ask me nicely, I might share with you a great way to make friends with your neighbors.
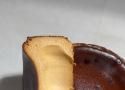
Ingredients
- 1,150 g full-fat cream cheese
- 260 g granulated sugar
- 350 g heavy cream
- 8 large eggs
- 45 g cornstarch
- 1 high-quality vanilla bean or 1 teaspoon vanilla bean paste
- 2 g salt
Instructions
- Preheat the oven to 220°C (430°F), conventional heat, and line a 24 cm cake ring or pan with parchment paper.
- Heat the heavy cream and vanilla in a saucepan until just below boiling.
- Place the sugar in a wide saucepan and caramelize gradually until it reaches a deep amber color.
- Carefully pour the hot cream into the caramel in several additions, stirring continuously. Cook until any hardened caramel has completely dissolved and the sauce is smooth.
- Add the salt and allow the caramel to cool until lukewarm.
- Mix the cream cheese on low speed until smooth. Add the lukewarm caramel and mix until fully combined.
- Gradually add the eggs, mixing on low speed to avoid incorporating air.
- Sift in the cornstarch and mix until the batter is smooth and uniform.
- Strain the batter into the prepared pan and bake for 25–30 minutes, until the top is deeply browned, the edges are set, and the center is still very jiggly.
- Allow the cake to cool completely at room temperature, then refrigerate for at least 8 hours, preferably overnight.
- Slice with a sharp knife for clean, neat portions.
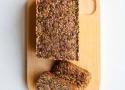
Ingredients
- 1 ½ cups dry steel cut oats
- ½ cup whole flax seeds
- ½ cup pumpkin seeds pepitas
- ½ cup sunflower seeds
- ½ cup quinoa flakes or oat flakes (see notes)
- 3 tablespoons whole psyllium husks
- 1 ½ cups water
- 4 teaspoons apple cider vinegar
- 1 ½ teaspoon salt (optional)
Instructions
- Soak the steel-cut oats: Place the steel-cut oats in a bowl and cover generously with water. Soak for 6 to 7 hours, until the oats are pliable and can be pressed between your fingers but still retain their shape. Do not oversoak. Drain very thoroughly using a fine mesh sieve.
- Combine the dry ingredients: Add the drained steel-cut oats, flaxseeds, sunflower seeds, pumpkin seeds, quinoa flakes, psyllium husk, and salt, is using, to a large bowl. Mix until evenly combined.
- Mix the liquids: In a separate container, stir together the water and apple cider vinegar.
Mix wet with dry: Pour over the oat and seed mixture. Mix thoroughly. Stir very well, making sure the psyllium and liquid are evenly distributed and there are no dry pockets. - Rest: Let the mixture sit for 25 to 30 minutes. This gives the psyllium time to fully hydrate and helps bind the loaf.
- Pack the loaf pan: Transfer the mixture to a nontoxic nonstick or parchment-lined 8 ½ x 4 ½-inch loaf pan. Press the mixture down very firmly and evenly. Compacting the mixture well is important for a loaf that holds together when sliced.
- Bake: Bake on the middle rack at 325°F (163°C) for 90 minutes.
Optional for a firmer crust: Carefully remove the bread from the pan for the final 10 to 15 minutes of baking and place it directly on the oven rack or a baking sheet. - Cool: Let the porridge bread cool completely, preferably on a cooling rack, before slicing. Allow at least 30 minutes so the loaf has time to firm up.