1728 shaares
462 results
tagged
recette
Ingredients
- 2 large eggs
- 1/2–1 tbsp orange zest
- 2 tbsp (30 g) fresh orange juice
- 1/3 cup (73 g) olive oil
- 1 tsp (5 g) vanilla extract
- 1/4 cup (85 g) honey
- 2 cups (192 g) almond flour
- 1/4 cup (30 g) almond meal
- 1/2 tsp (2 g) baking powder
- 1/2 tsp (2.5 g) baking soda
Instructions
- Preheat oven to 350°F (175°C). Grease 6”x3”3” loaf pan or a 8-inch round cake pan.
- In a large bowl, whisk the eggs until lightly frothy. Add the orange zest, orange juice, olive oil, vanilla, and honey. Whisk until smooth and fully combined.
- In a separate bowl, combine the almond flour, almond meal, baking powder, and baking soda.
- Gently fold the dry ingredients into the wet mixture until just incorporated. Do not overmix.
- Pour the batter into the prepared pan and smooth the top with a spatula.
- Bake for 30–35 minutes, or until a toothpick inserted into the center comes out clean.
- Allow the cake to cool completely in the pan before slicing.

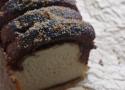
Ingredients
- 2 1/4 cups (313 g) all-purpose flour
- 1 1/2 tsp baking powder
- 1 tsp baking soda
- 1 tsp cornstarch
- 3/4 cup (150g) dark brown sugar
- 1/4 cup (50g) granulated sugar
- 2 cold eggs
- 2 teaspoons vanilla extract
- 1 cup (225g) unsalted butter, slightly softened
- Pinch of salt
- 1 1/2 cups (250g) semi-sweet chocolate chips
- 1 cup (200g) dark chocolate chips
Instructions
- Preheat oven to 350°F (180°C). Line a baking sheet with parchment paper.
- Whisk together flour, baking powder, baking soda, and cornstarch in a medium bowl. Set aside.
- Cream together brown sugar, granulated sugar, and butter in a large bowl until light and fluffy.
- Beat in eggs one at a time, followed by vanilla extract, for 3-4 minutes until the batter turns pale and the sugar is well incorporated.
- Gradually mix in dry ingredients until just combined, being careful not to overmix.
- Stir in chocolate chips.
- Scoop 2 tablespoon-sized balls of dough onto the prepared baking sheet. Leave the dough balls slightly rough and stacked, with a rustic texture. Place 4 cookies on each pan, leaving 4 inches of space between each one. Top with extra chocolate chips.
- Bake for 13-16 minutes on middle rack or until edges are lightly golden brown.
- Remove from oven and let cool on the baking sheet for 5 minutes before transferring to a wire rack to cool completely.
Ingredients
Rhubarb layer
- softened unsalted butter, for greasing the cake pan
- 50 g (¼ cup) caster/superfine or granulated sugar
- 450 g (1 pound) rhubarb, about 8-10 stalks, trimmed (For the prettiest end result, use rhubarb stalks that are as red as possible.)
Vanilla cake
- 150 g (¾ cup) caster/superfine or granulated sugar
- 85 g (¾ stick) unsalted butter, softened
- 1 tsp vanilla bean paste (or 2 tsp vanilla extract)
- 3 US large/UK medium eggs, room temperature
- 180 g (1½ cups) plain gluten free flour blend (I used Doves Farm Freee gluten free plain white flour that doesn't have any xanthan gum added. You can also mix your own gluten free flour blend using this recipe. Note that for this homemade blend, 1 cup = 150g, so ideally use a digital food scale and the weight measurements for best results.)
- 50 g (½ cup) almond flour
- 1½ tsp baking powder
- ½ tsp xanthan gum (Omit if your gluten free flour blend already contains xanthan gum or other binders.)
- ¼ tsp salt
- 115 g (½ cup) full-fat plain or Greek-style yoghurt, room temperature
- 150 g (⅓ pound, about 1½ cups) rhubarb stalks, cut into roughly ½-inch (1cm) pieces
Instructions
Rhubarb layer
- First, trim the rhubarb stalks to make sure that they fit snugly into a 9-inch (23cm) cake pan. I recommend doing a test run, where you arrange them on the bottom of the pan before you line it with parchment/baking paper. That way, you’ll be confident that all the rhubarb stalks fit snugly on the bottom of the pan, without having to do any additional trimming later on.
When it comes to the rhubarb topping, you can make the “pattern” on top as simple or as complex as you want. I just cut the rhubarb stalks to size and arranged them in a simple parallel fashion (see blog post for photos). - Adjust the oven rack to the middle position and pre-heat the oven to 350ºF (180ºC). Lightly butter a 9-inch (23cm) round cake pan and line its bottom with a round of parchment/baking paper. Generously butter the parchment/baking paper as well.
Tip: Don't use a springform pan, as some of the rhubarb juices could leak out during baking. - Sprinkle the sugar in an even layer on the bottom of the prepared cake pan.
- Arrange the rhubarb stalks on top of the sugar so that they completely cover the bottom of the pan. Make sure that they're packed together as tightly as possible (that’ll prevent the batter from getting underneath them and it’ll give you the prettiest end result).
Set aside until needed.
Vanilla cake
- In a large bowl, cream together the sugar, butter and vanilla until pale and fluffy. You can do this by hand with a large balloon whisk, using a stand mixer fitted with the paddle attachment or a hand mixer fitted with the double beaters.
- Add the eggs, one at a time, mixing well after each addition, until well combined.
Tip: It's very important that your eggs are at room temperature and that you add them one at a time. This way, you'll maintain the emulsion of the butter as much as possible. If you forgot to take your eggs out of the fridge, place them in warm water for 5-10 minutes before using them. - In a separate bowl, whisk together the gluten free flour blend, almond flour, baking powder, xanthan gum and salt.
- Add half of the dry ingredients to the butter-sugar mixture, and whisk well to combine. Add the yoghurt and whisk until smooth. Finally, add the rest of the dry ingredients and whisk well until you get a smooth cake batter with no flour clumps.
Tip: This alternating way of adding dry and wet ingredients helps to maintain the emulsion of the butter in the cake batter as much as possible. When alternating dry and wet ingredients, make sure to always end with the dry. - Add the chopped rhubarb and mix well until it's evenly distributed throughout the batter.
- Dollop the batter on top of the rhubarb layer and smooth it out into an even layer.
- Bake at 350ºF (180ºC) for about 55-60 minutes or until the cake is golden brown on top, well risen and an inserted toothpick or cake tester comes out clean. If the cake starts browning too much or too quickly, cover it with a sheet of aluminium foil (shiny side up) and continue baking until done.
Inverting & serving the upside down cake
- Allow the cake to cool in the cake pan for 10-15 minutes, then carefully invert it onto a large plate while it's still hot. (Run a knife or a small offset spatula along the edges of the cake to loosen it from the pan if necessary.)
Tip: Don’t cool it for longer than that, otherwise your cake can end up sticking to the baking pan when you try to remove it. - Serve the cake either warm or cooled completely to room temperature. It pairs beautifully with a scoop of vanilla ice cream or a dollop of lightly sweetened vanilla whipped cream.
Ingredients
- 135 g salted butter, (US = just over ½ cup, or just over 1 stick)
- 55 g cocoa powder, (plus 1 tablespoon) unsweetened, plus extra for sprinkling
- 350 g sugar
- 110 g plain flour, (actually, just less than a full cup, about 0.85 cups)
- 1 teaspoon vanilla extract
- 3 eggs, lightly whisked
Instructions
- Pre-heat the oven to 180C/355F. Line the bottom of a 7-9 inch (see note below) springform cake pan with a circle of baking paper, then grease the paper and the sides of the pan.
- Melt the butter in a medium saucepan, then take off the heat and set aside.
- Add the cocoa, sugar, flour and vanilla to the butter and stir a little. Then add the eggs and stir everything together until well combined.
- Pour the mixture into the cake pan and bake for 20 to 25 minutes (see note below) until the top is set but the centre is still gooey (the top should be firm but crack under a little pressure from your finger).
- Let the cake cool in the pan, then run a knife between the pan and the cake to loosen it. Turn out onto a plate or cake stand (see note below). Dust generously with cocoa powder and serve warm with ice cream or cream.
Note pour la version sans gluten, il suffit de remplacer la farine par de la poudre d'amandes.
Ingrédients
- 500g mascarpone
- 130g sucre
- Biscuits à la cuillère
- 210g blanc d’œuf
- 40cl limoncello
- 30cl eau
- Zestes de citron non traité
Instructions
- Fouetter le mascarpone avec 80g de sucre
- Fouetter le blanc d’œuf avec 2 cuillères de sucre glace
- Mélanger les 2 préparations délicatement
- Mélanger et fouetter le limoncello avec l’eau et les 50g restant de sucre
- Disposer une couche de crème au fond du plat, imbiber les biscuits dans la préparation au limoncello et les disposer dans le plat
- Disposer une nouvelle couche de crème et recommencer avec les biscuits pour un deuxième et dernier étage de biscuit imbibé dans la préparation au limoncello
- Ajouter la dernière couche de crème, l’étaler délicatement
- Pour le service, saupoudrer de fins zestes de citron à l’aide d’un zesteur.

Ingredients
For the Overnight Starter
- 1/2 cup whole wheat flour
- 1/2 cup water
- 1/8 tsp dried yeast
For the Dough
- 1/8 cup milk
- 1 tbsp sugar
- 1 tsp dried yeast
- All the overnight starter
- 1 medium sized banana mashed
- 2 3/4 to 3 1/4 cup all-purpose flour
- 2 tbsp coconut oil
- 1 egg lightly beaten
- 1 tsp salt
For the Filling
- 50 gm salted butter soft at room temperature
- 4 tbsp brown sugar
- 1 small to medium banana mashed
- Powdered cinnamon to taste
- Powdered dried ginger to taste
- Bread crumbs or vanilla cake crumbs as required
Instructions
Make the Overnight Starter
- The previous night of baking these buns/ bread, mix together the ingredients for the overnight starter in a medium bowl. Cover and leave on the counter overnight (about 8 to 10 hours).
- The morning of making the bread, proof the yeast in lukewarm milk and sugar. Mix well and keep aside for 5 to 10 minutes till frothy.
Make the Dough
- Using your hand or a kneading machine, mix together the overnight starter, the proofed yeast, 2 and 3/4 cups of flour and remaining ingredients for the dough. Knead well, adding as much more flour as required to make a dough of soft, smooth and elastic consistency. The dough should be just short of sticky.
- Shape the dough into a ball and put in a well-oiled bowl, turning to coat it well. Cover loosely and let it rise till double in volume, about 2 hours or so. In the meanwhile make the filling by mixing together all the filling ingredients in a bowl. It should be of spreadable consistency but not gloopy. Refrigerate till ready to use, if necessary.
For Loaves
- Once the dough has doubled, turn it out onto a floured board. Divide into 2 equal pieces. For loaves, gently shape the dough into flat rectangles that are about 2 centimetres thick. Smear the filling over each rectangle and roll like jelly rolls, from the narrow side, to make 2 loaves. Put the rolls seam side down in parchment paper covered bread tins.
- Cover the tins with a damp clean tea towel and let rise at warm room temperature until almost double. To test if it has risen enough, flour your finger and press gently on the edge - it should very slowly spring back. For comparison, try pressing early on to see how it quickly springs back when the dough has not risen enough.
To Shape & Cut the Buns
- Using a lightly floured wooden rolling pin, roll one of the two pieces of dough as thinly as you can, into a long rectangle. Evenly slather the top of the rectangle with half the filling. Roll the rectangle up as tightly as you can to form a long tube. Cut diagonally and use a chopstick or finger to press down the centres so that the spiral flares out. Place well apart on parchment covered cookie sheet. Repeat with the other piece of dough.
- See the link to the video in post above to understand the shaping process better. Cover the shaped buns with a damp tea towel and let sit in until they have almost doubled.
- Pre-heat the oven to 200C (400F). Put the bread loaves in. After 15 minutes, turn the temperature down to 180C (350) and bake for another 25 to 30 minutes until they’re golden brown, done and sound hollow when tapped. Do the same for the buns but they will need a slightly shorter bake time. Half way through baking, turn the loaves/ buns around as with all that sugar, the bottoms of the buns especially, really want to burn.
- If you have made buns, place them still on the parchment paper on a footed rack on the counter to cool completely. If you have made bread, remove it from the pans, and place each loaf on its side to cool on the footed rack. If you wish to serve warm bread (of course you do), reheat it after it has cooled completely.
- To reheat any uncut bread, turn the oven to 200C (400F) for 5 minutes or so. Turn the oven OFF. Put the bread into the hot oven for about ten minutes. This will rejuvenate the crust and warm the crumb perfectly.
Ingredients
For the Dough
- 1 cup milk
- 50 gm unsalted butter
- 1 tsp instant yeast
- 3 cups all-purpose flour
- 2 tbsp sugar
- 1 tsp salt
For the Topping
- 50 gm unsalted butter
- 1/4 cup white sugar
- 1/4 cup lightly packed light brown sugar
- 1 tbsp ground cinnamon
Instructions
Make the Dough
- Scald the milk over medium heat for 3 to 4 minutes (bubbles on the edges but not boiling). Take it off the heat, add the butter and stir to melt. Let it cool to slightly warmer than room temperature. Stir in the yeast.
- Knead using a stand mixer or by hand. Whisk together the flour, sugar, and salt in a large bowl. Add the milk mixture and knead into a soft, smooth and elastic dough. If the dough seems dry, add milk, one tablespoon at a time till dough is of desired consistency.
- Place the dough into a bowl, cover loosely and let it rise for about 1 1/2 hours or so till doubled in volume. You can also let it rise in the refrigerator overnight. The rise will not be as much as regular dough because of the butter in the dough which will harden the dough. If refrigerating the dough, take it out next morning, lightly knead it, and then let it rise till double in volume.
- Line a 9 x 5 -inch loaf pan with parchment paper. Remove the parchment and set aside on a baking sheet.
Make the topping
- Melt the butter in a mall pan or bowl. Stir in the sugars and cinnamon.
- Deflate the risen dough and press it out or roll out into an 8 x 7 -inch rectangle. Roll the dough into a loaf, starting from the 8-inch edge side. Place it, seam side down, onto the parchment.
- Slit the loaf 6 to 8 times with a serrated knife, cutting about 2/3rds into the dough. Stuff the slits generously with the cinnamon-sugar-butter.
- Using the parchment, lift the loaf into the pan. Spread the remaining mixture over the top of the dough uniformly. Let it rise till almost double, for about 45 minutes.
- Bake at 180C (350F) for about 30 minutes or so until the bread is done. Do watch the top to see it doesn’t get burned. My loaf came pretty close to it, as you can see from the images. Cool on a wire rack.
Ingrédients
- 250 g de farine
- ½ sachet de levure
- 1 pincée de sel
- 1 cuillère à soupe de sucre
- 1 cuillère à soupe d' huile pour lier la pâte
- 2 cuillères à soupe de rhum
- 1 cuillère à soupe de fleur d'oranger
- 5 œufs
- 2 sachets de sucre vanillé
- 75 cl de lait
Instructions
- Mettre les 5 œufs dans un saladier et ajouter la farine, le sucre, le sel, la levure et le sucre vanillé.
- Incorporer le lait et bien mélanger pour obtenir une pâte bien liquide.
- Ajouter ensuite l'huile, le rhum et la fleur d'oranger, mélanger et laisser reposer 1h à température ambiante.
Ingrédients
Biga
- 500 g de farine blanche forte en gluten, genre Manitoba tipo «0»
- 255 g d’eau
- 5 g de levure fraîche
Pâte
- La biga
- 50 g de farine, la même que pour la biga
- 130 ml d’eau tiède en hiver, froide en été
- 10 g de sel
- Semoule de blé dur pour le façonnage
Instructions
Biga
- Dans la cuve du pétrin faire fondre la levure dans l’eau puis ajouter la farine par-dessus.
- Pétrir à la première vitesse, pendant 3 à 4 minutes, jusqu'à ce que la pâte se forme. La pâte est très compacte car très peu hydratée.
- Couvrir et laisser fermenter à température ambiante (idéalement 18 à 20°C), ceci pendant 18 à 24 heures.
- La pâte va fermenter, se développer tout en restant relativement compacte mais bien assouplie.
Pâte
- Au bout d’environ 20 heures le mélange aura fermenté avec un légère odeur acide, la pâte s’est étalée tout en restant collante.
- La transférer dans le bol du robot et démarrer le pétrissage pendant 2 minutes en première vitesse et 2 minutes en vitesse rapide, jusqu'à obtenir une pâte lisse et sans grumeaux.
- A ce stade, tout en pétrissant à la deuxième vitesse, ajouter le sel puis un peu d’eau. Ensuite il faudra ajouter l'eau par petites quantités en alternant avec un peu de farine. Ne pas ajouter la quantité suivante tant que la précédente n’a été absorbée. Cette phase va durer une bonne dizaine de minute. La pâte va devenir très élastique et bien hydratée. C’est incroyable ce que cette pâte est capable d’absorber autant d’eau.
- Huiler légèrement un récipient rectangulaire et avec vos mains mouillées, y transvaser la pâte qui va s’étaler sur toute la surface.
- À ce stade, toujours avec les mains humides, effectuer un premier pliage, en soulevant la pâte d'un côté à l'autre, sur les 4 côtés.
- Ensuite, après 30 minutes, répéter ces pliages encore à deux reprises puis laisser la pâte lever pendant 60 à 90 minutes, cela va beaucoup dépendre de la température ambiante. Elle devrait doubler de volume.
- Une fois la pâte bien développée, saupoudrer généreusement la table d’un mélange de semoule et de farine et retourner le bac délicatement.
- À ce stade, ne pas la manipuler ni la dégonfler, simplement la saupoudrer de semoule et la diviser en deux pains égaux ou plusieurs petits, à choix.
- Retourner délicatement les deux pains sur des feuilles de papier sulfurisé séparées et les saupoudrer de semoule.
- Pour une ciabatta moins épaisse ou des plus petites, étirer légèrement les pains en le tirant avec les mains.
- Laisser les pains à découvert à température ambiante pendant 30 minutes.
- Pendant ce temps, préchauffer à 250 °C. Placer une plaque de cuisson en bas et une pierre à pizza (réfractaire) sur la grille du milieu.
- Une fois le four très chaud, avec une pelle à pizza, glisser les ciabattas, avec le papier sulfurisé pour éviter de faire retomber la pâte.
- Avant de fermer la porte du four, verser un petit verre d’eau sur la plaque du bas pour générer de la vapeur, ce qui empêche la formation immédiate d'une croûte et permet aux ciabattas de lever davantage.
- Cuire à 250 °C pendant 10 minutes, puis baisser la température à 210°C et continuer la cuisson pendant encore 20 à 25 minutes.
- Une fois cuites, éteindre le four et laisser les ciabattas, porte entrouverte, pendant 5 minutes.
- Ensuite les laisser refroidir complètement sur une grille et elles sont prêtes à être dégustées. Buon appetito !
Ingrédients
-500 g de farine blanche
- 30 à 32 cl de lait entier pasteurisé
- 80 g de beurre
- 25 g de levure fraîche
- 10 g de sel
- 5 g de sucre
- 10 g d’extrait de malt
- 2 jaunes d’œuf + lait
Instructions
- Délayer la levure et le sucre dans le lait, tempéré en hiver ou froid en été.
- Dans la cuve de votre pétrin, mettre la farine, l’extrait de malt et le lait-levure. En première vitesse, pétrir 2 à 3 minutes jusqu’à ce que la pâte se forme.
- Couper le beurre froid en petits cubes et toujours en vitesse lente, l’ajouter petit à petit à la pâte.
- Ensuite en 2ème vitesse, pétrir pendant 3 à 4 minutes, la pâte va absorber tout le beurre et se détacher des parois de la cuve.
- Ajouter enfin le sel et continuer le pétrissage pendant encore 5 à 6 minutes, la pâte va devenir belle lisse et élastique.
- Contrôler l'élasticité de votre pâte en l'écartant doucement entre les doigts elle doit s'étendre et créer une fine membrane presque transparente. Si c'est le cas, c’est que le réseau de gluten s’est formé et la pâte est prête.
- Contrôler aussi la température de votre pâte, elle devrait se situer entre 23 et 25 degrés en fin de pétrissage.
- Sortir la pâte du pétrin, en faire une boule et la déposer dans un grand bol recouvert d’une feuille de plastique afin de la protéger des courants d’air. Laisser lever pendant 30 minutes à température ambiante. On appel cette phase le pointage et la pâte va commencer à fermenter.
- Reprendre la pâte à moitié fermentée puis la diviser en 15 pâtons de 60 g, les bouler et sur un torchon enfariné, laisser reposer pendant 30 minutes recouverts d’un torchon humide.
- Sur votre surface de travail enfarinée, reprendre les pâtons un à un et avec une petite baguette en bois (ici j'utilise un bout de crayon de couleur), presser fortement au milieu de chaque boule pour obtenir la forme typique du petit pain au lait, mais sans toutefois les couper.
- Ensuite les déposer sur une plaque de cuisson recouverte d’un papier sulfurisé.
- Laisser reposer les petits pains, à couvert pendant 15 minutes puis les dorer avec le jaune d’œuf mélangé à du lait.
- Dans un endroit abrité des courant d’air, laisser encore fermenter les pains pendant 20 à 30 minutes, selon la température de la pièce.
- Dorer une deuxième fois les petits pains et les enfourner dans le four préchauffé à 200 degrés. Après 5 minutes, régler le four à 180°C et continuer la cuisson pendant encore 10 minutes.
- Aussitôt cuits, laisser refroidir les pains sur une grille.

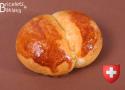
Ingredients
Dough
- 1 Tbsp/Packet Red Star Platinum Yeast
- ¾ Cup milk , warmed (not hot)
- 1/3 Cup sugar
- 3 Tbsp. softened butter
- ½ tsp. salt
- 1 egg
- 2 ½ + Cups unbleached, all-purpose flour
Filling
- 1/3 Cup peanut butter
- ½ Cup brown sugar
- If desired: mini chocolate chips
Frosting
- 1 Cup powdered sugar
- 2 Tbsp. peanut butter
- 2 Tbsp. milk
Instructions
- Place warm milk and yeast in EZ DOH bucket and stir to dissolve yeast.
- Let rest 1 minute.
- Add one cup of flour, then additional dough ingredients.
- EZ DOH-it for 2-3 minutes, or until dough is smooth and soft and all ingredients are incorporated.
- Remove dough from bucket, spray bucket with cooking spray, “smooth” dough and replace in bucket.
- Cover and let rise until doubled.
- Stir together filling ingredients.
- Remove dough from the bucket and roll out into a rectangle, about 12x9”.
- Spread with peanut butter filling ingredients.
- If desired, sprinkle with chocolate chips or chopped peanuts.
- Roll up tightly from the long side.
- Slice into 9 equal-sized rolls and place in a 9” greased round pan.
- Cover and let rise. (I like to cover with plastic wrap and place in the fridge. They will rise overnight and you can bake them in the morning).
- When risen, bake at 375 for 20-25 minutes, or until golden.
- Mix the frosting ingredients thoroughly, adding powdered sugar if too thin.
- Frost rolls while warm.
Ingredients
For the cake
- 240ml guinness
- 140g salted butter
- 70g cocoa powder + 2 Tbsp Black Cocoa Powder
- 300g Dark Brown Sugar
- 50g Golden Caster Sugar
- 180ml sour cream OR crème fraiche
- 2 large eggs
- 4g Flaked Salt
- 2 Tbsps vanilla extract
- 250g plain flour
- 2½ tsp baking powder
- 100g Dark or Milk Chocolate Chips
For the topping
- 3 tbsp baileys
- 140g icing sugar
- 300g Mascapone at room temperature
- 200ml double cream
- 1 Tbsp Vanilla Extract or bean paste
- Pinch of flaked salt
Instructions
- Preheat oven to 160°C Fan. Grease a 23cm tin with melted butter and set aside. I like to dust mine with a little cocoa powder too.
- In a large saucepan, combine the Guinness and butter. Place over medium-low heat until the butter melts, then remove from heat. Add the cocoa powder and caster sugar, and whisk until well blended. Combine all the ingredients together and bake for 55 minutes/ 1 hour, or until risen and firm. A skewer inserted into the centre should come out clean.
- Let the cake cool completely in the pan on a wire rack.
- Add all the topping ingredients together into the bowl of your stand mixer and using the beater attachment, beat together until thick and creamy.
- Once the cake is fully cooled, remove it from the pan and place it on a serving plate or cake stand. Spread the frosting over the top of the cake only, so it resembles the creamy head of a pint of Guinness.

Ingrédients
- 1 kg de farine
- 1 à 1½ cuillère à soupe de sel
- 2 cuillères à soupe de sucre
- 21 g de levure
- 6 dl de lait tiède
- 100 g de beurre fondu, refroidi
- 1 jaune d'œuf battu, pour badigeonner
- quelques raisins secs
Instructions
- Mélanger la farine, le sel et le sucre, puis former un puits.
- Délayer la levure dans un peu de lait, verser le tout dans le puits avec le reste du lait et le beurre.
- Pétrir jusqu’à obtenir une pâte souple.
- Laisser reposer à couvert à température ambiante jusqu’à ce que la pâte double de volume.
- Diviser la pâte en 12 portions égales.
- Former 3 morceaux à partir de chacune d’elles : une boule de la taille d’une noisette, qui servira de queue, un boudin d’environ 28 cm de long pour le corps, avec le reste de la pâte, former un morceau ovale d’environ 9 cm de long pour les oreilles.
- Entailler le morceau ovale au milieu pour former les oreilles.
- Pour le corps du lapin, enrouler le boudin.
- Assembler le corps, les oreilles et la queue du lapin directement sur la plaque préparée.
- Laisser les lapins lever encore une fois pendant le préchauffage.
- Badigeonner de jaune d’œuf et garnir de raisins secs (par ex. pour les yeux).
- Cuire 12 à 15 minutes au milieu du four préchauffé à 220 °C (chaleur supérieure/inférieure) (four à chaleur tournante 200 °C).

Ingrédients
Sirop
- 210 g d’eau
- 6 g d’anis étoilé
- 18 g d’écorce de citron, citron vert et orange ou de zestes
- 210 g de miel
- 100 g de cassonade
- 1 pincée de fleur de sel
Pâte
- 150 g de farine de seigle
- 70 g de farine T55 (ou T45)
- 3 g de cannelle moulue (3/4 de cuillère à café)
- 2 g de mélange à pain d’épices (1/2 de cuillère à café)
- 12 g de bicarbonate alimentaire
- 135 g de beurre
Finition
- ½ cuillère à soupe de gelée de coing
- 1 ou 2 bâtons de cannelle
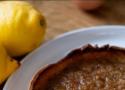
Ingrédients
Crème citron
- 190g de sucre
- 120g de beurre fondu
- 3 œufs
- Jus + zeste de 3 citrons
- 1 pincée de sel
Pâte
- 300g de farine
- 175g de beurre
- 150g de sucre
- 75g de poudre d’amande
- 1 œuf + 1 jaune
- 1 c. à c. de levure
- 1 pincée de sel
- Quelques gouttes d’arôme d’amande mais pas obligé
Instructions
- Mélange farine, sucre, sel et beurre.
- Ajoute levure, œufs, arôme et poudre d’amande.
- Fonce ton moule et précuis 10 min à 180°C avec billes.
- Retire les billes et remets au four pour 10 min pour une base bien dorée.
- Mélange les ingrédients de la crème citron.
- Verse sur la pâte précuite et enfourne 30 à 40 min à 180 °C.
- Laisse bien refroidir avant de couper.


Ingrédients
- 500g de farine
- 10g de sel
- 10g de levure fraiche
- 350g d'eau
- 500g de beurre
- 500g de sucre
Voir aussi Recette de Kouign Amann. Le véritable Kouign amann - YouTube
Ingredients
- 1 cup butter
- 1 cup brown sugar
- 1 cup white sugar
- 2 eggs
- 1 tsp vanilla
- ¾ tsp salt
- 1 tsp baking soda
- 2 cups flour
- 1 cup chocolate chips
Instructions
- Melt butter in a cast iron.
- Turn off the heat
- Add remaining ingredients and mix.
- Bake on 325°F for 25 minutes.
Testé. Ce n'est pas concluant.